

ChiBattery TORque Pack; Rewiring & Observations
This is a companion article to the rewiring log for the CBCSO, found here.
The TORque Pack is a battery that is billed as being designed for/with the TORque Box, which is the battery box enclosure done as a collaboration between Badger Wheel and The Onewheel Rider’s Workshop in the EU. The box aims to fit larger battery packs that normally would not fit in a stock Onewheel XR sized battery enclosure.
Much like with the CBCSO rewiring write up, this particular pack belongs to a member of the VESC Onewheel conversion community, and his parts were purchased for the projects.
This particular battery was claimed to have been designed for the TORque box, and wired for the ENNOID XLITE 24S BMS unit. There are, however, issues with using this battery in such a manner, and I will detail them below along with the relatively simple process I underwent to address the lack of proper wiring.
The initial issue I have with this battery is that it simply doesn’t fit the box properly with enough room for the incoming wiring of the main harness that extends from front to back in a Onewheel shaped build. The right side corner is cramped, and a very small channel exists for the larger gauge wiring to squeeze, and this lack of space will easily cause pinch points, and hot spots, which is generally not a good idea when it comes to fitting a battery for a particular space.
Granted, the landscape of modifying Onewheels with larger batteries has become accustomed to pinching wires, forcing things into unsafe situations (the CBXR & JWXR type batteries are the most common example of what I believe are unsafe setups and unsafe installations).
Assuming that compressing wiring assemblies between two rigid surfaces with harsh angles is a good way to go, is not something I have or currently think is a good idea. To me, this is clearly a bad fit, and to say it was designed for this fit, is very discouraging.


Consistent with other batteries from this company, the assumed fit simply isn’t good. Vertically, the box does not close, which means there is simply not enough room to begin with, let alone enough room for padding foam. Even without padding, the box lid has to be forced down to be closed, and will buckle upward in the middle while compressing at the edges.
The balance wiring is also mildly problematic, in that it’s simply too long and excessive. The ENNOID XLITE is an open PCB, with JST connectors and a USB port facing upward, creating sharp edges. While this is fairly normal for any given PCB, it does mean that there have to be care and considerations when implementing the BMS, aside from the wiring scheme itself. The wires bunch up over the exposed JST connectors, and bunch down onto the rest of the PCB when the lid is shut and clamped.


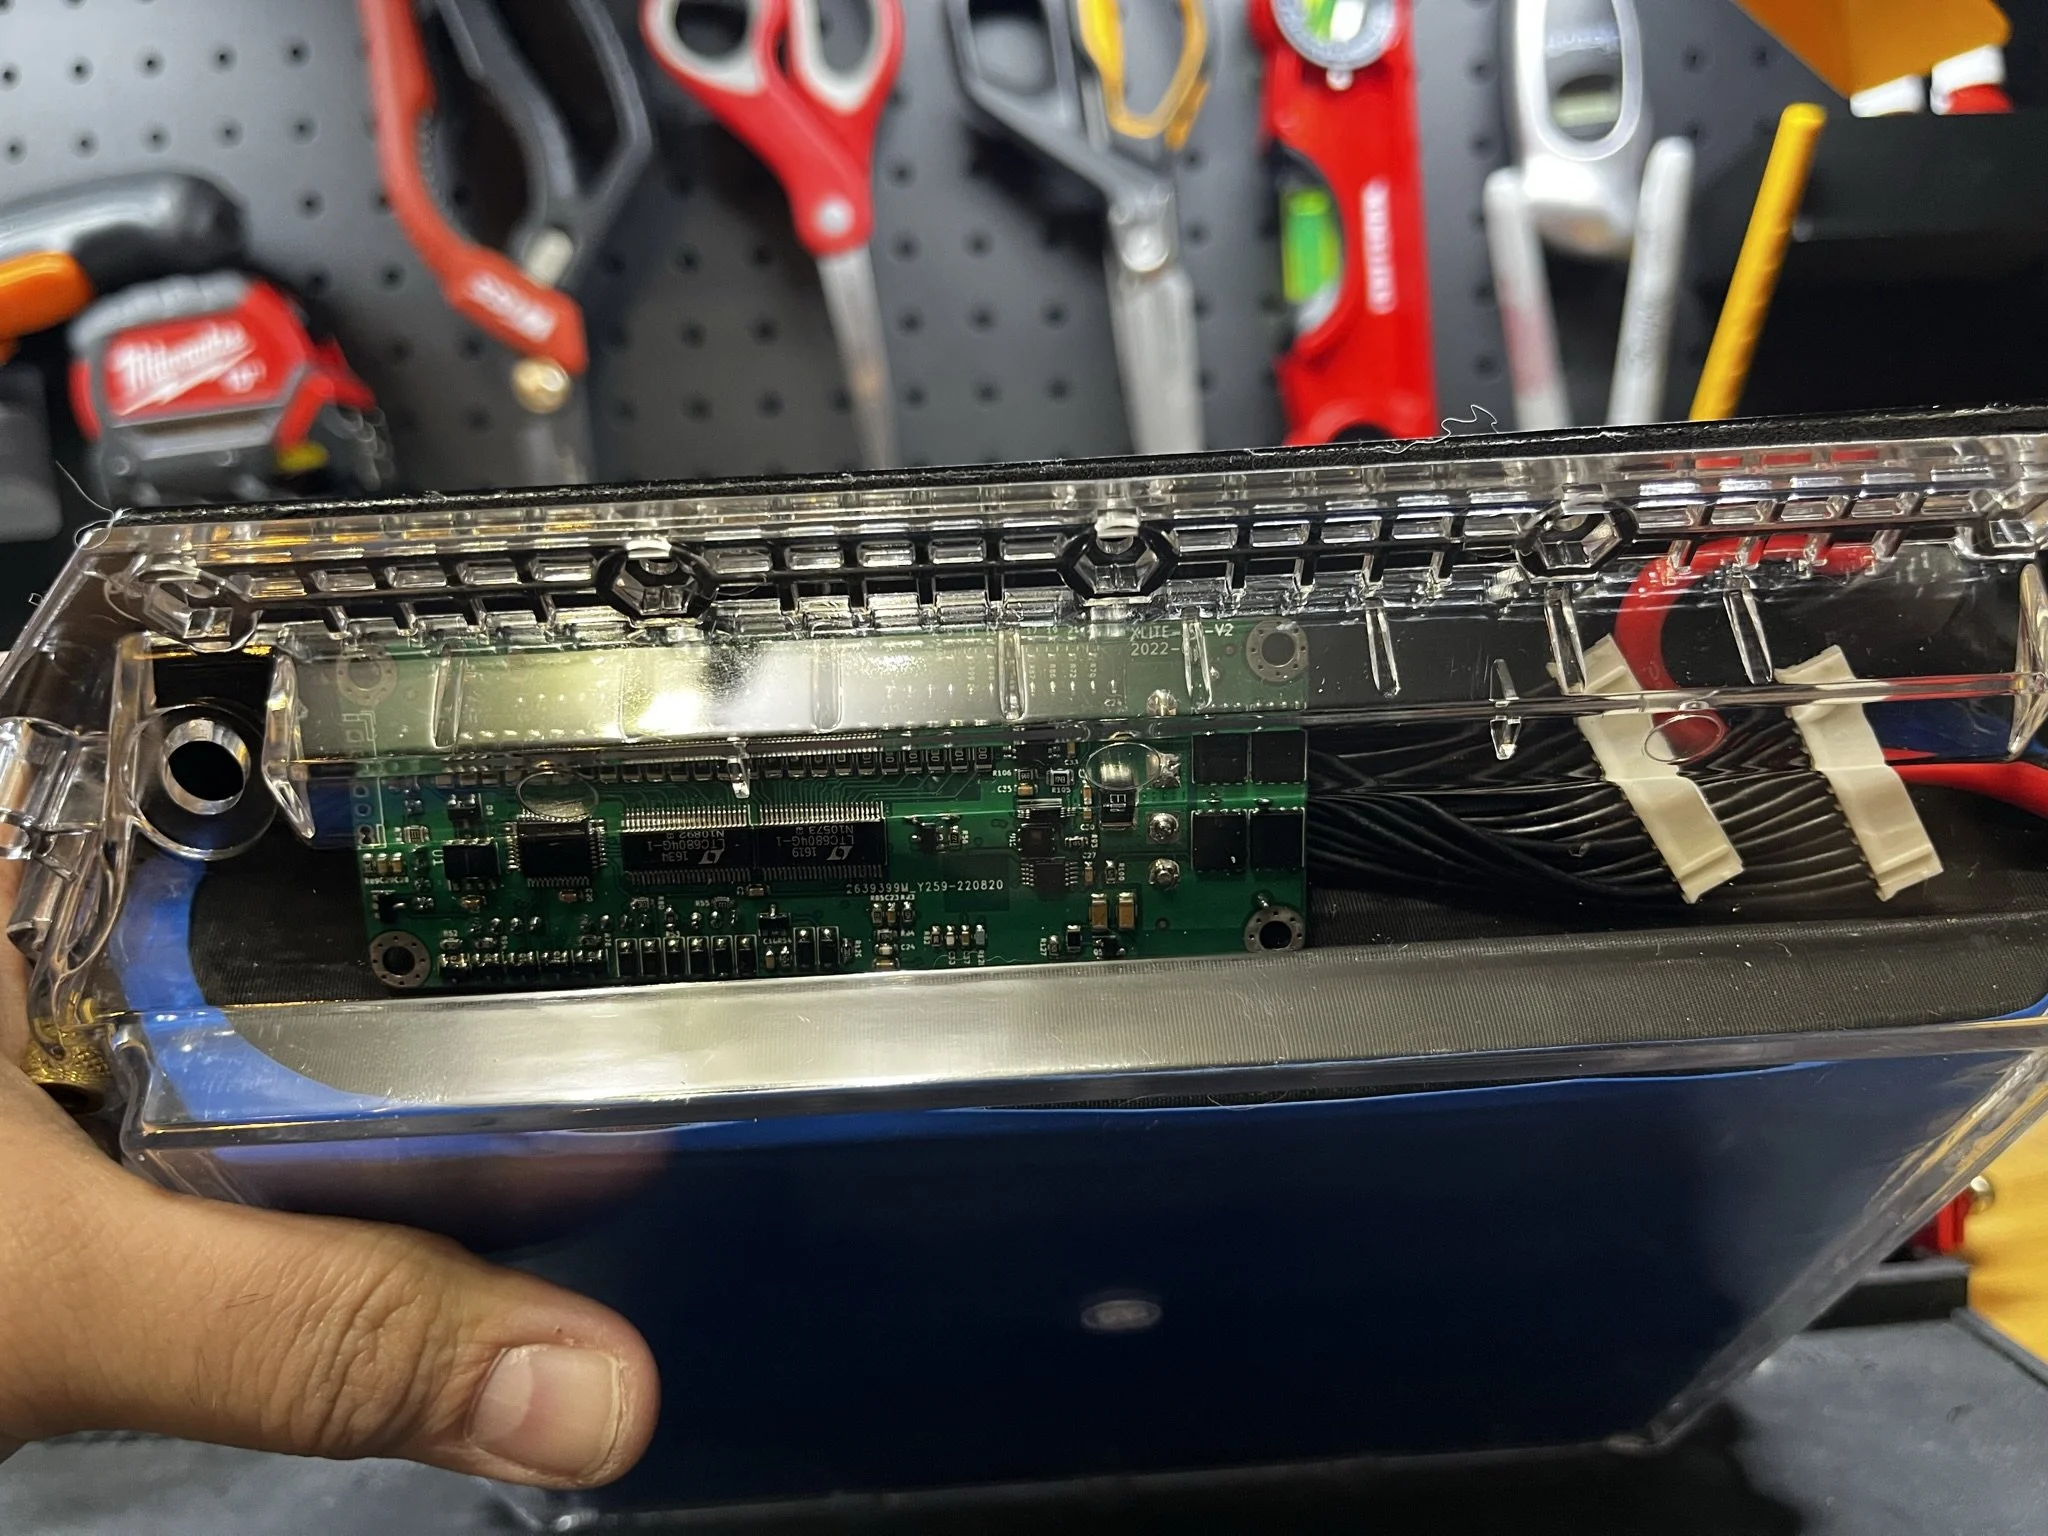


Moving on to the wiring itself, the pack ommits the dedicated connector for the pack terminal input of the XLITE BMS. The ENNOID XLITE uses XT30 connectors for the power in and out, to connect to the charger and the battery, respectively. The TORque pack leaves this out, I assume because it’s easier to leave it to the user to splice this into the harness wiring. This is kind of lazy, and asks more work of the wiring harness that I personally think is best left to the battery pack, in having distinct charge and discharge circuits. This is, in fairness, a judgment call, but every other PEV battery I have encountered that uses distinct charge and discharge circuits, have them wired separately and with different connectors in order to streamline their installation.
So for this pack, I opened it up and added the connector wiring for the ENNOID XLITE. The operation itself wasn’t very difficult, it was straightforward, as it was just parallelling a smaller connector set to the terminals.


Lastly, I have a couple of comments on the pack construction itself.
I was surprised and glad to see that of the few welds I could observe, they were not bad. I didn’t test their strength, as that would be destructive, however they did not appear to be burned. So that’s good.
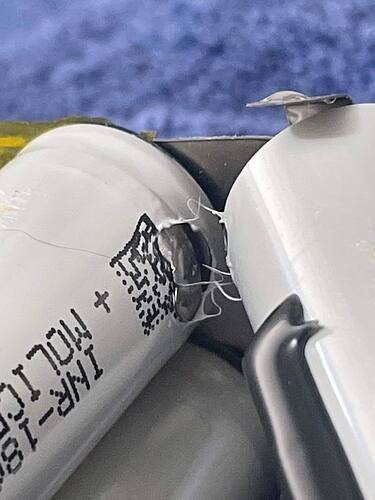
However, there simply was not insulation between cells of different voltage potentials. Essentially, no insulation between parallel groups. And this is simply not a safe way to assemble a battery, especially a battery that is designed for use in a device that is exposed to extreme amounts of vibration and impact. The cell wraps are just not enough to prevent short circuits reliably, especially long term.
And, especially not in such a battery pack that gets highly compressed during its forceful installation.


Below is a more recent example of a short circuit event inside a CBCSO pack, where the cells are also not insulated between parallel groups, and it is clear to see that the insulation had worn away, causing the short, which then further melted the insulation.
To conclude, it does not seem that this pack, nor the CBCSO, are worthwhile products to use in these VESC Onewheel rebuilds or from-scratch builds. Their quality is not at a standard that I would feel comfortable installing into a customer’s board in my shop, and so I do not accept those kinds of jobs for Onewheels or any other kind of PEV.
Especially for the price that these products command, the quality and care should be much higher, and there should be more (or any, from what it seems) testing and fitment confirmation. Because as it stands, it’s abysmal.