
Fungineers GTFO Kit Install Notes
These are some photos and notes that pertain to the build project featured in this video:
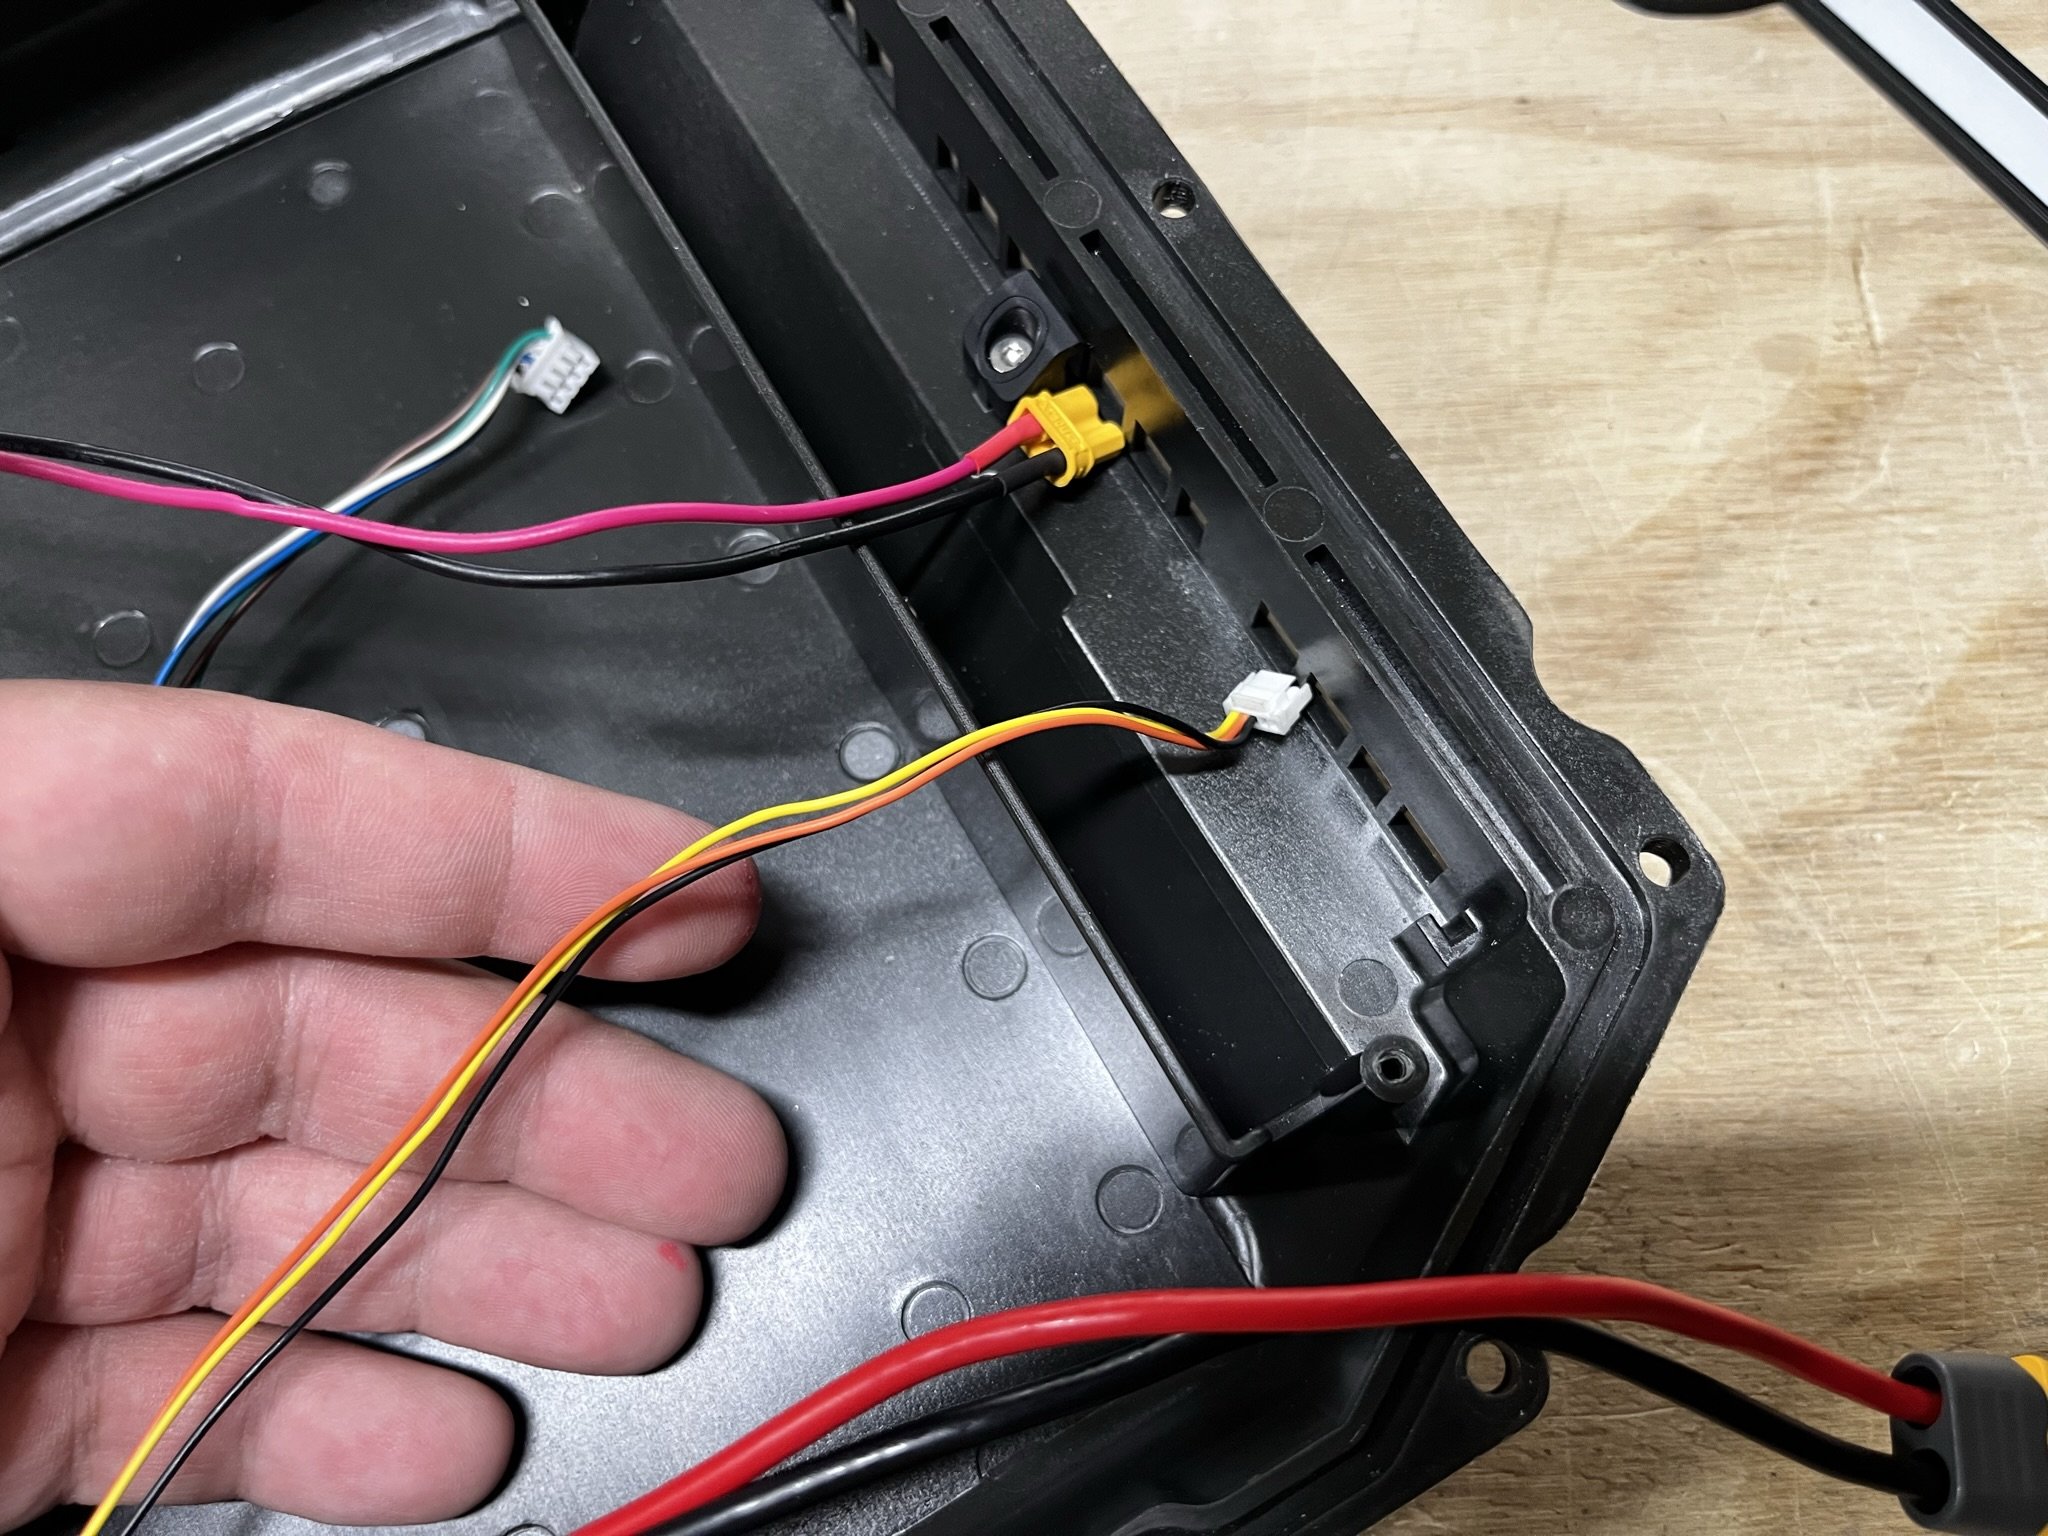
Front, Rear & Status LED Parts
Three bits were included with this set, a head light, tail light, and a status bar. The headlight appears similar to something like what AvaSpark offers, in that it’s a status LED unit, and other parts connect to it as a sort of hub or distribution board.
The one I received didn’t work properly, and so it was connected to the status LED header, and the tail light was connected directly to the Thor’s rear light header.
The status LED unit has headers on it, that are meant to work with the stock GT wiring cable. Since mine did not work, I modified that wiring cable to work with the LED pieces separately.


Wiring Changes
Since the wiring cable needed to be modified, the following changes were made:
Remove single connector in front.
Splice out each wire, making separate connections for tail light and CAN bus connection and extending wires.
Trace each wire to keep coloring as consistent as possible, and match the destination in rear.
Depin and repin the rear tail light connector.
Recrimp rear wiring for the BMS CAN connection.


Front Box Motor Connector
The Superflux motor connector needs a round port hole, and the GT box has a port hole with a flat edge to key into the stock motor connector. This needed to be removed and rounded, but that creates a slightly uneven port hole, and so I used sealing silicone (RTV) to seal the gaps that the o-ring can’t fully seal.


Tech Rails Extended 357 Hole Misalignment
The rails are generally fine, and since they’re used, I have no idea if this is how they arrived from the manufacturer or if they’re somehow bent from use.
Either way, the rear had an alignment issue with the mounting holes at the battery box, and the rails had to be pulled into alignment with a clamp for the holes to match up fully.


