

Hoyt Street Tabor Internal Look
This article is a companion piece to a video review on the Tabor, made by Hoyt Street Skate. Video is embedded below.
Drivetrain Details
As mentioned in the review video, I am very glad that this board features a belt drive. It offers it the opportunity to remain simple and practical, but also leaves a bit of a blank canvas to add some quality of life features that aid in the maintenance and repair of the drivetrain.
Shown below are the belt tensioning parts, which include the self-tensioning springs, as well as the override posts that can be used to further tension the belt beyond the spring’s own compression strength.
Another subtle feature that I have some to really appreciate is the sleeving of the motor cables.
In most electric skateboard motors, one can notice that the motor wiring is sheathed in a kind of polyethylene mesh sleeve. It’s a good material, and works for most things. However, as time goes on, I’ve come to find that it can be a source of issues when trying to seal the entry points of an enclosure from dust, debris, or moisture splashes. The sleeve is open, and so it allows intrusion of those things.
As shown in the below image, the sleeving has been changed to what I believe to be a high temperature sheathing made of a weave of nylon and polyolefin fibers, that acts similar to a heat shrink. These enter the enclosure through oversized rubber grommets (similar to what I’d see on a LaCroix board), that gets internally sealed off.
The motor cables are also held in place at the rear, by a plastic bracket that fastens to the deck through the same plate that bolts through the deck via top screws, the same as the other underside plates.
Enclosure Mounting
The way the enclosure is mounted to the deck is just fantastic. Rather than use threaded inserts that get installed into the deck, the Tabor uses a bolt-through approach, with a very high end finesse.
In DIY eskate circles, it’s often thought that having an enclosure mount to a deck via threaded inserts in the deck itself, is preferable for the sake of the look. However in terms of strength and reliability, a bolt-through approach is better, as it removes the possible issues with threaded inserts coming out, weakening the wood, etc. These issues are actually real, as it’s something I have had to deal with on EVERY single LaCroix board I’ve had in the shop. There’s always at least one loose deck insert, and it has to either be replaced entirely, or the deck wood has to be repaired, or it needs to be epoxied in to prevent it from backing out.
On the Tabor, is works with a bolt-through style, but without the ugly results that can come from just using bolts and nuts.
The bolts come in from the top, and thread into 2-hole plates that brace the enclosure at several spots along the edge. It’s insanely robust, and comes apart very easily. It’s a fantastic design.


Internal Inspection
The insides of a PEV are just as important as the outsides, and as a PEV repairperson, it tends to be something I’m interested in. I have my own sensibilities of how to do internal wiring of DIY and custom eskates, and while they aren’t the end all be all, it’s good to see different builders come to similar approaches. It means that certain things are based on actual end results rather than just blind preference.
That being said, it’s impressive how the relatively small internal space of the Tabor was used efficiently. Accessory electronics leverage the side flares of the enclosure, and those same negative spaces are used to further brace the internal battery.

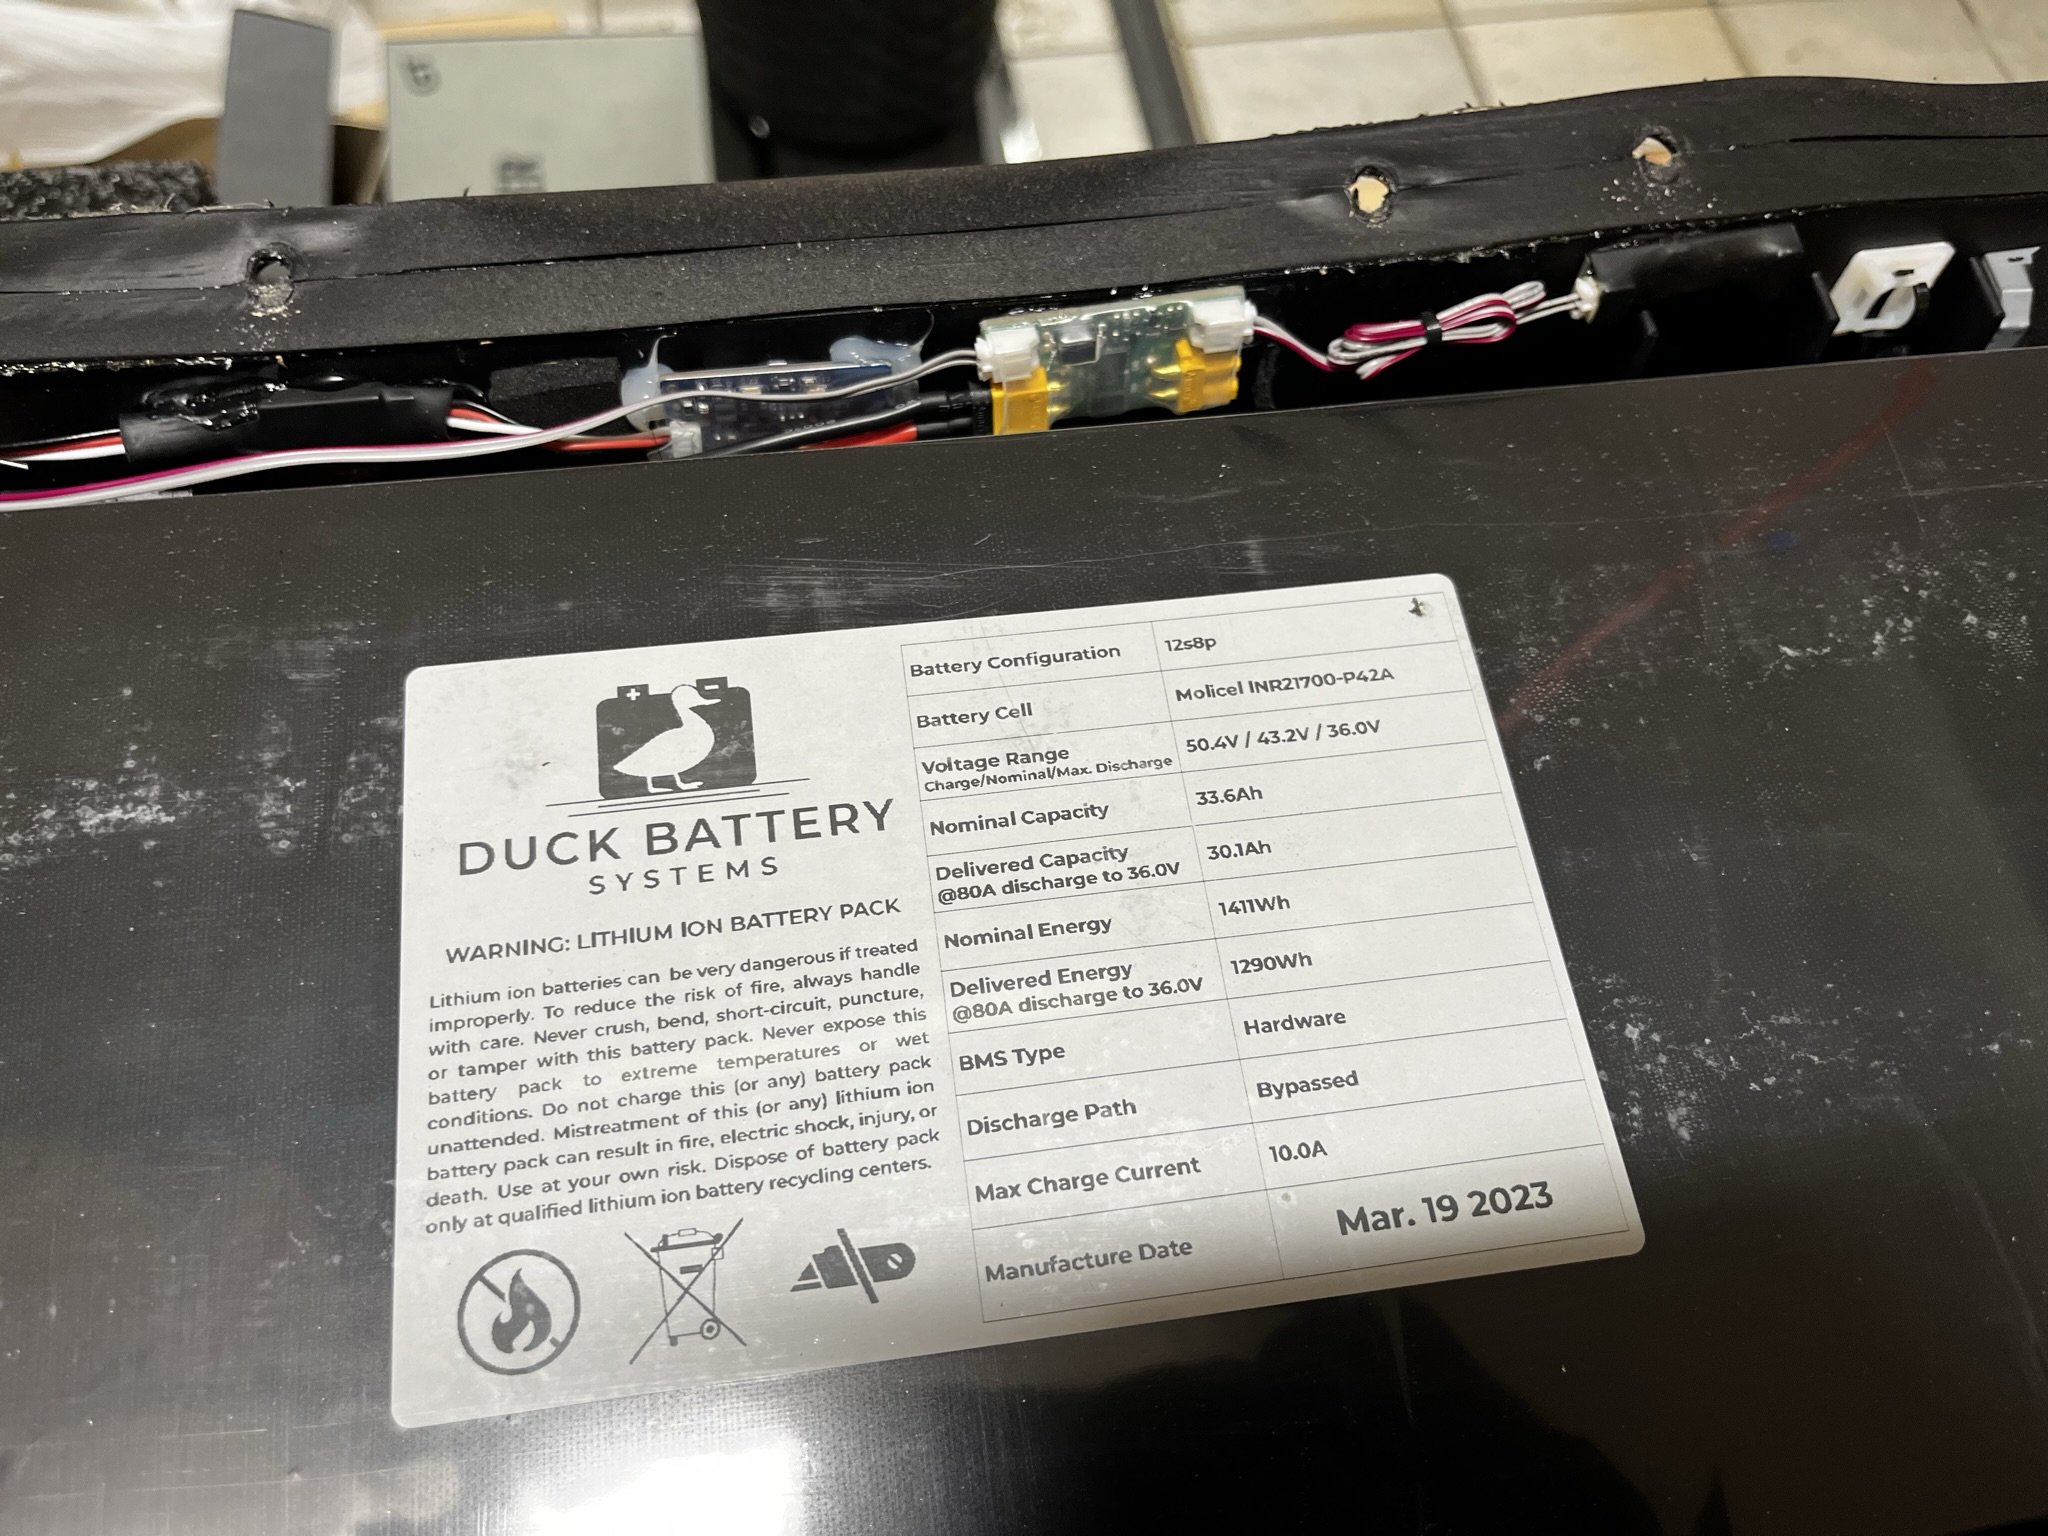
The battery, which is a 12s8p configuration, is compression fit with foam-lined, plastic braces. When the deck is clamped on, it doesn’t move. However, the hold is not done through adhesives, so removing the battery is easy.
Next to the battery is the light driver and switch for the nose-mounted battery meter. That meter is one of my favorite implementations. It’s simple, effective, clean. An elegant solution.


In the rear, I find a Daly hardware BMS, which is excellent. I’ve built with tens of those things, and they are rock solid. They simply work. Currently, there isn’t a smart BMS that I know of, that’s anywhere NEAR the reliability of a Daly hardware BMS. Smart choice for a device that’s meant to just last.
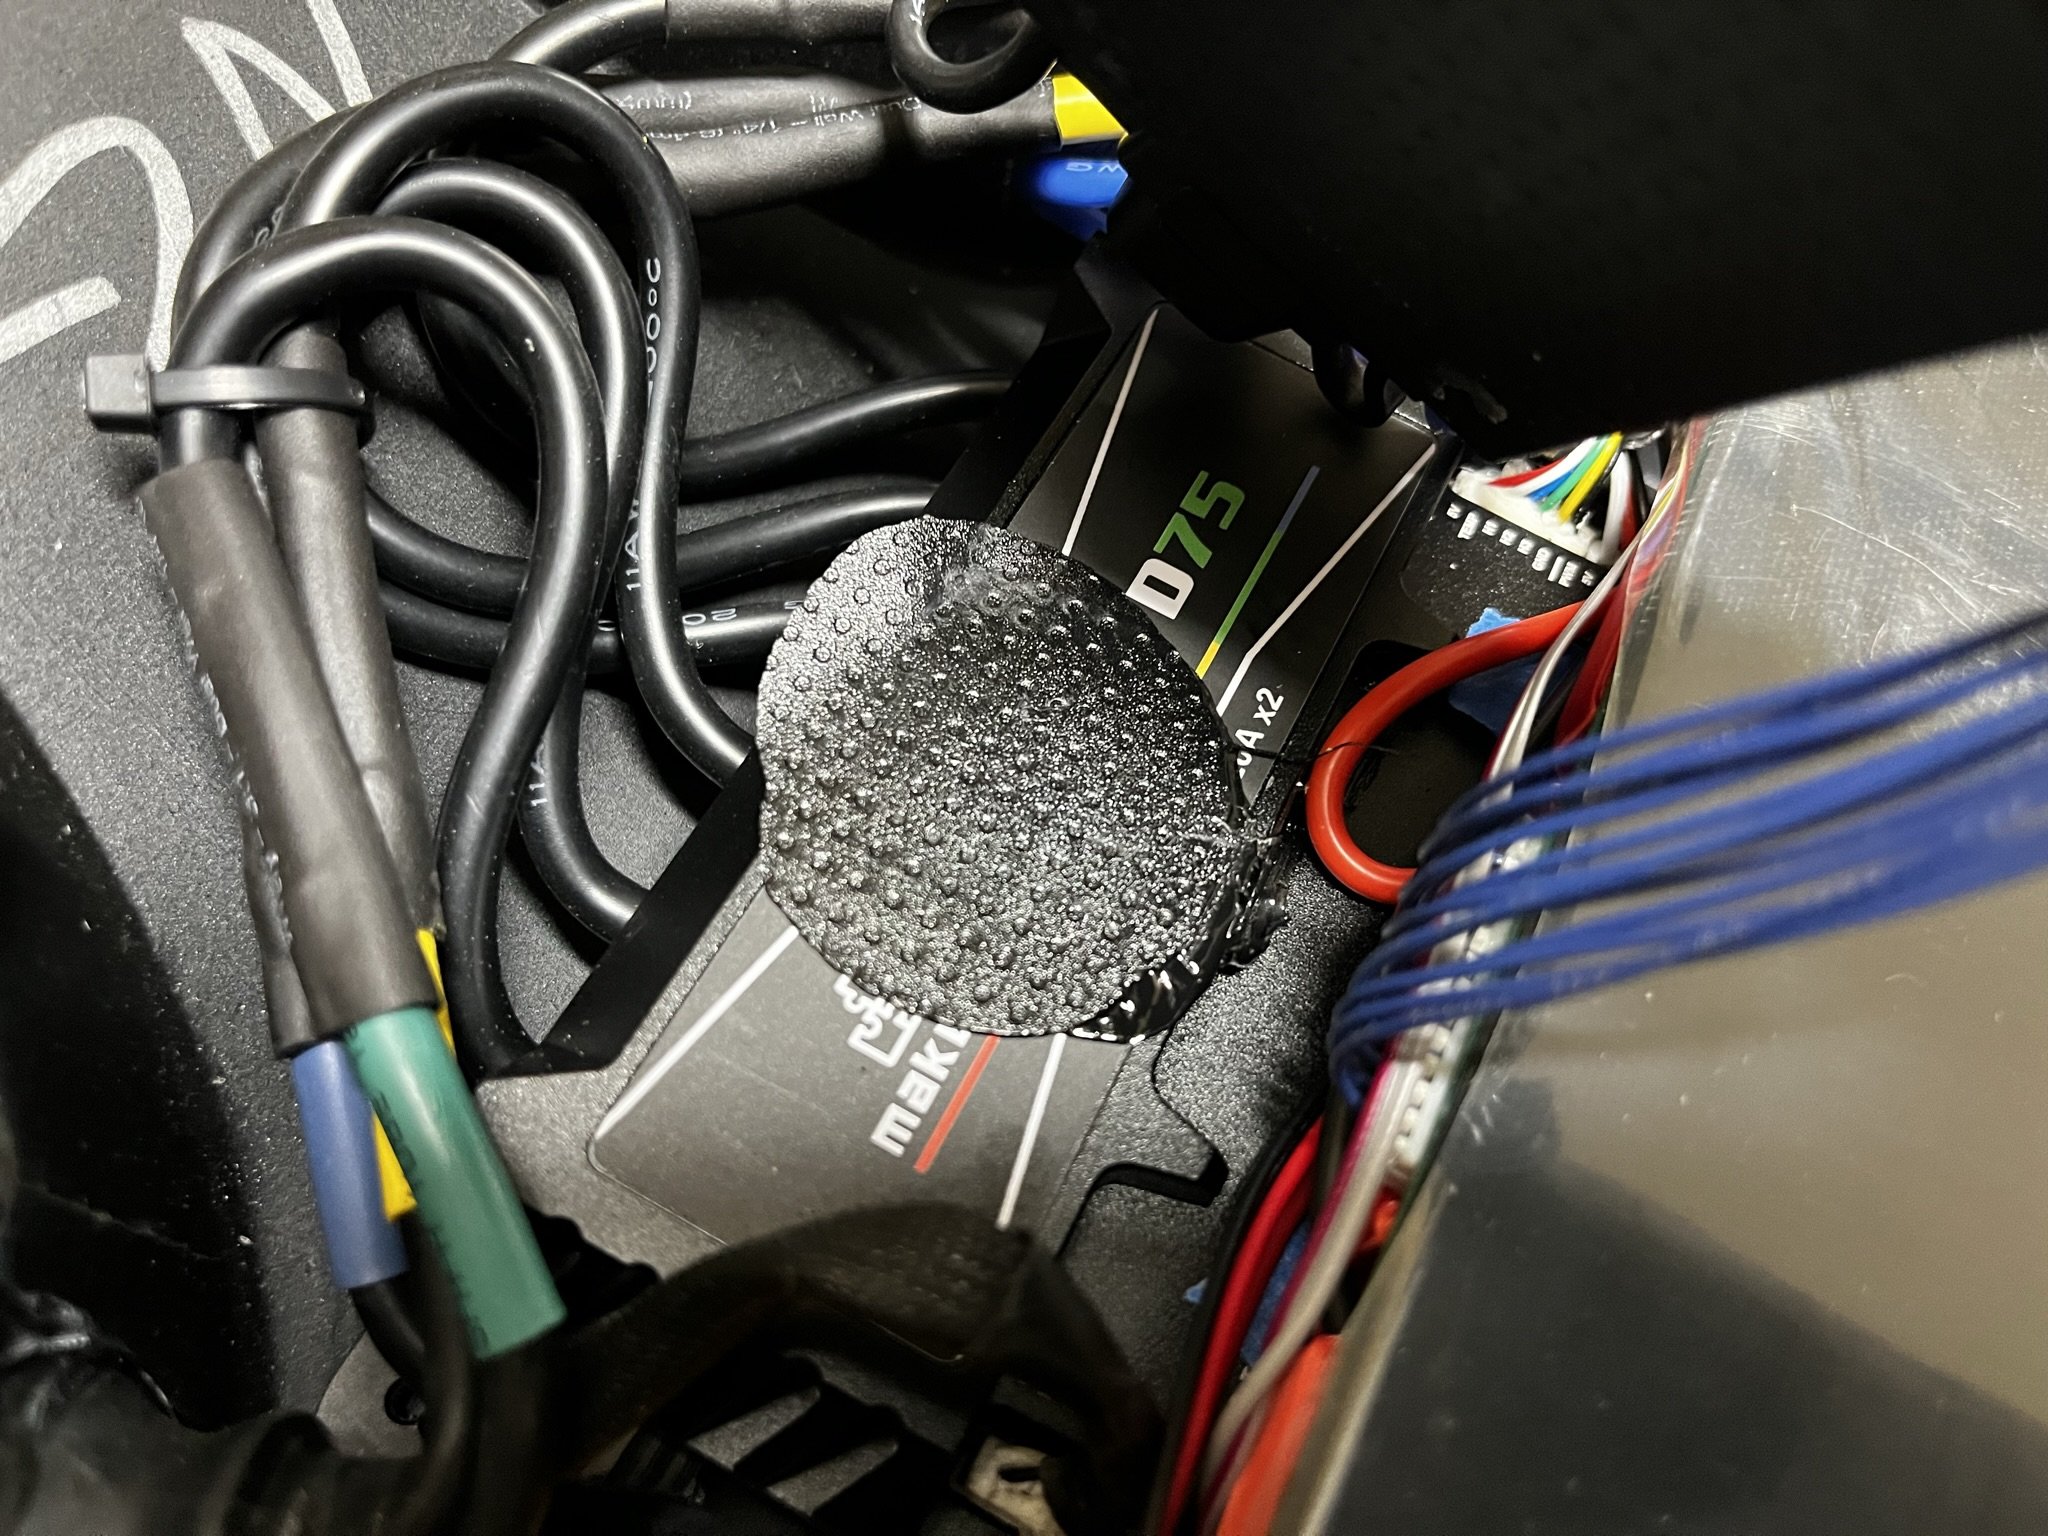
Below it, is the VESC. It’s a Maker-X D75 high voltage VESC. Another excellent choice. This VESC is meant for higher voltage boards (above the 12s voltage range of this one). Using something like this keeps the operating voltage of the board farther below the ratings of the components of the VESC.
In higher end enthusiast eskate building, VESCs are usually sold and used nearly at their component rating. Maybe 10v below their rating. This is NOT how things go in the real world of electronics design where reliability means a decade of solid use, not just one riding season.
Most 12s (50.4v) ESCs have components rated for 60v. In the real world, that’s just insane. And 60v components shouldn’t be used above 30-40v if the user wants reliability.
The D75 is spec’d to work with up to 16s (67.2v), and so using it with a system that tops out at 50.4v will help ensure that the VESC doesn’t incur damage from voltage spikes or other transients. Smart idea.
Outside of all that, the wiring inside is pretty clean, well organized and routed, and with no pinching or areas of abrasion that I can see. It’s well put together, and seems to hold together well. I am the 3rd person to have this board on loan, and it seems to have survived through a decent amount up until now.