19s2p Battery Installation Guidance
This article briefly covers the installation of the 19s2p battery pack that’s outlined in the following article:
This install assumes the use of the ENNOID XLITE V4 BMS with the 6-pin JST-PH header removed. That can be found here, and you can contact ENNOID directly for the modification. They should be familiar with the modification, as I have requested it myself for the sake of these installs.
A brief note on handling the XLITE V4 BMS. The main balance IC chips are on the underside of the BMS unit. These chips are a bit fragile, and susceptible to static electricity. They can sometimes be damaged in this way. When I receive these units myself, I immediately add conformal coating to the ICs on the underside of the BMS and allow it to dry for at least 24 hours. Once I do this, I find that handling them does not incur any electrostatic damage or effects. And so, I recommend anyone do that as well. The conformal coat I use is this one:
Fitment
The 19s2p battery pack is designed to fit into the follow enclosures:
TORque Box 2 (+XR) – The Float Life
VEXR Big Torque Battery Box - ATLOWSHOP
Protection
Many riders and builders tend to install urethane foot pads on their boards. I don’t, but many do. This can lead to crushing of the battery pack over time, since the rider’s weight is transferred through the battery box lid onto the battery pack. This is bad.
It is a very good idea to install a more rigid lid for the battery box. I use the TFL Billetproof Lid here:
BilletProof TORque Box 2 Lid – The Float Life
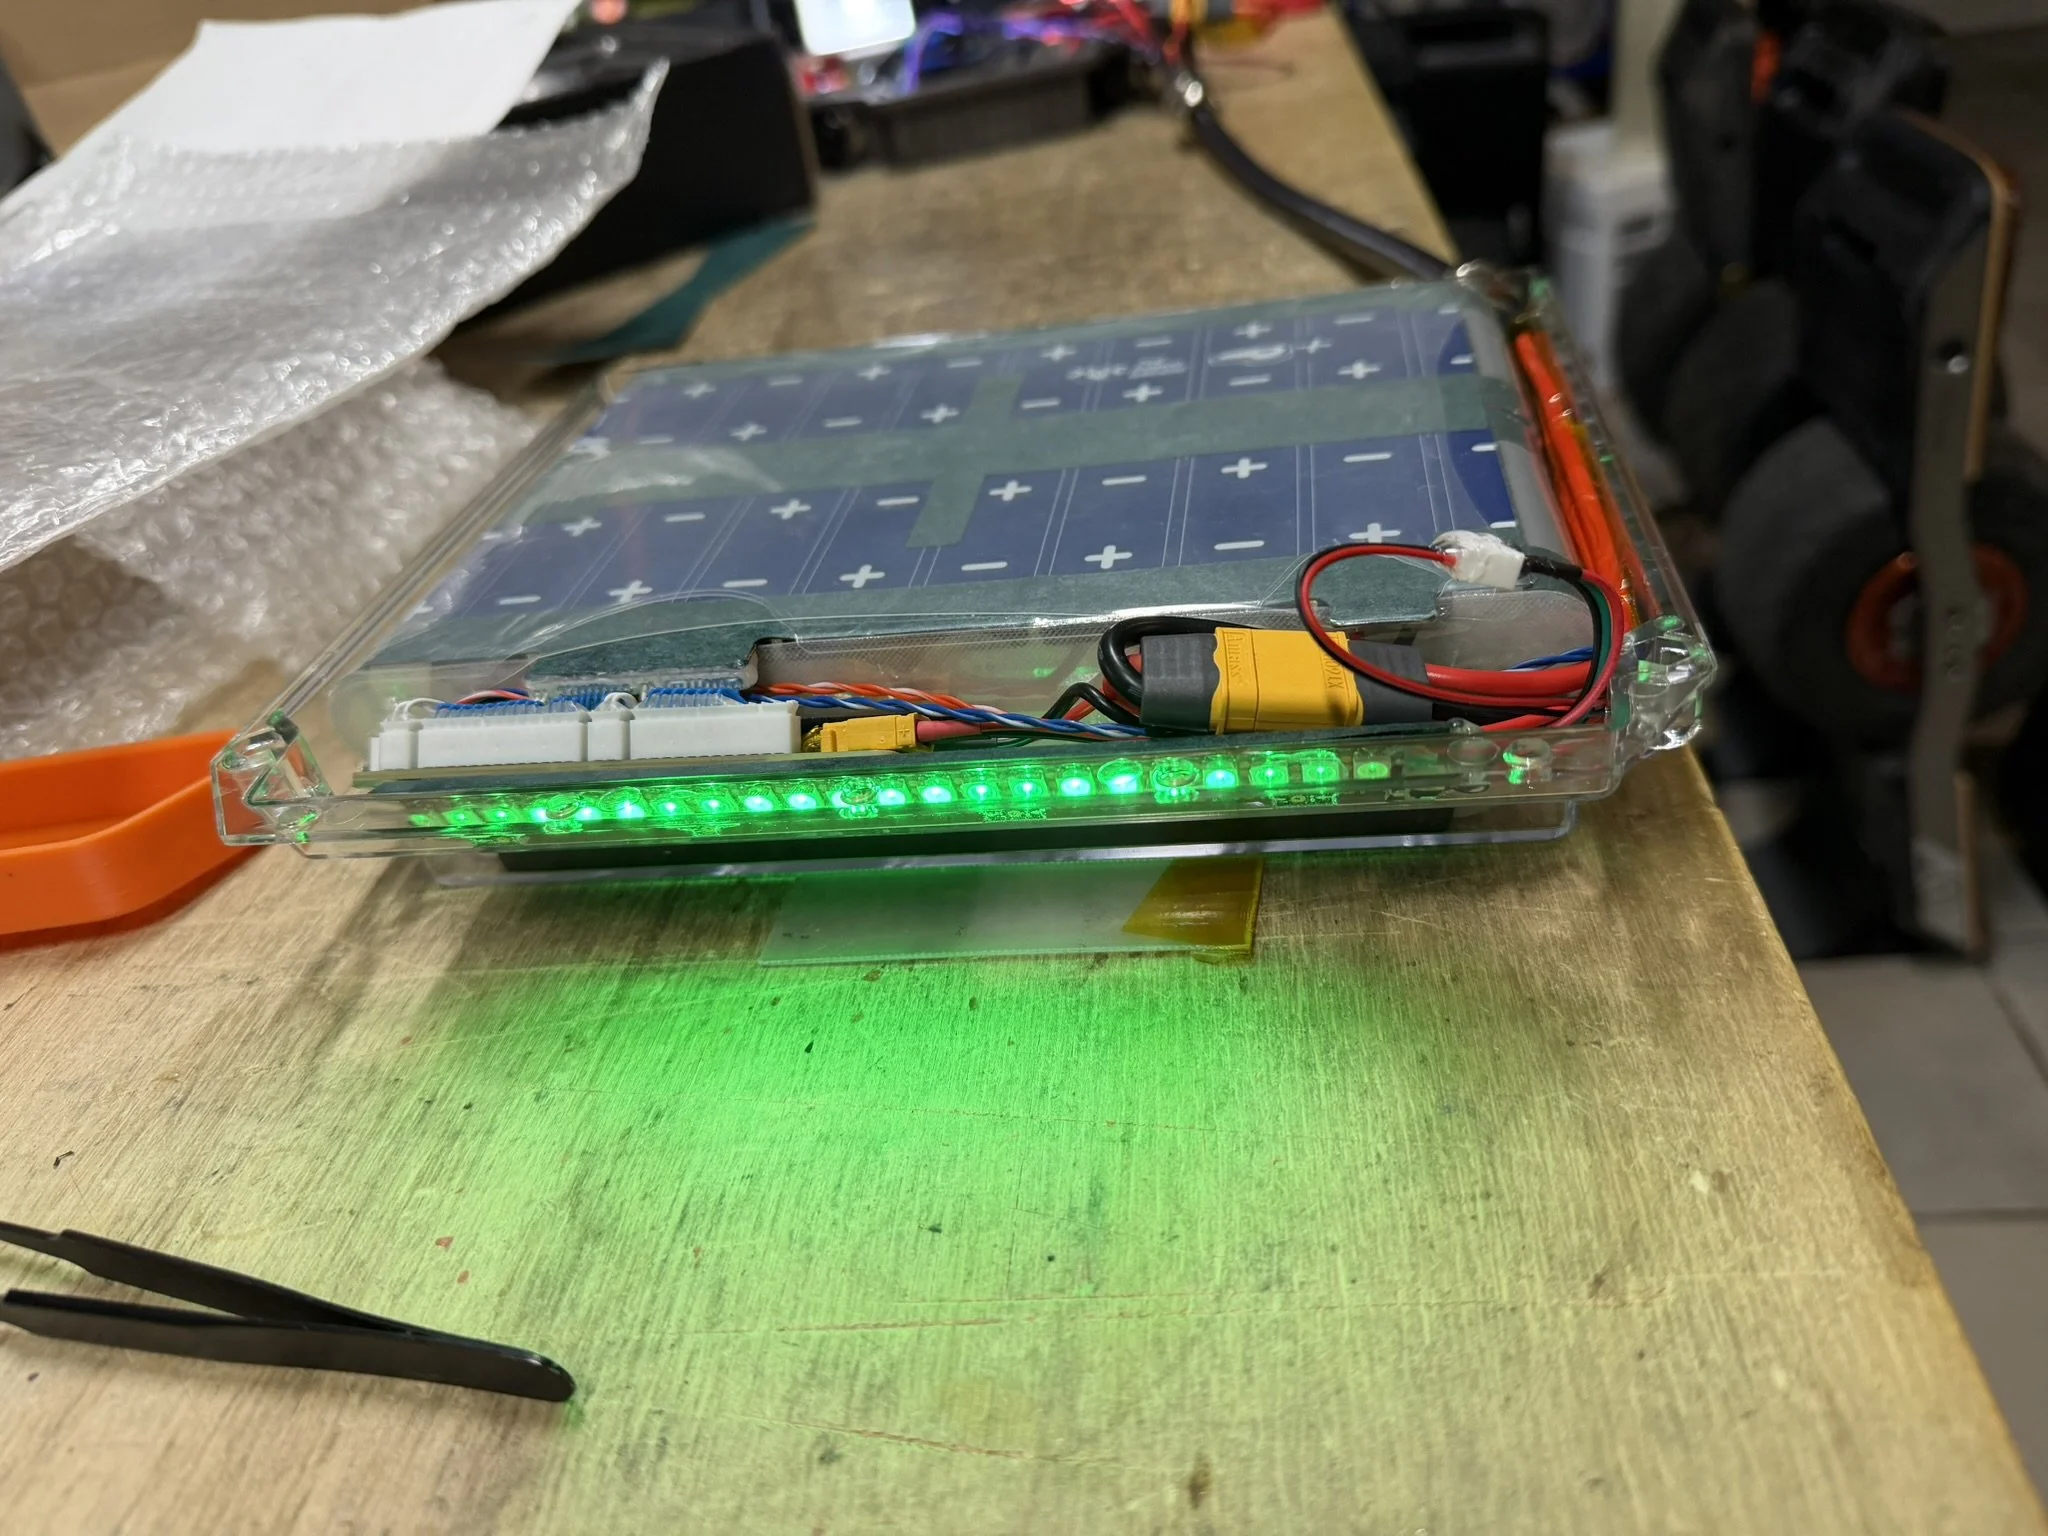
Tail Light Protection
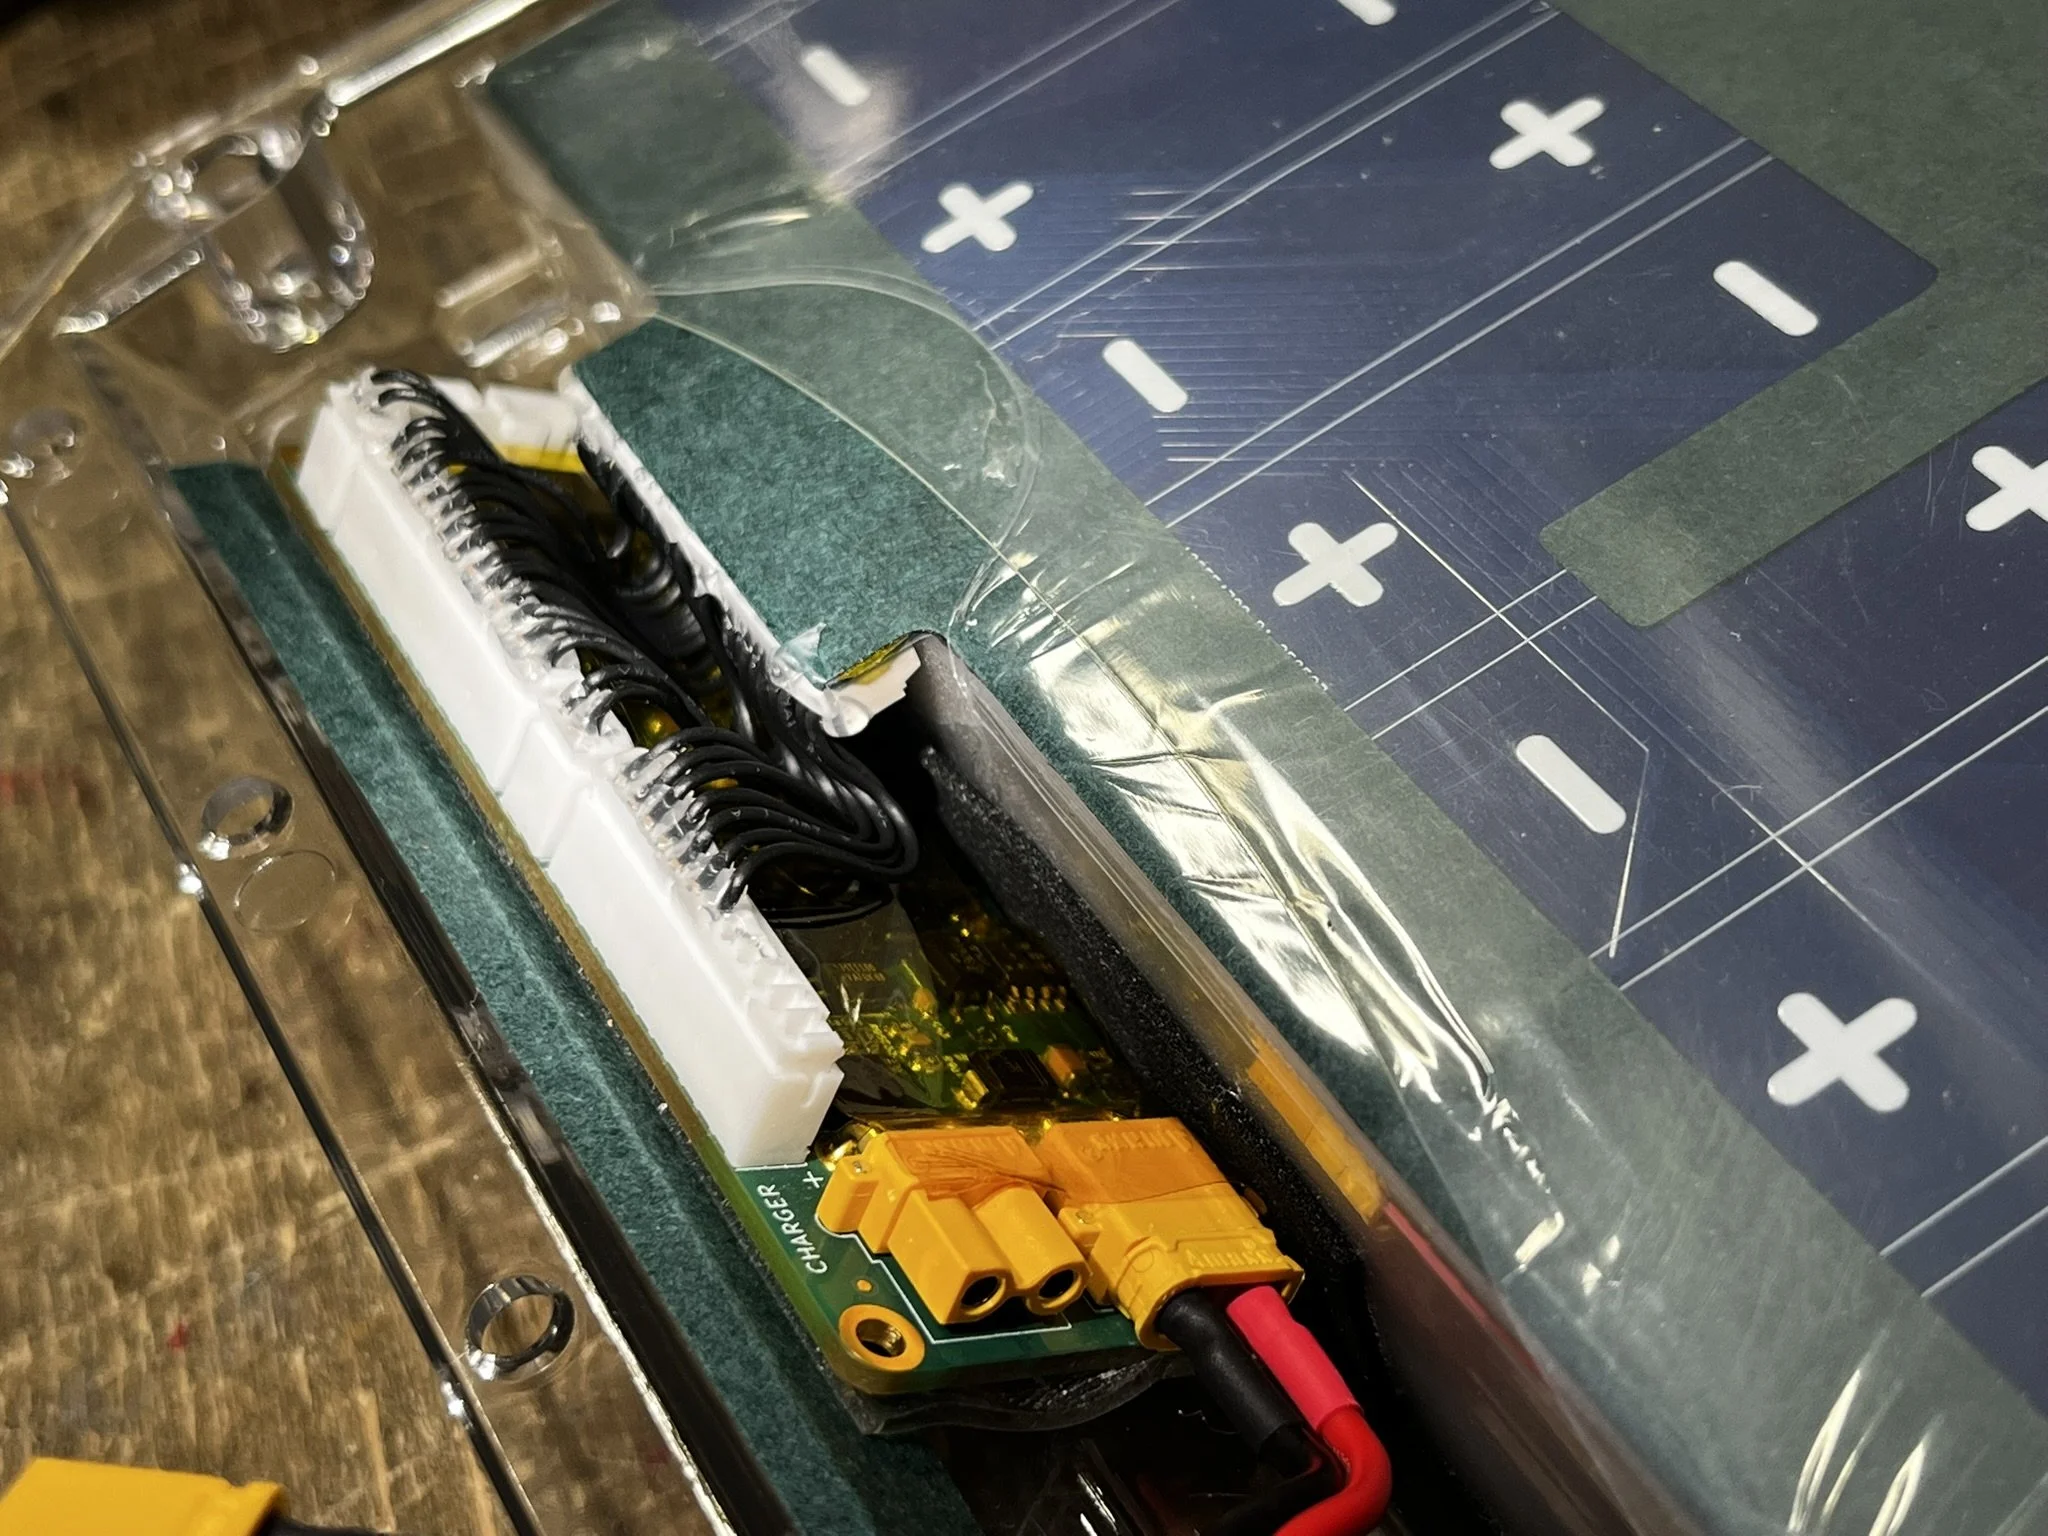
If installing a tail light into the rear battery box, it’s important to protect and insulate the LED strip/bar from the BMS that will be installed near it. Note the photos below for reference.
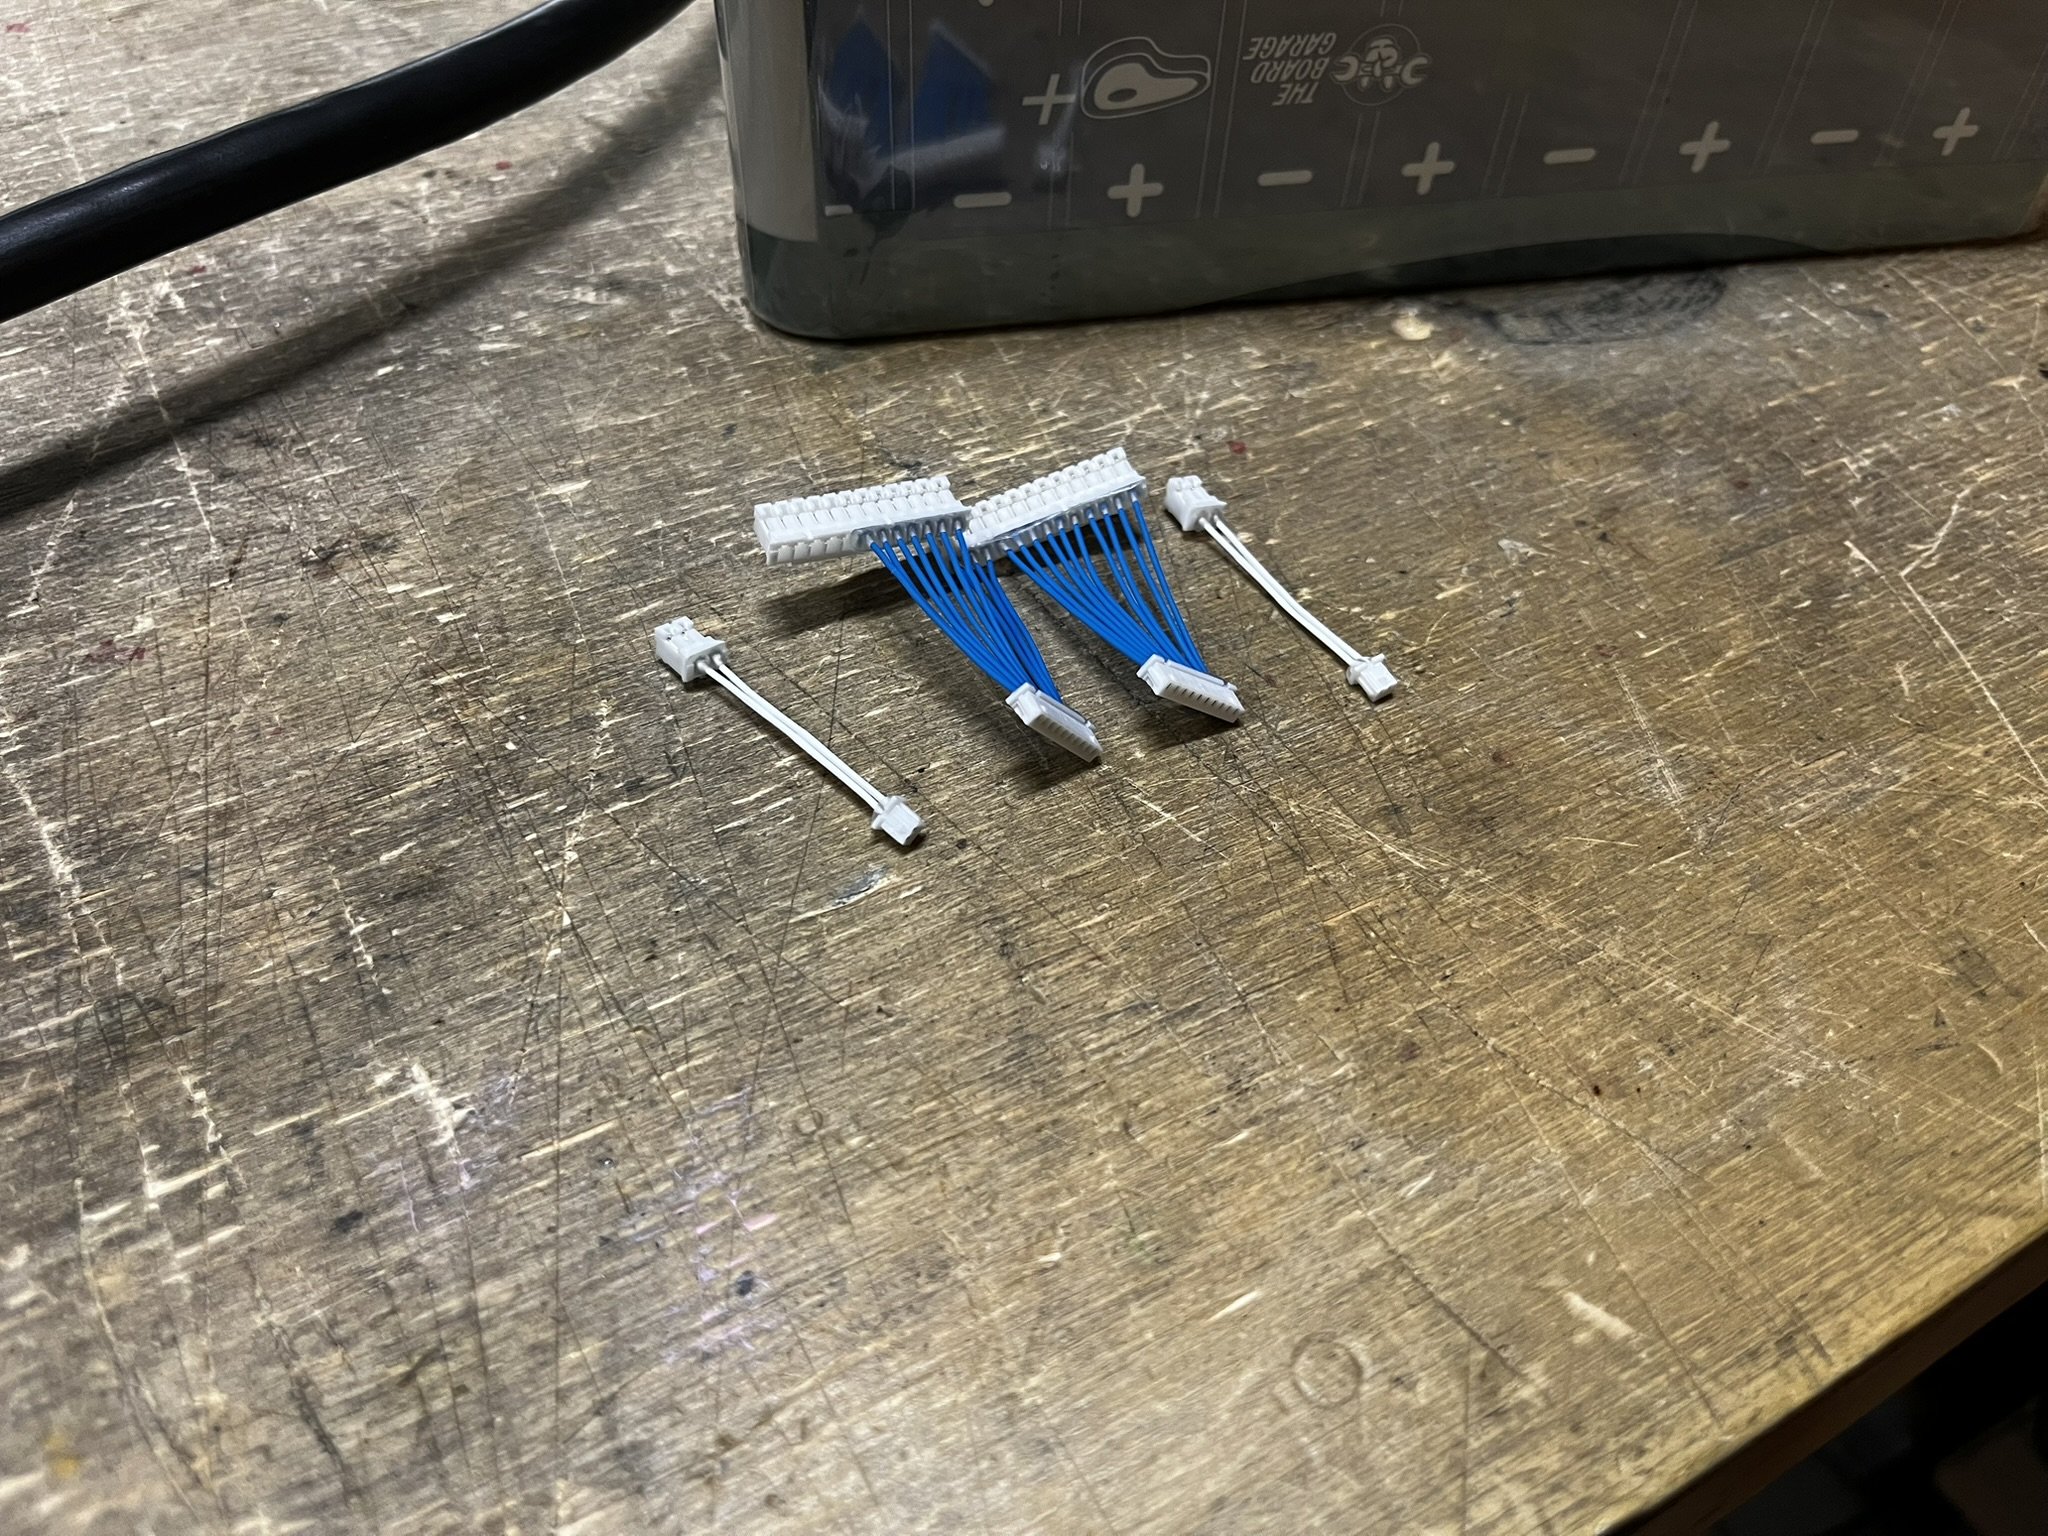
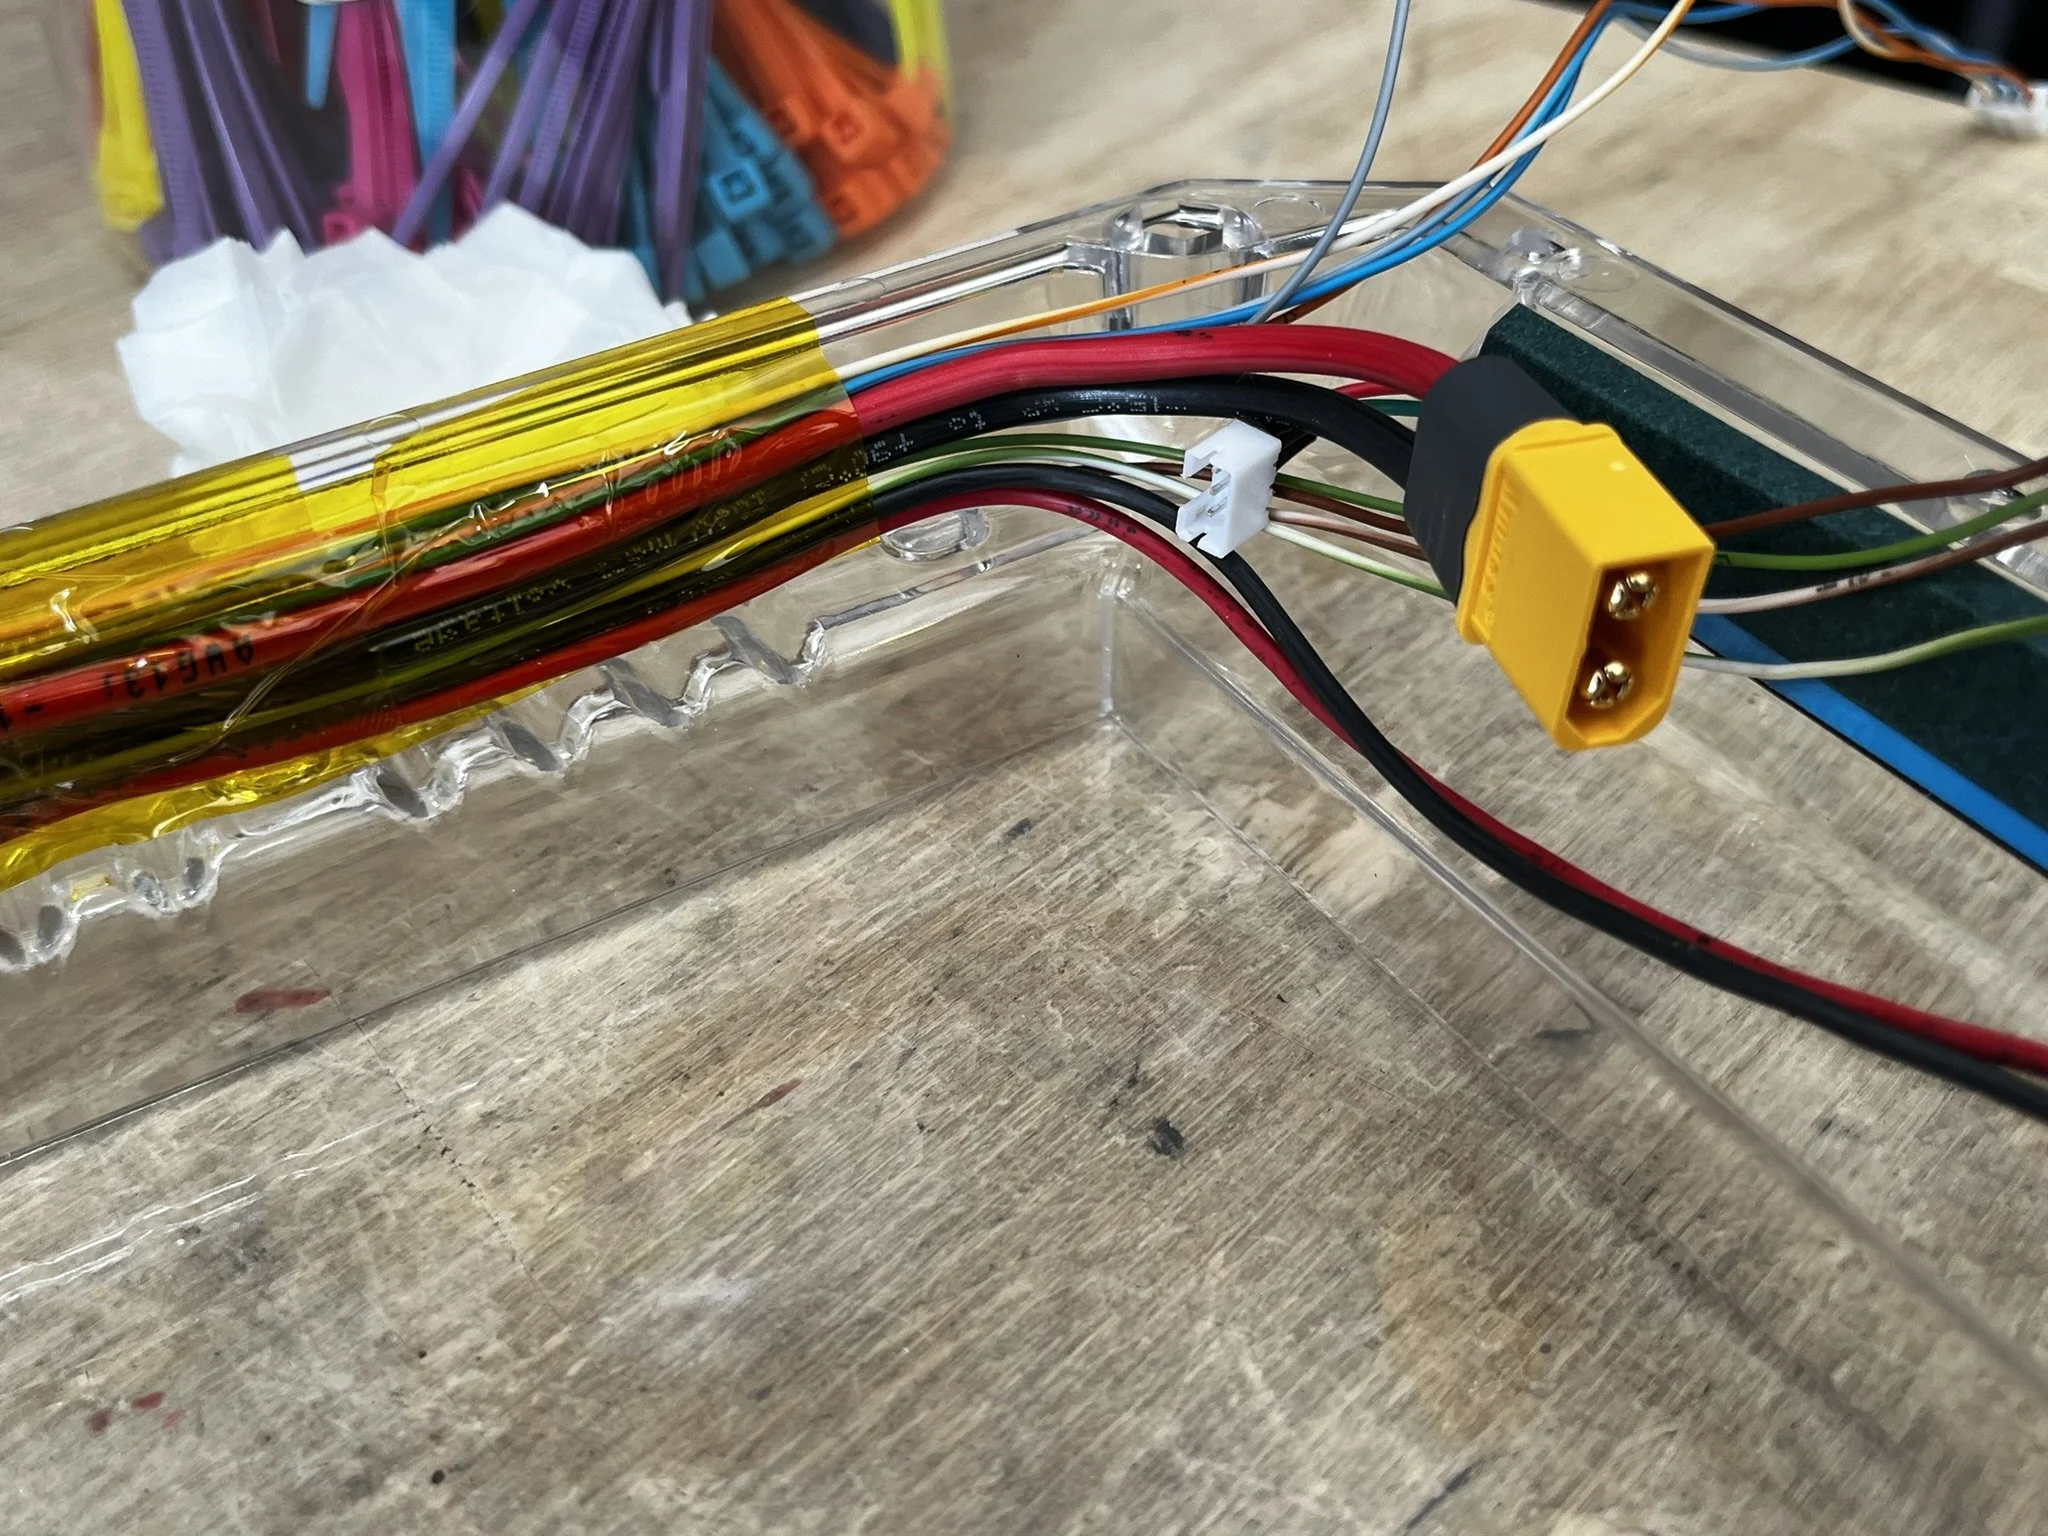
Wiring Harness
The details of the wiring harness are in the file set for the battery pack build log. As mentioned there, that wiring harness is detailed for use with the ENNOID XLITE V4 BMS, with the 6-pin JST-PH header removed for fitment.
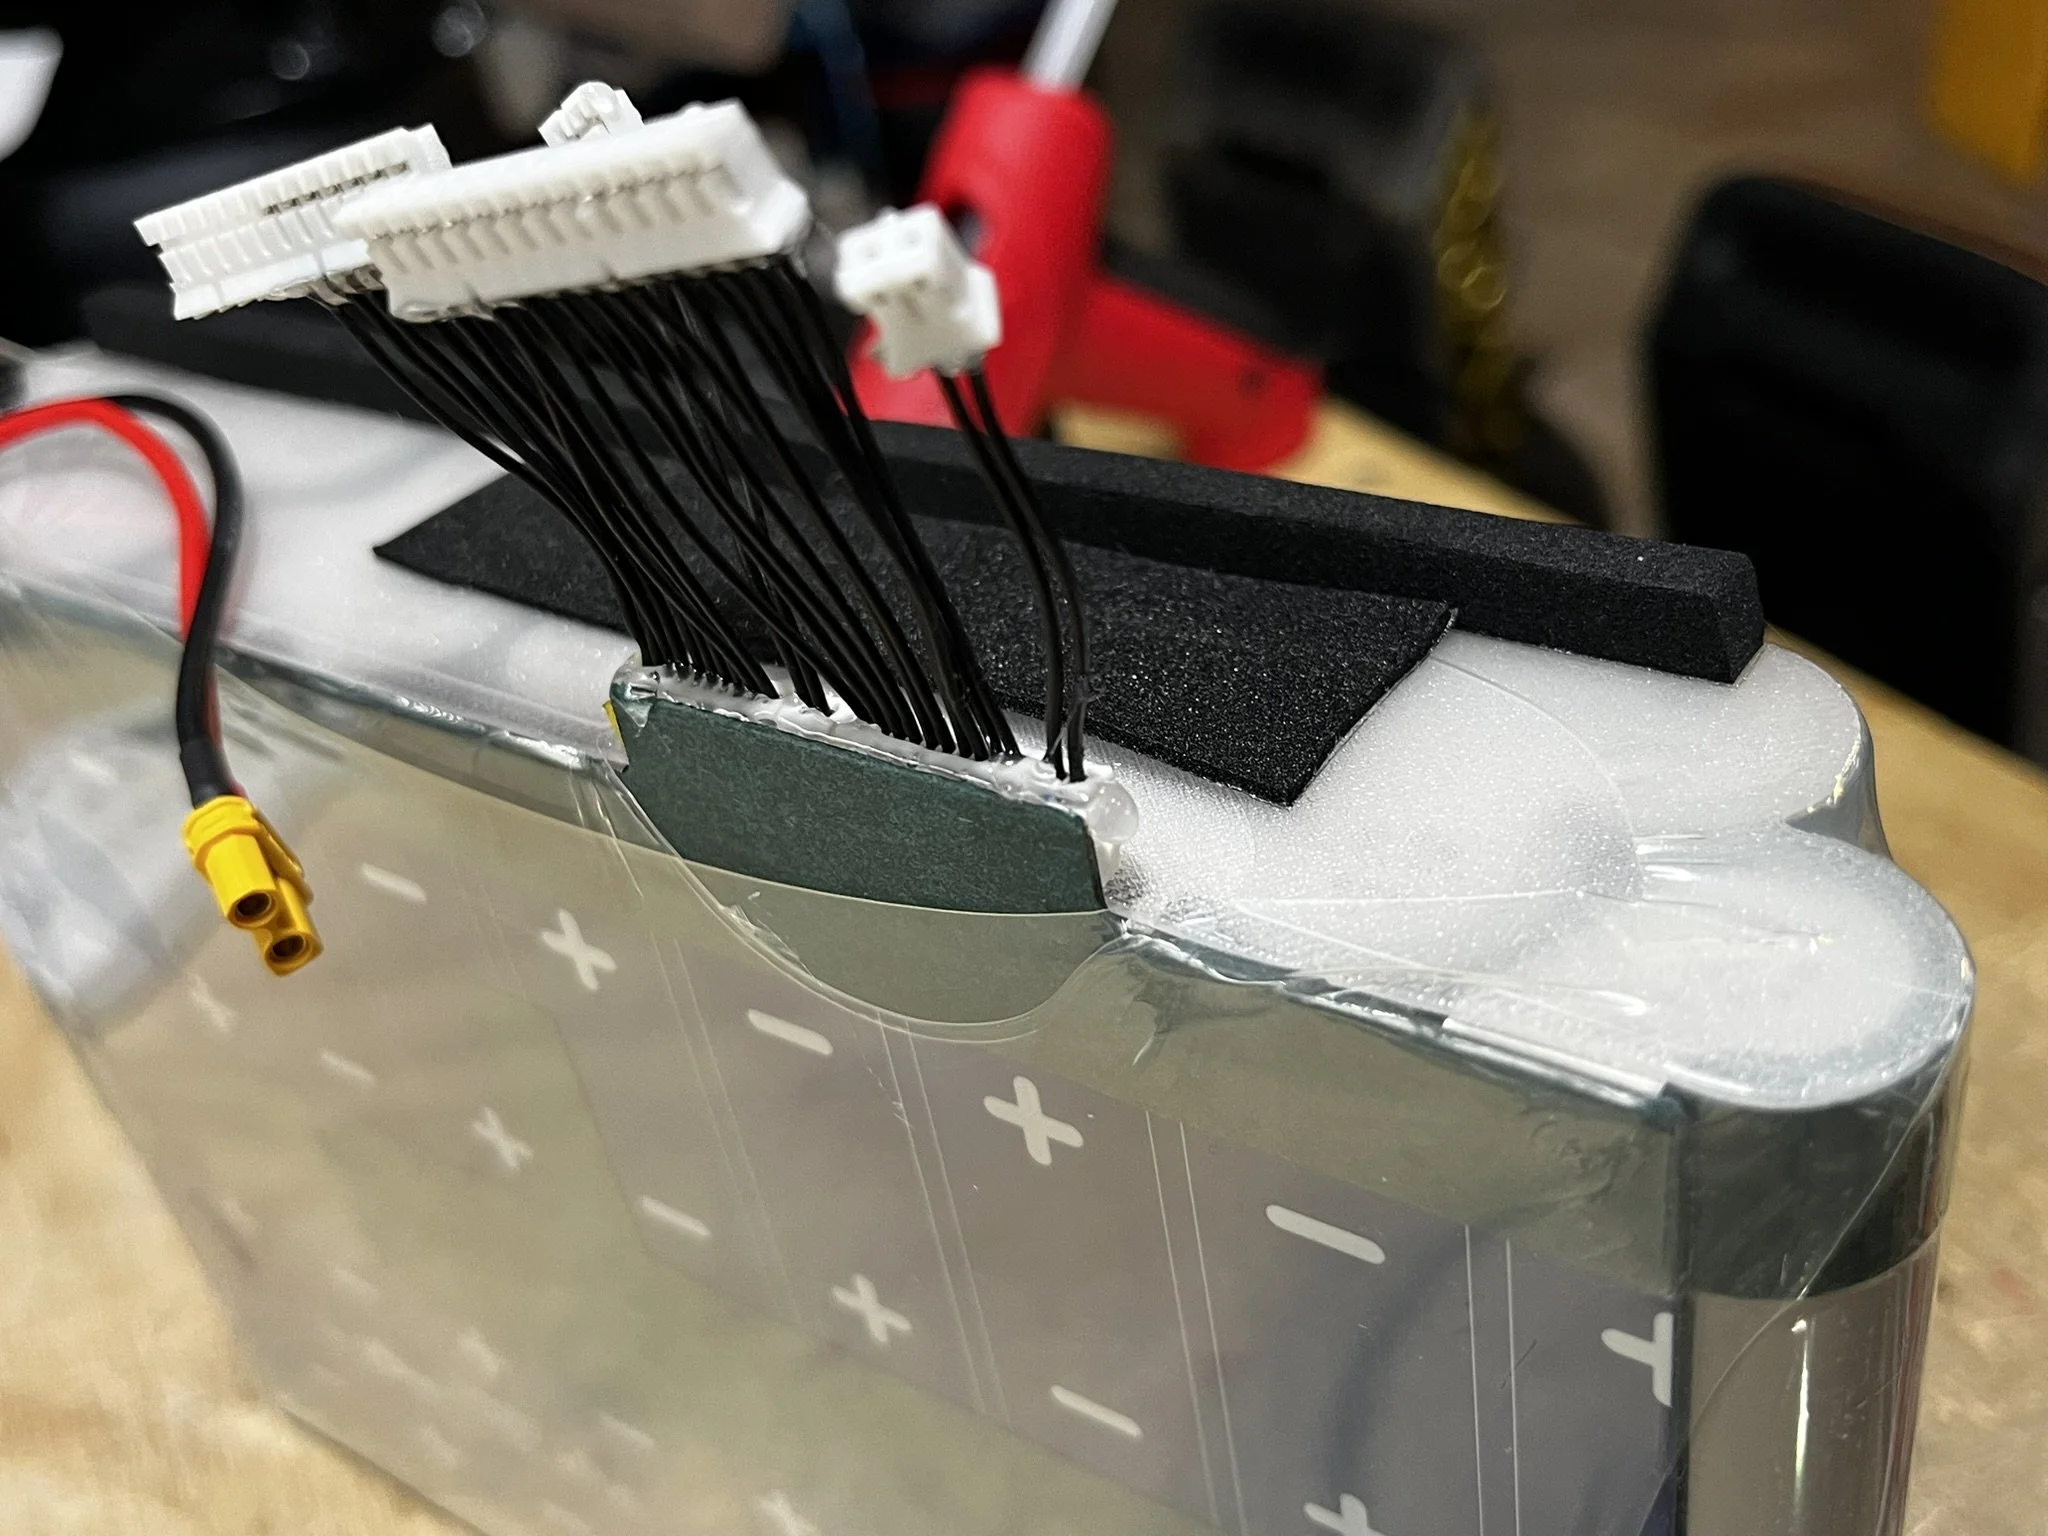
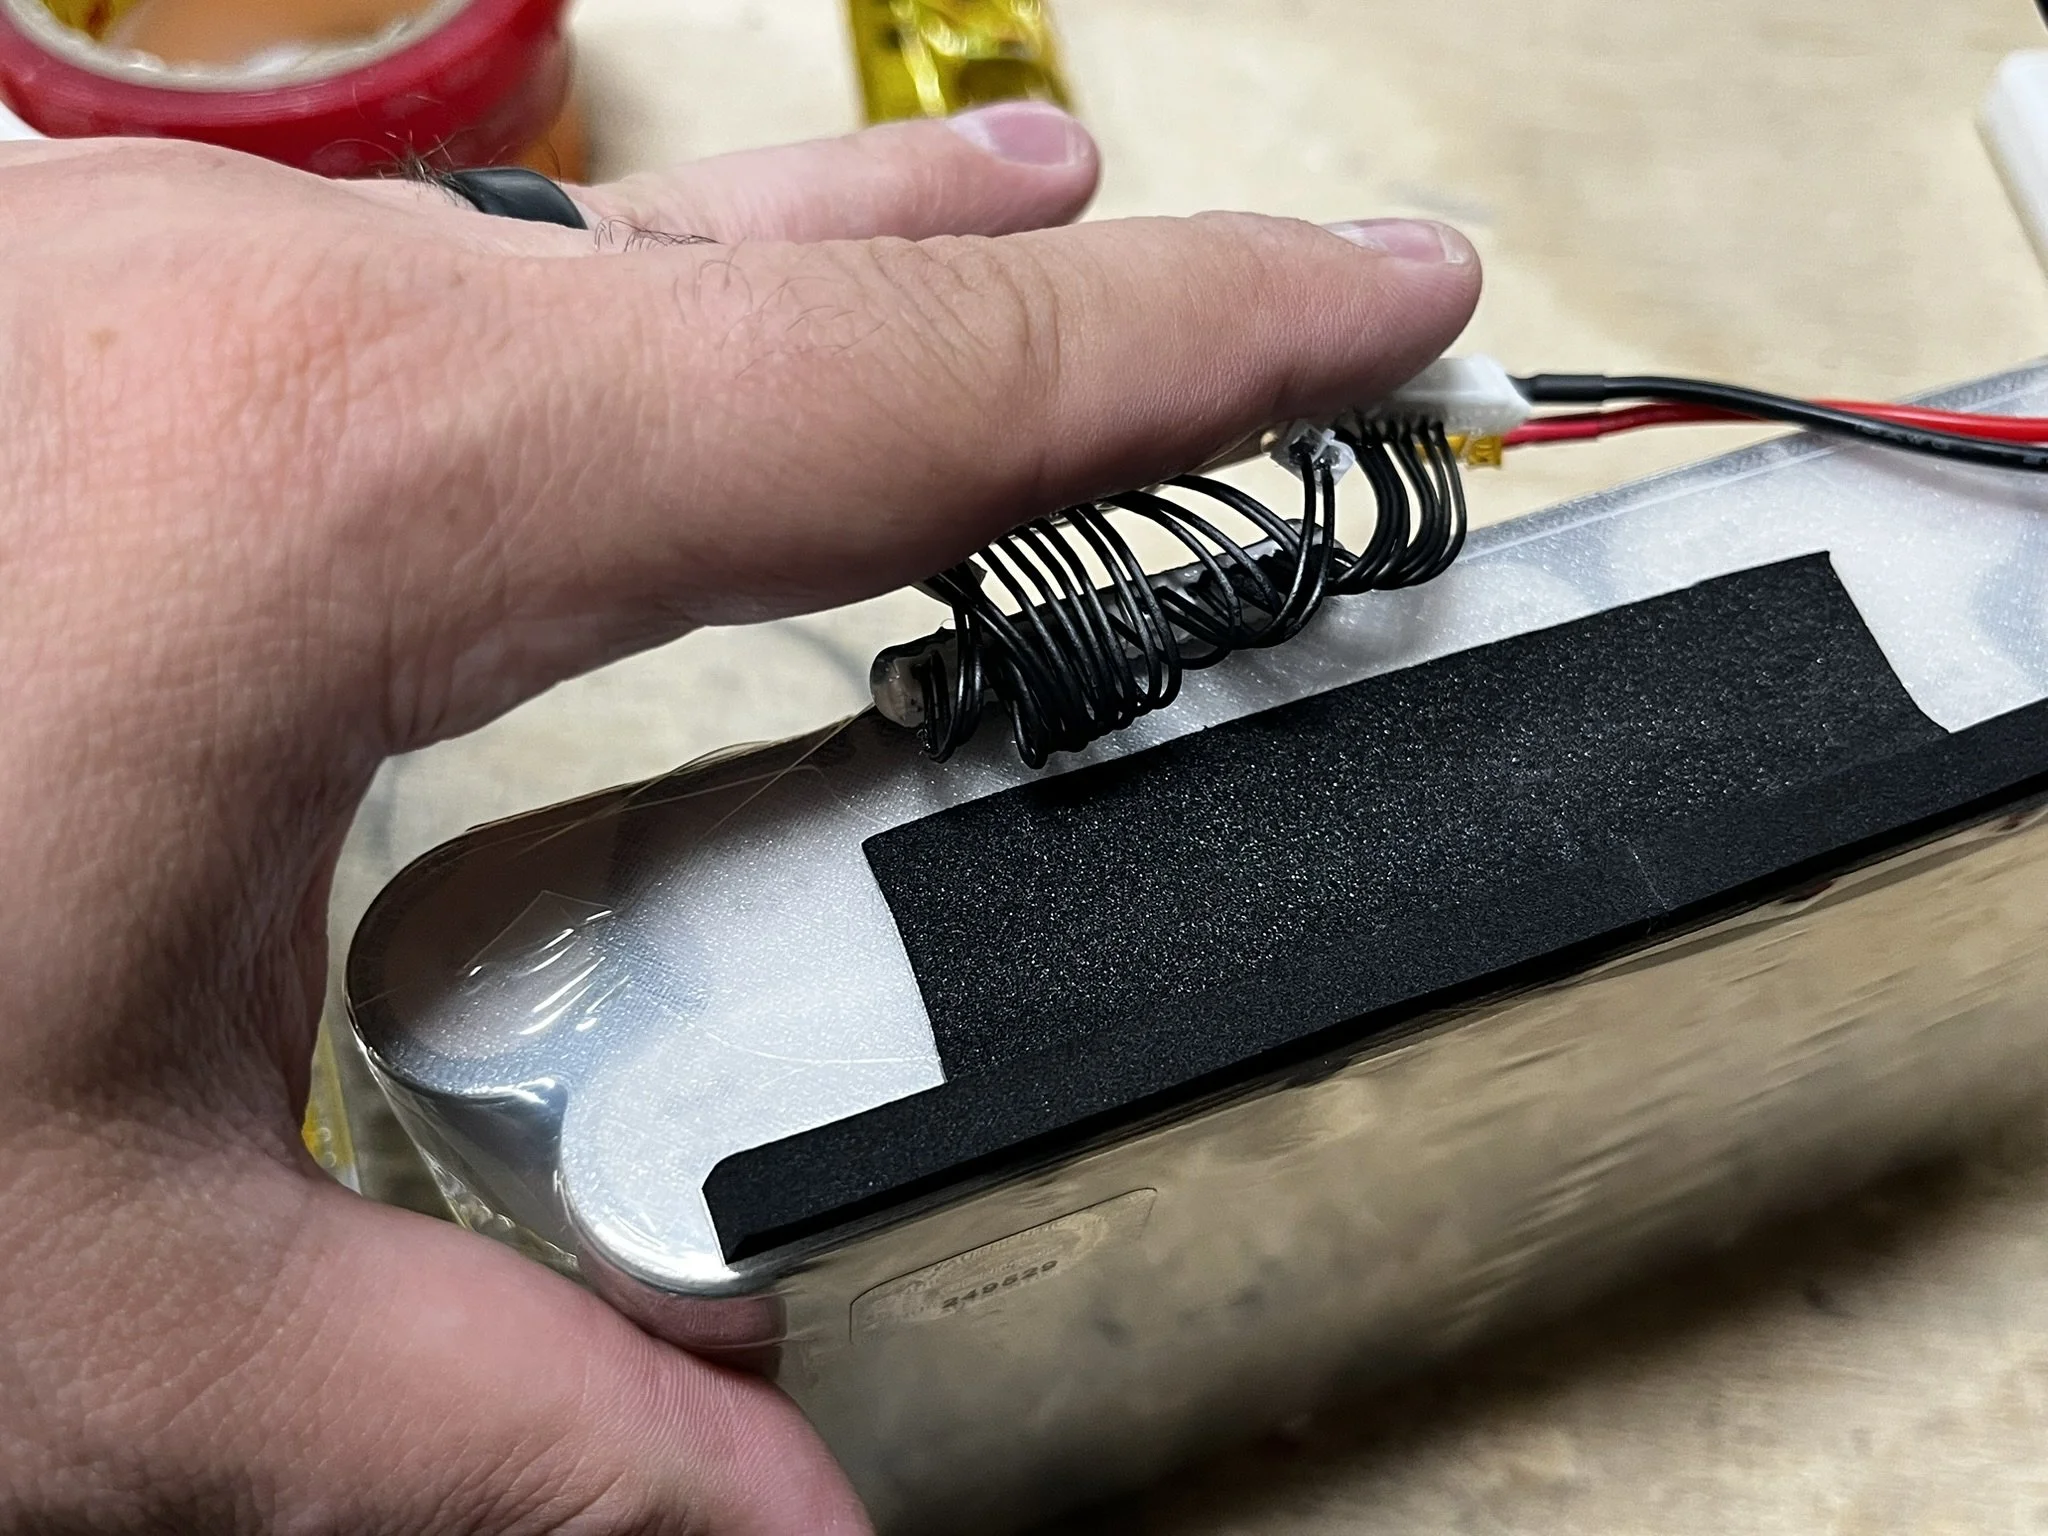
When installing the harness onto the pack, I secure the Molex PicoBlade connector with a thin bead of hot glue to keep it stable if there’s pressure from the rider’s weight through the lid. I also add glue for strain relief around the connectors. This kind of glue application can’t be done hamfistedly, it should end up pretty slim and not with large blobs protruding everywhere. There is a very tight fit for the wiring harness, and so be mindful of that part of the install.
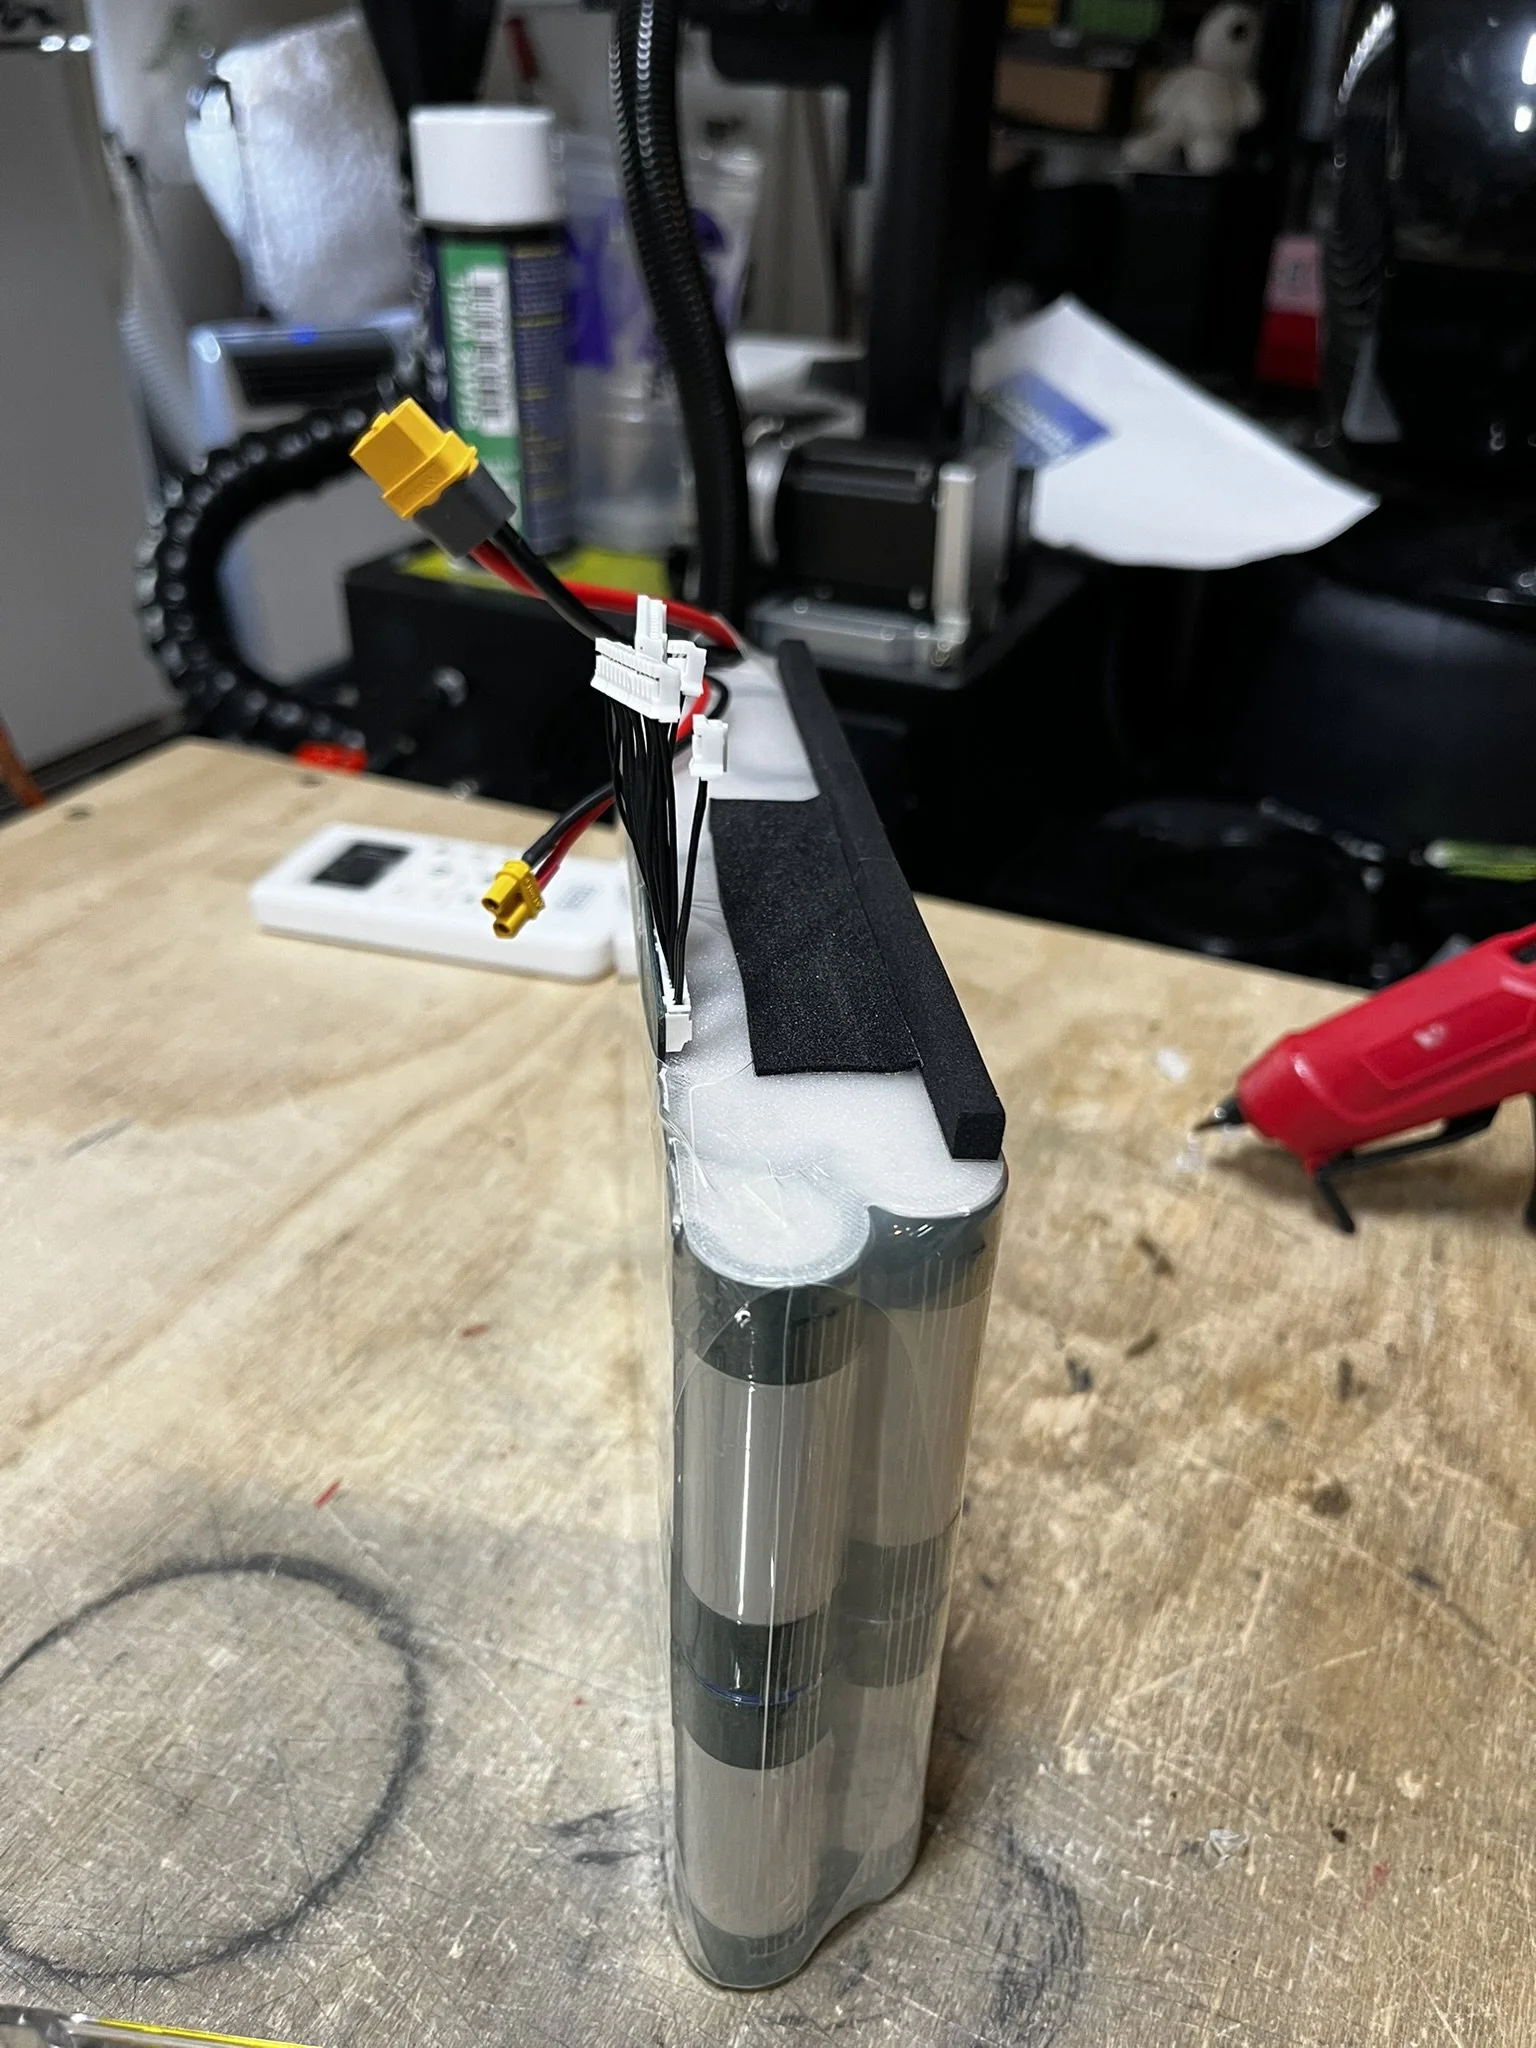
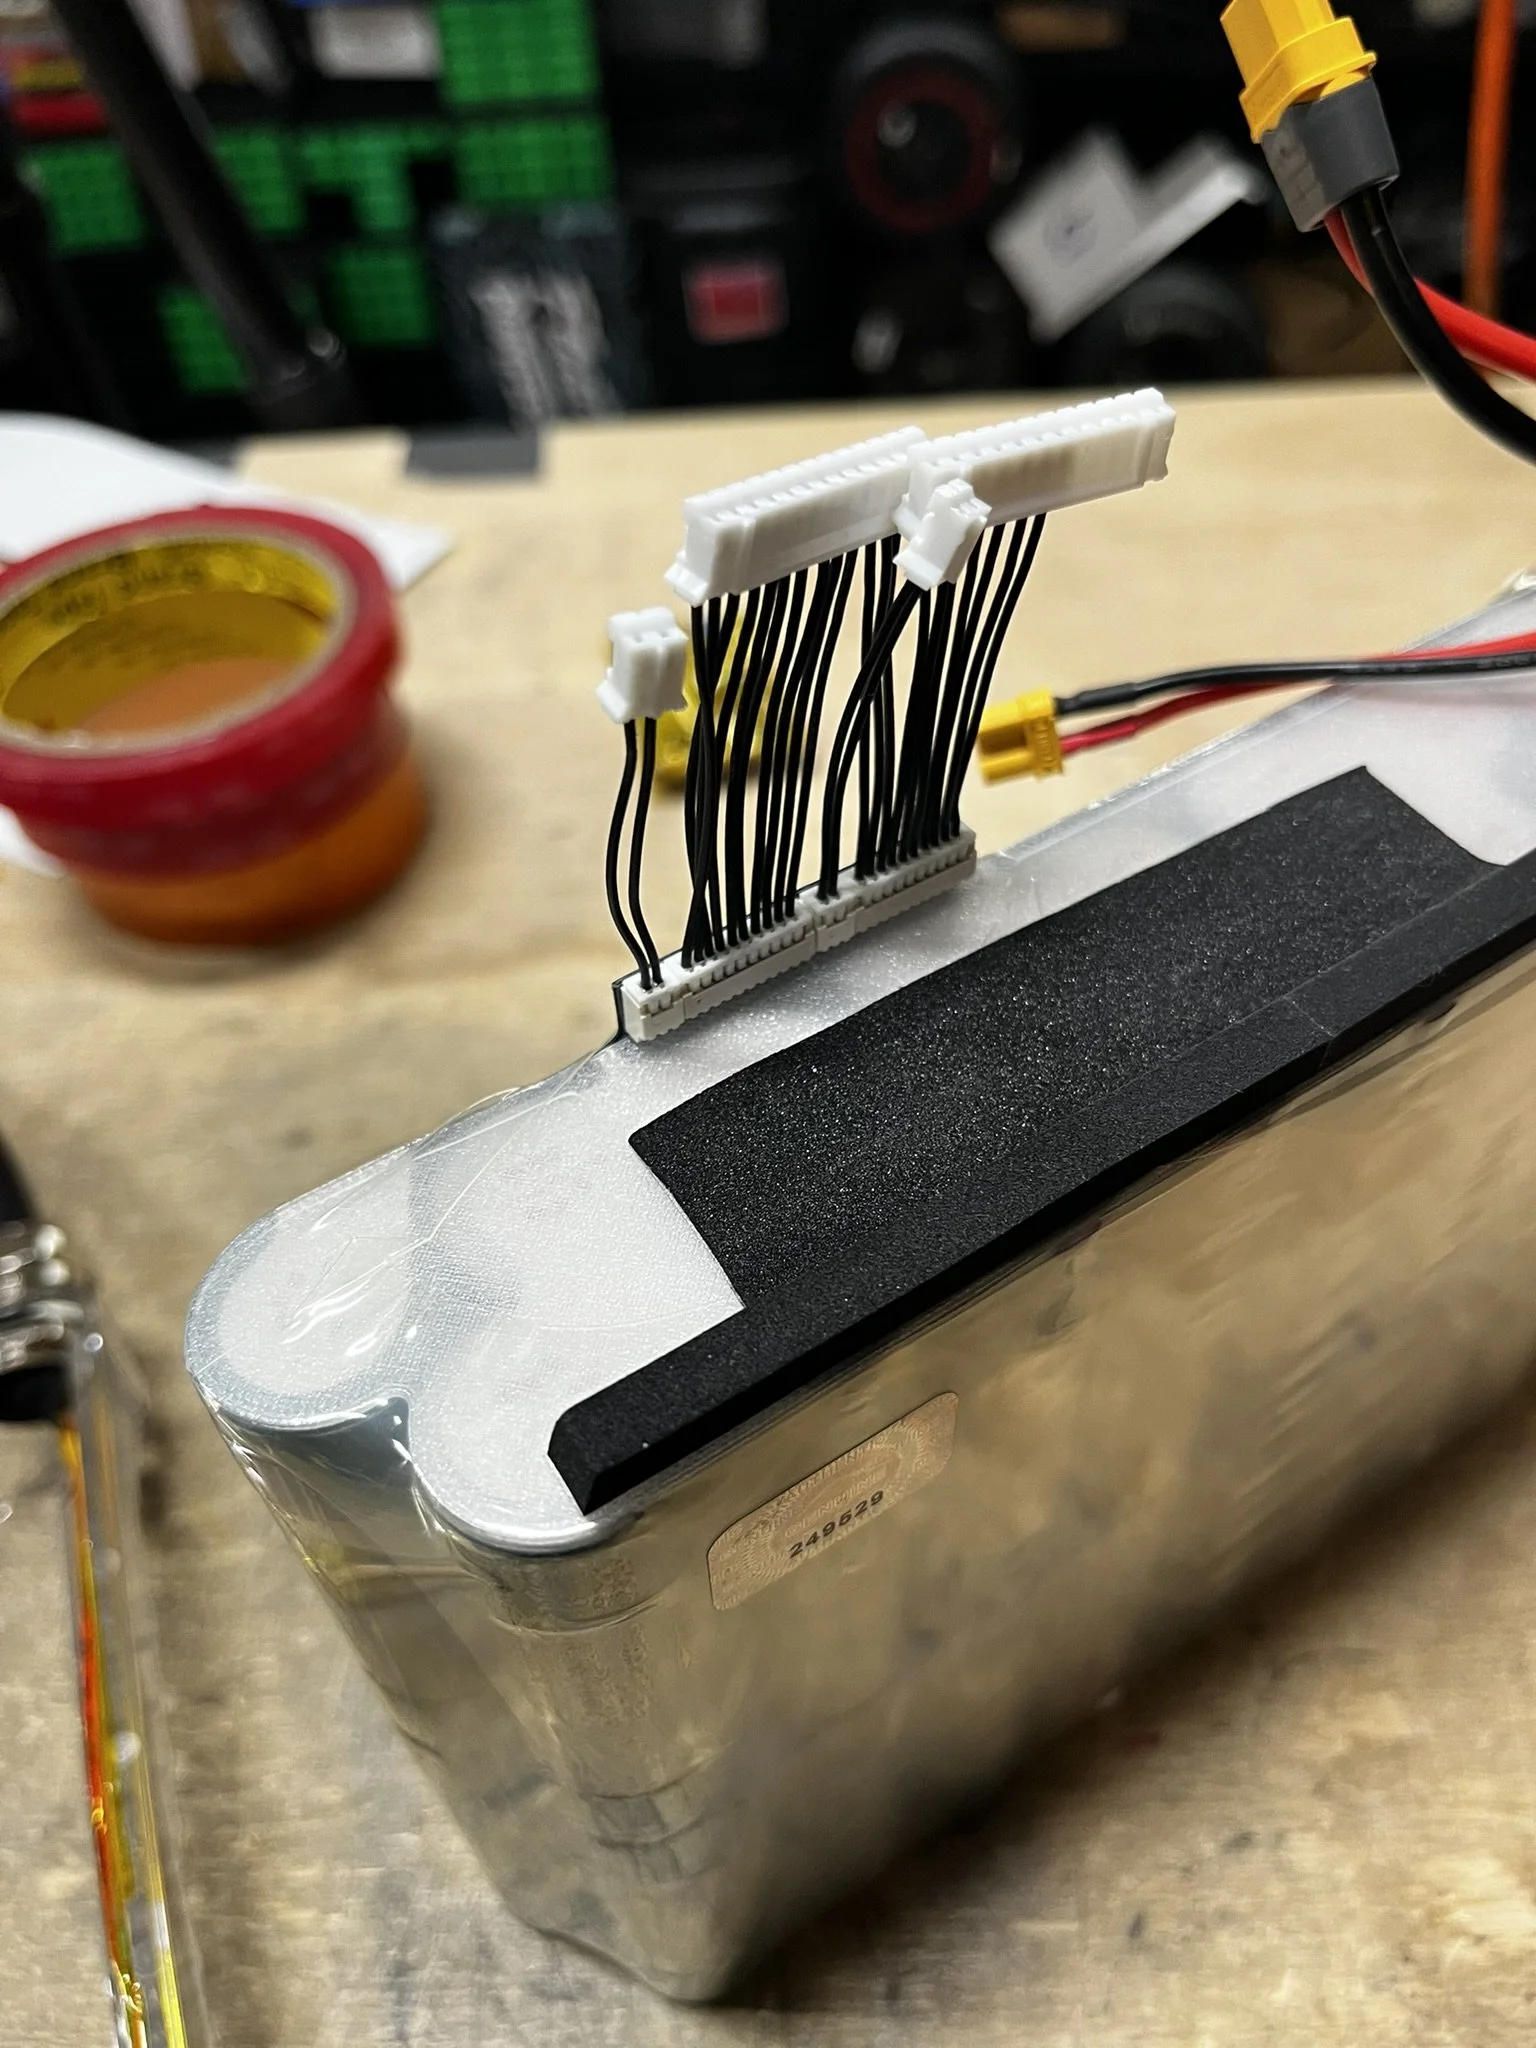

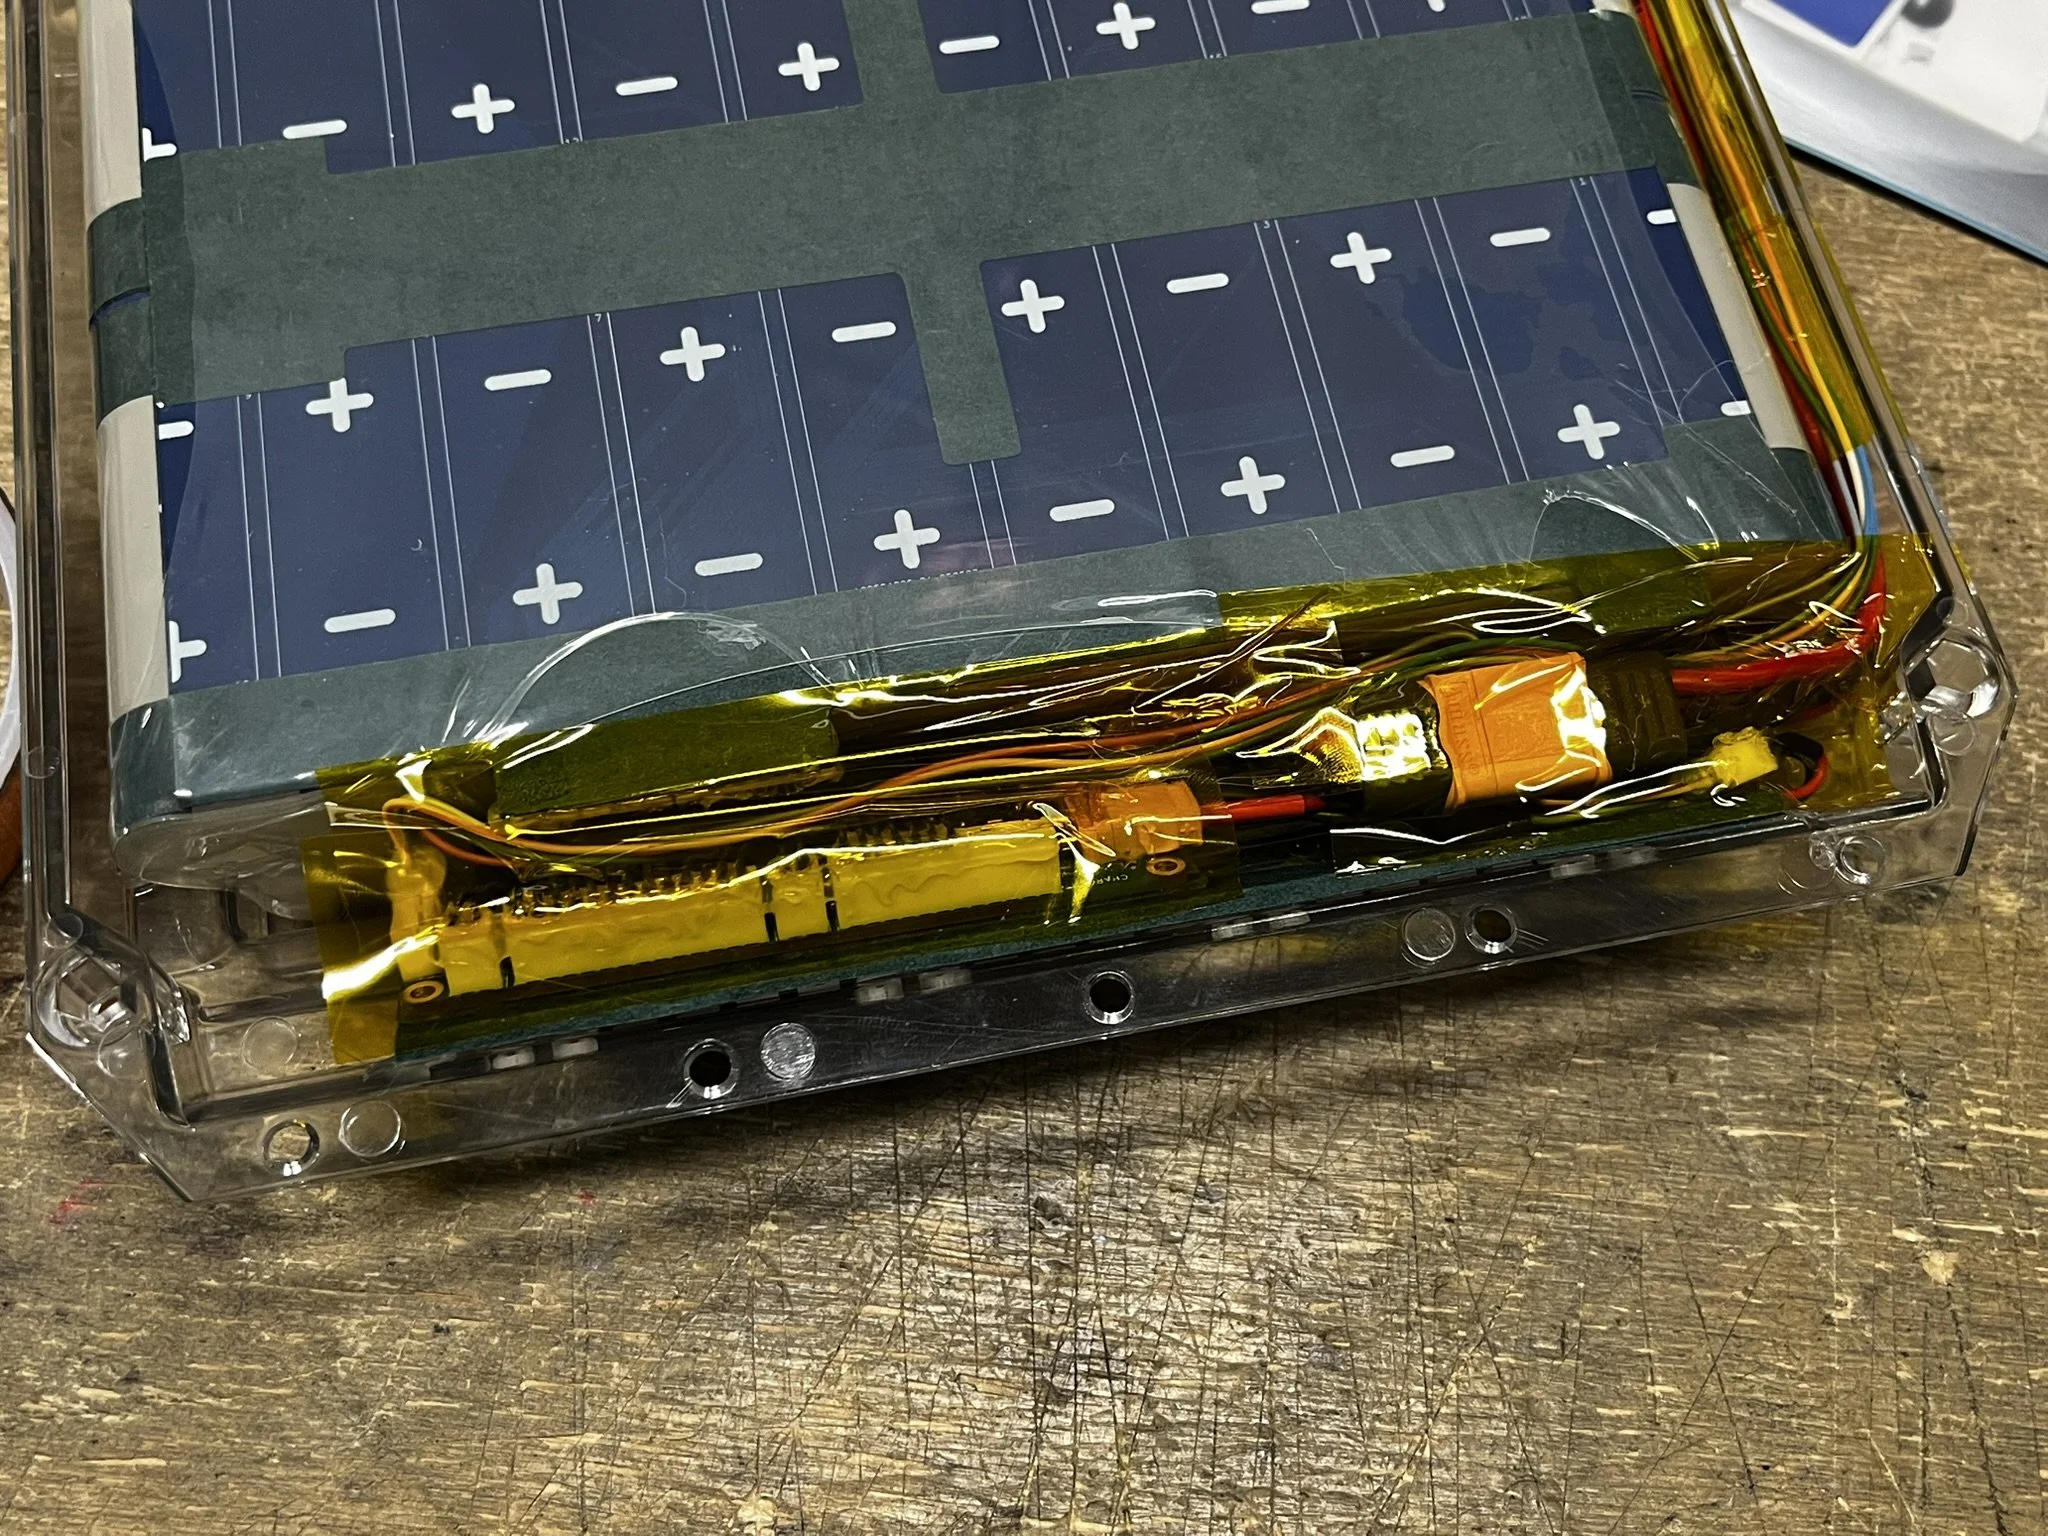
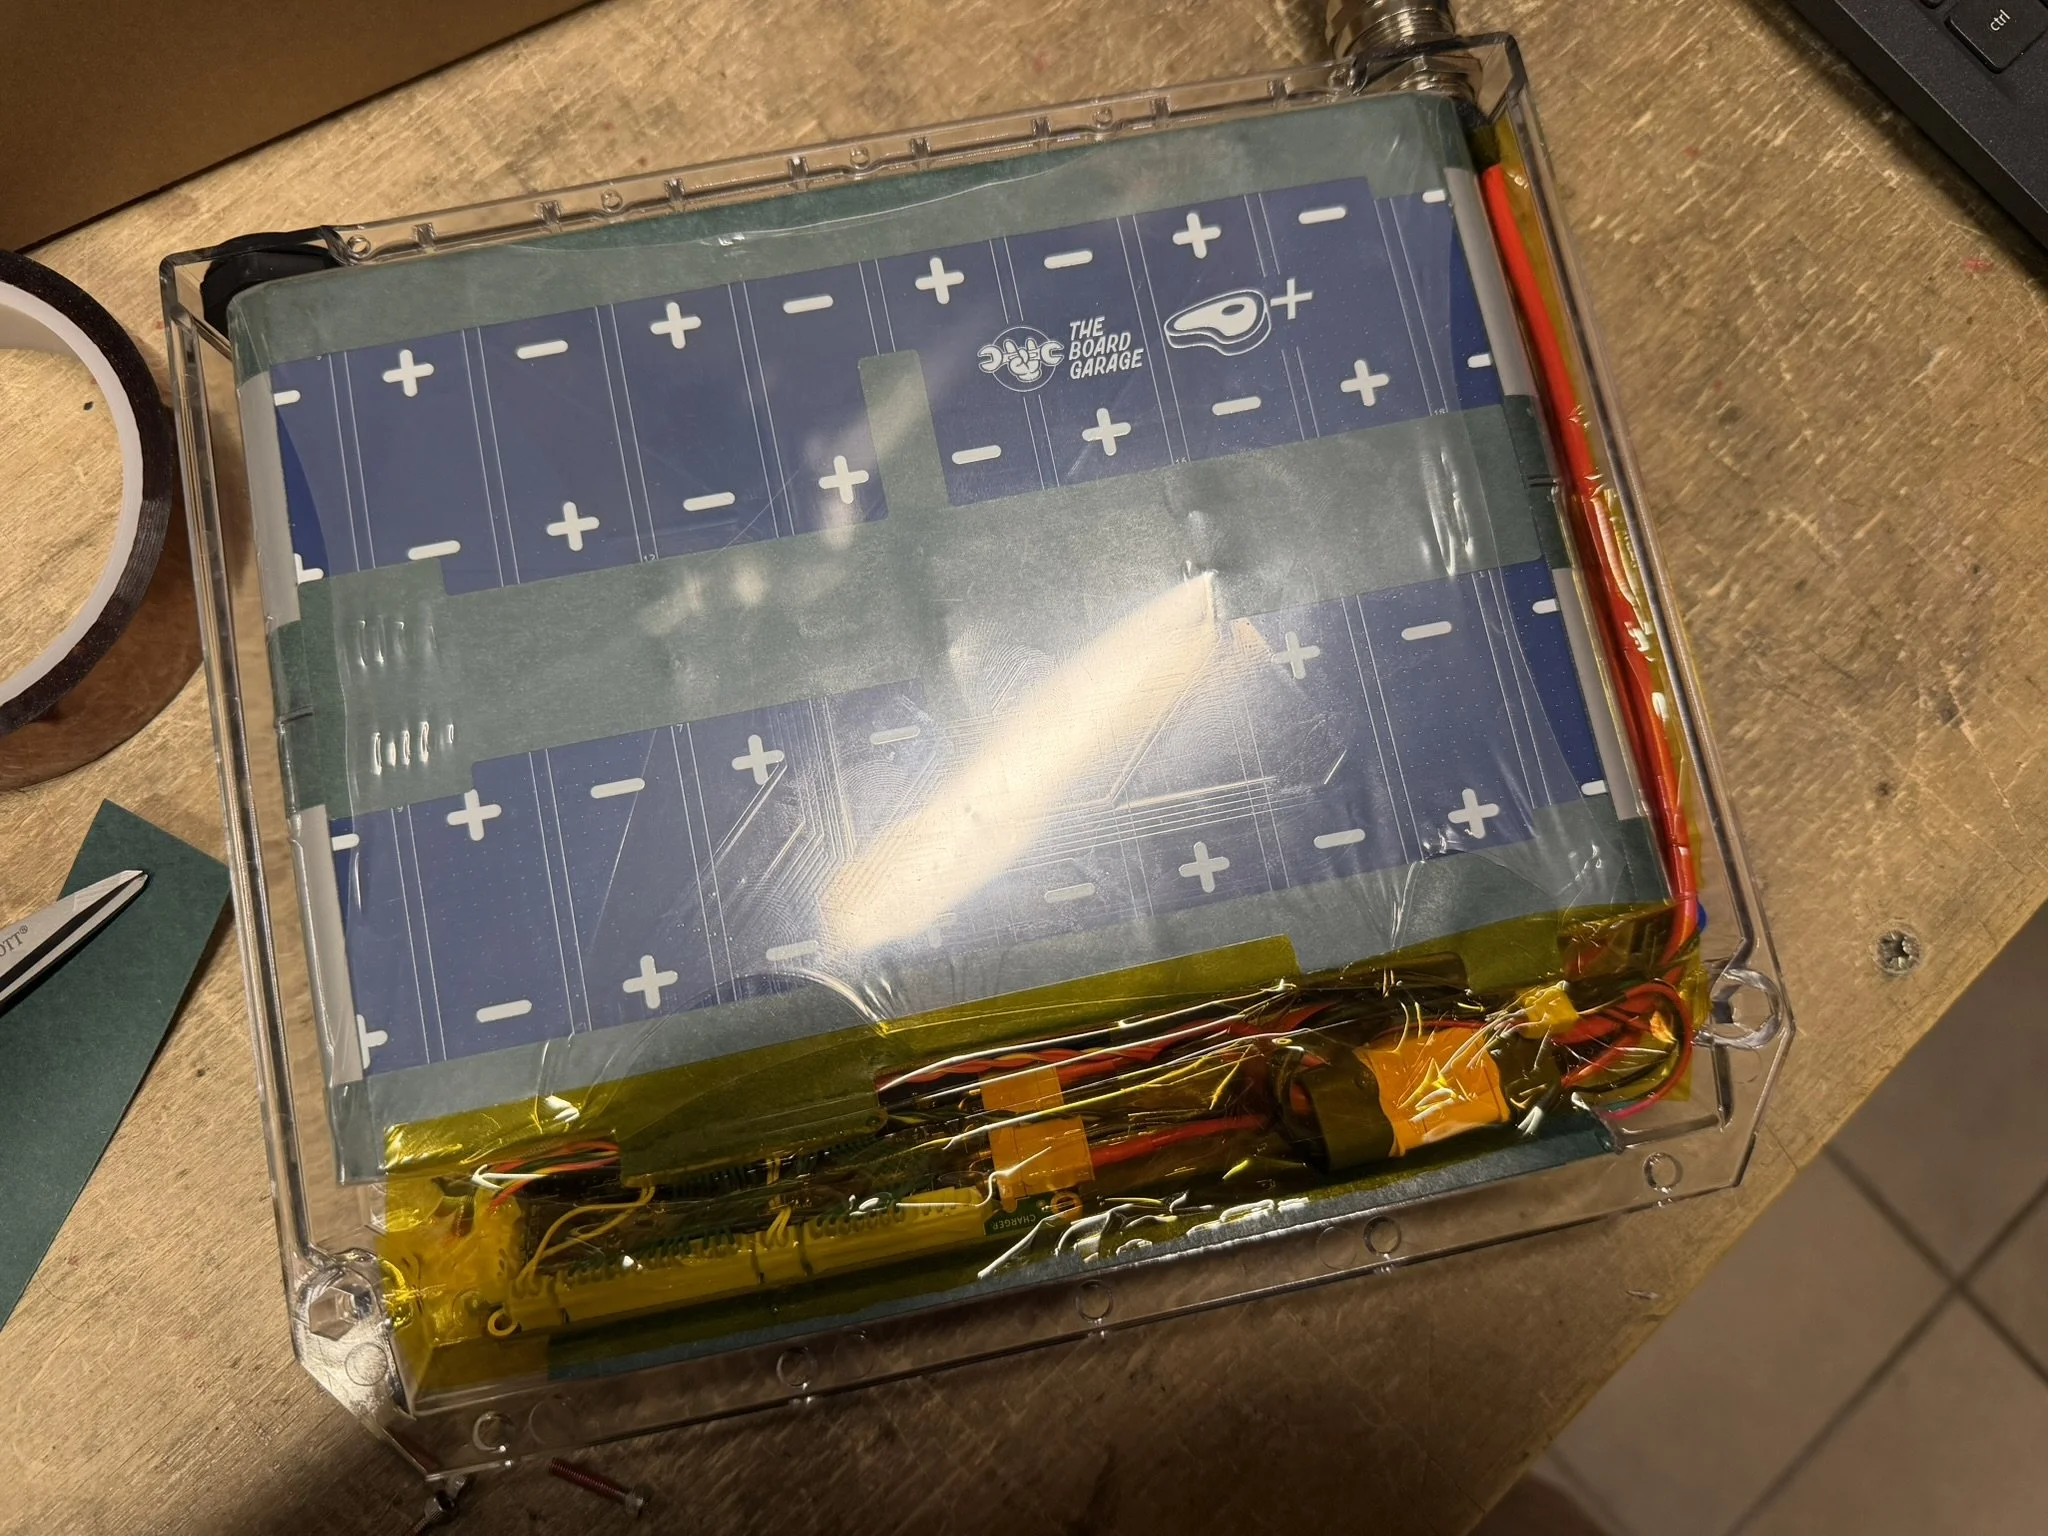
Padding The Battery Pack
There are 2 pieces of foam that are needed to bias/push the pack into a forward position in the box, as well as pad the BMS that will sit against the side of the pack. These keep the BMS seated low, so that the pack doesn’t push the BMS upward into the lid.
I use the follow foam items for this:
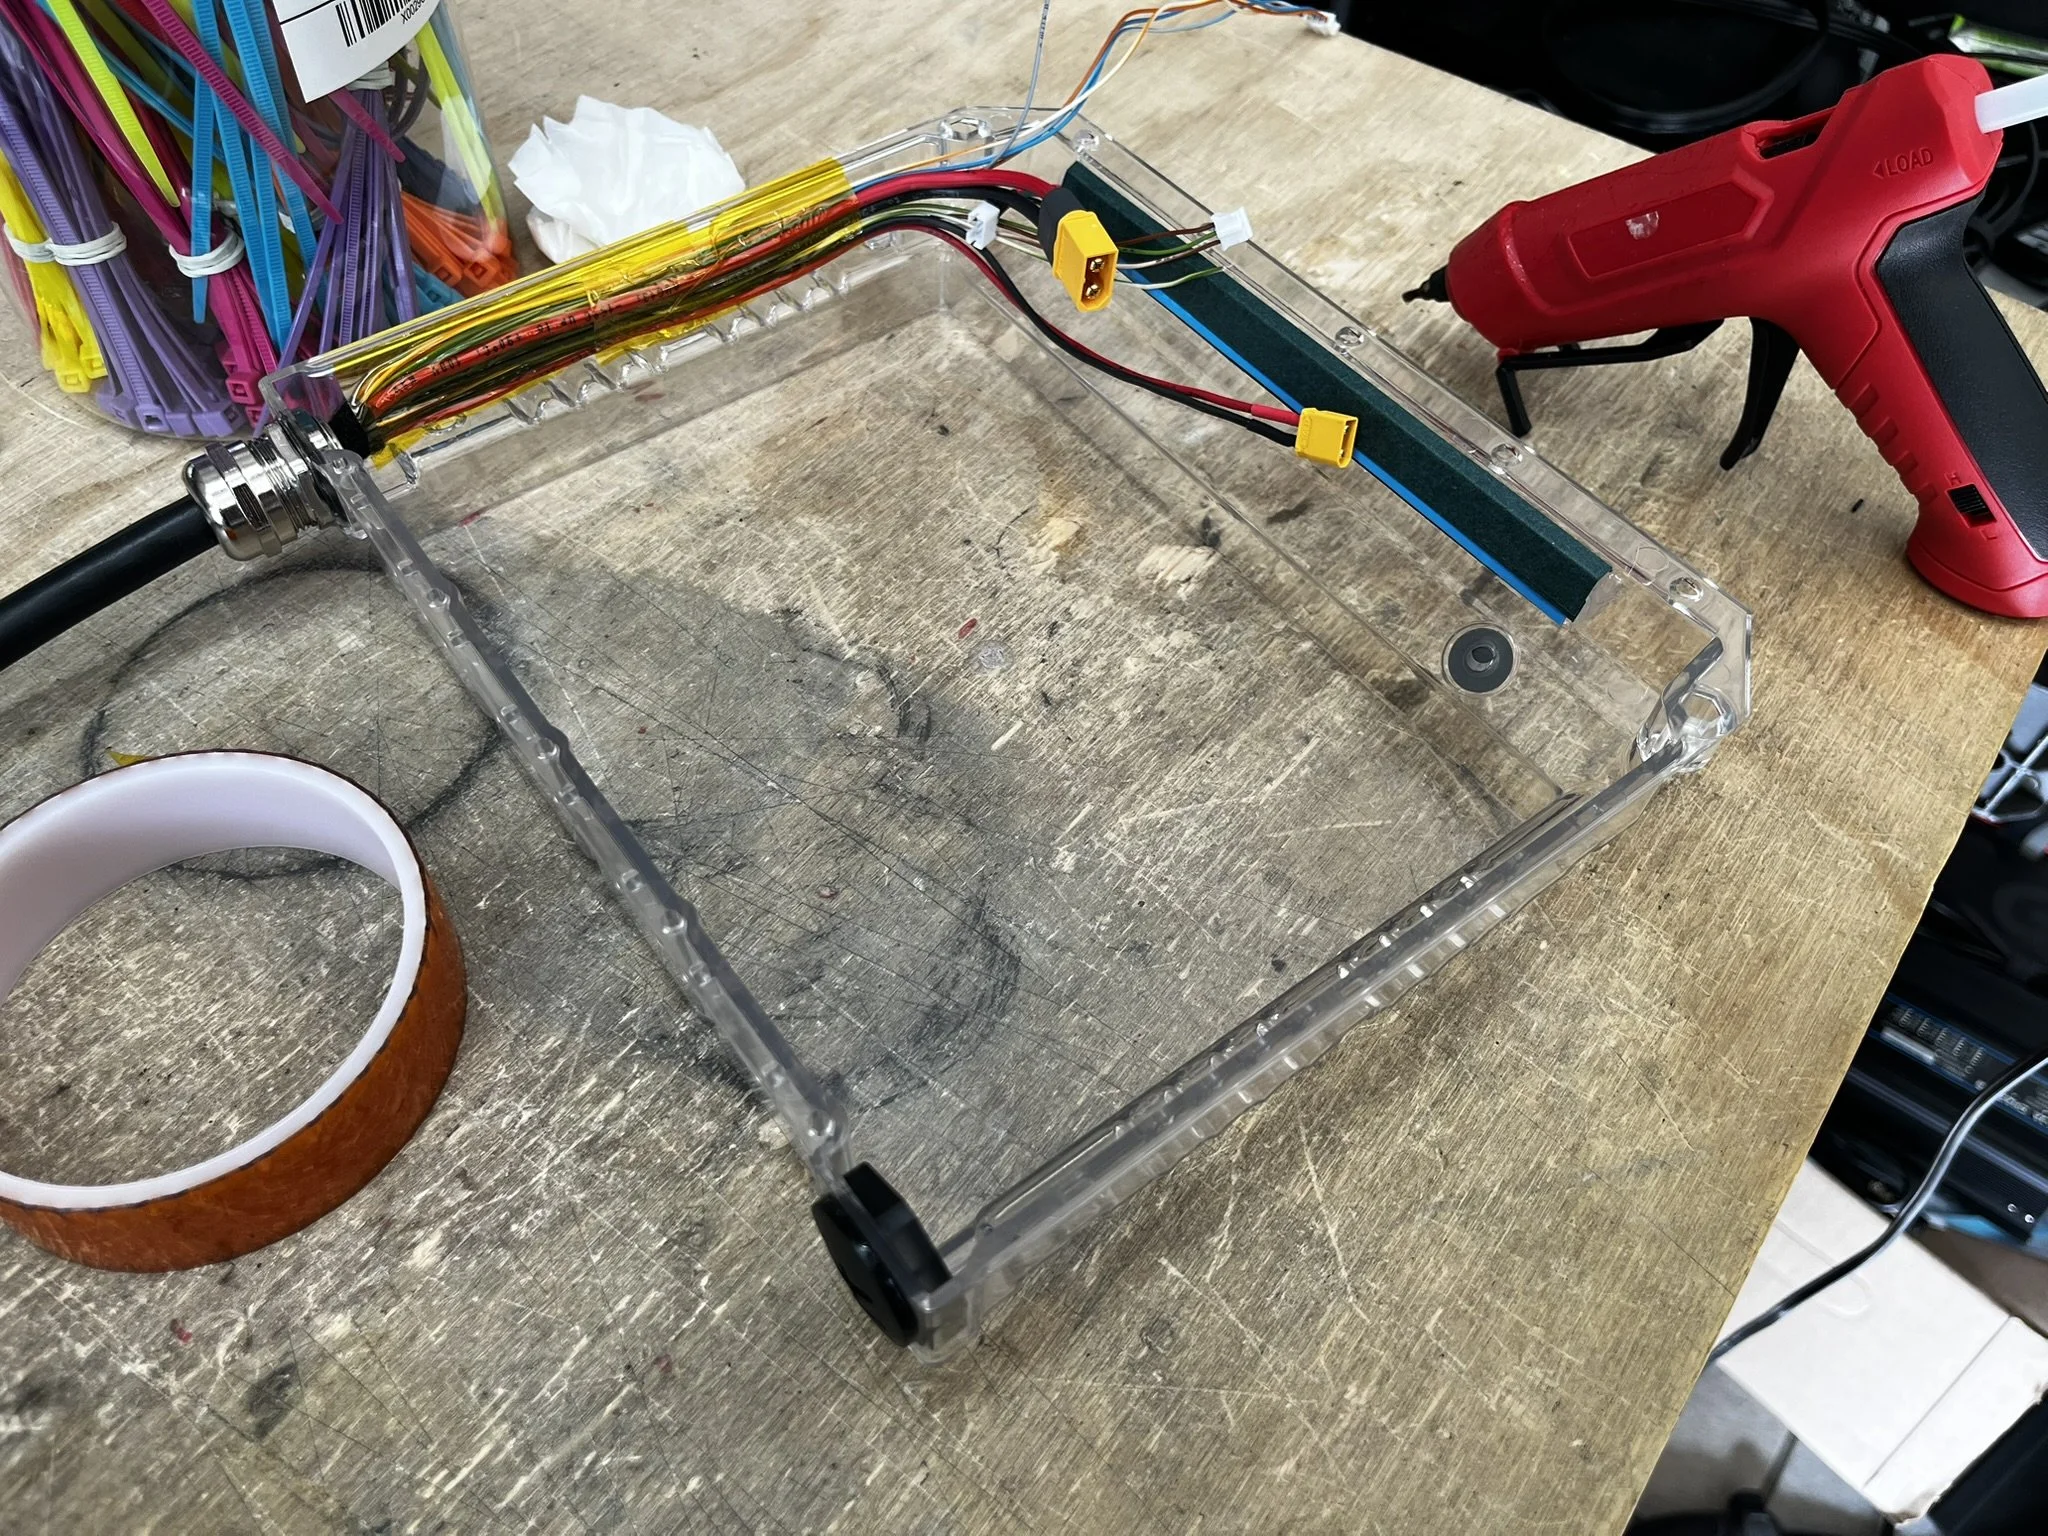
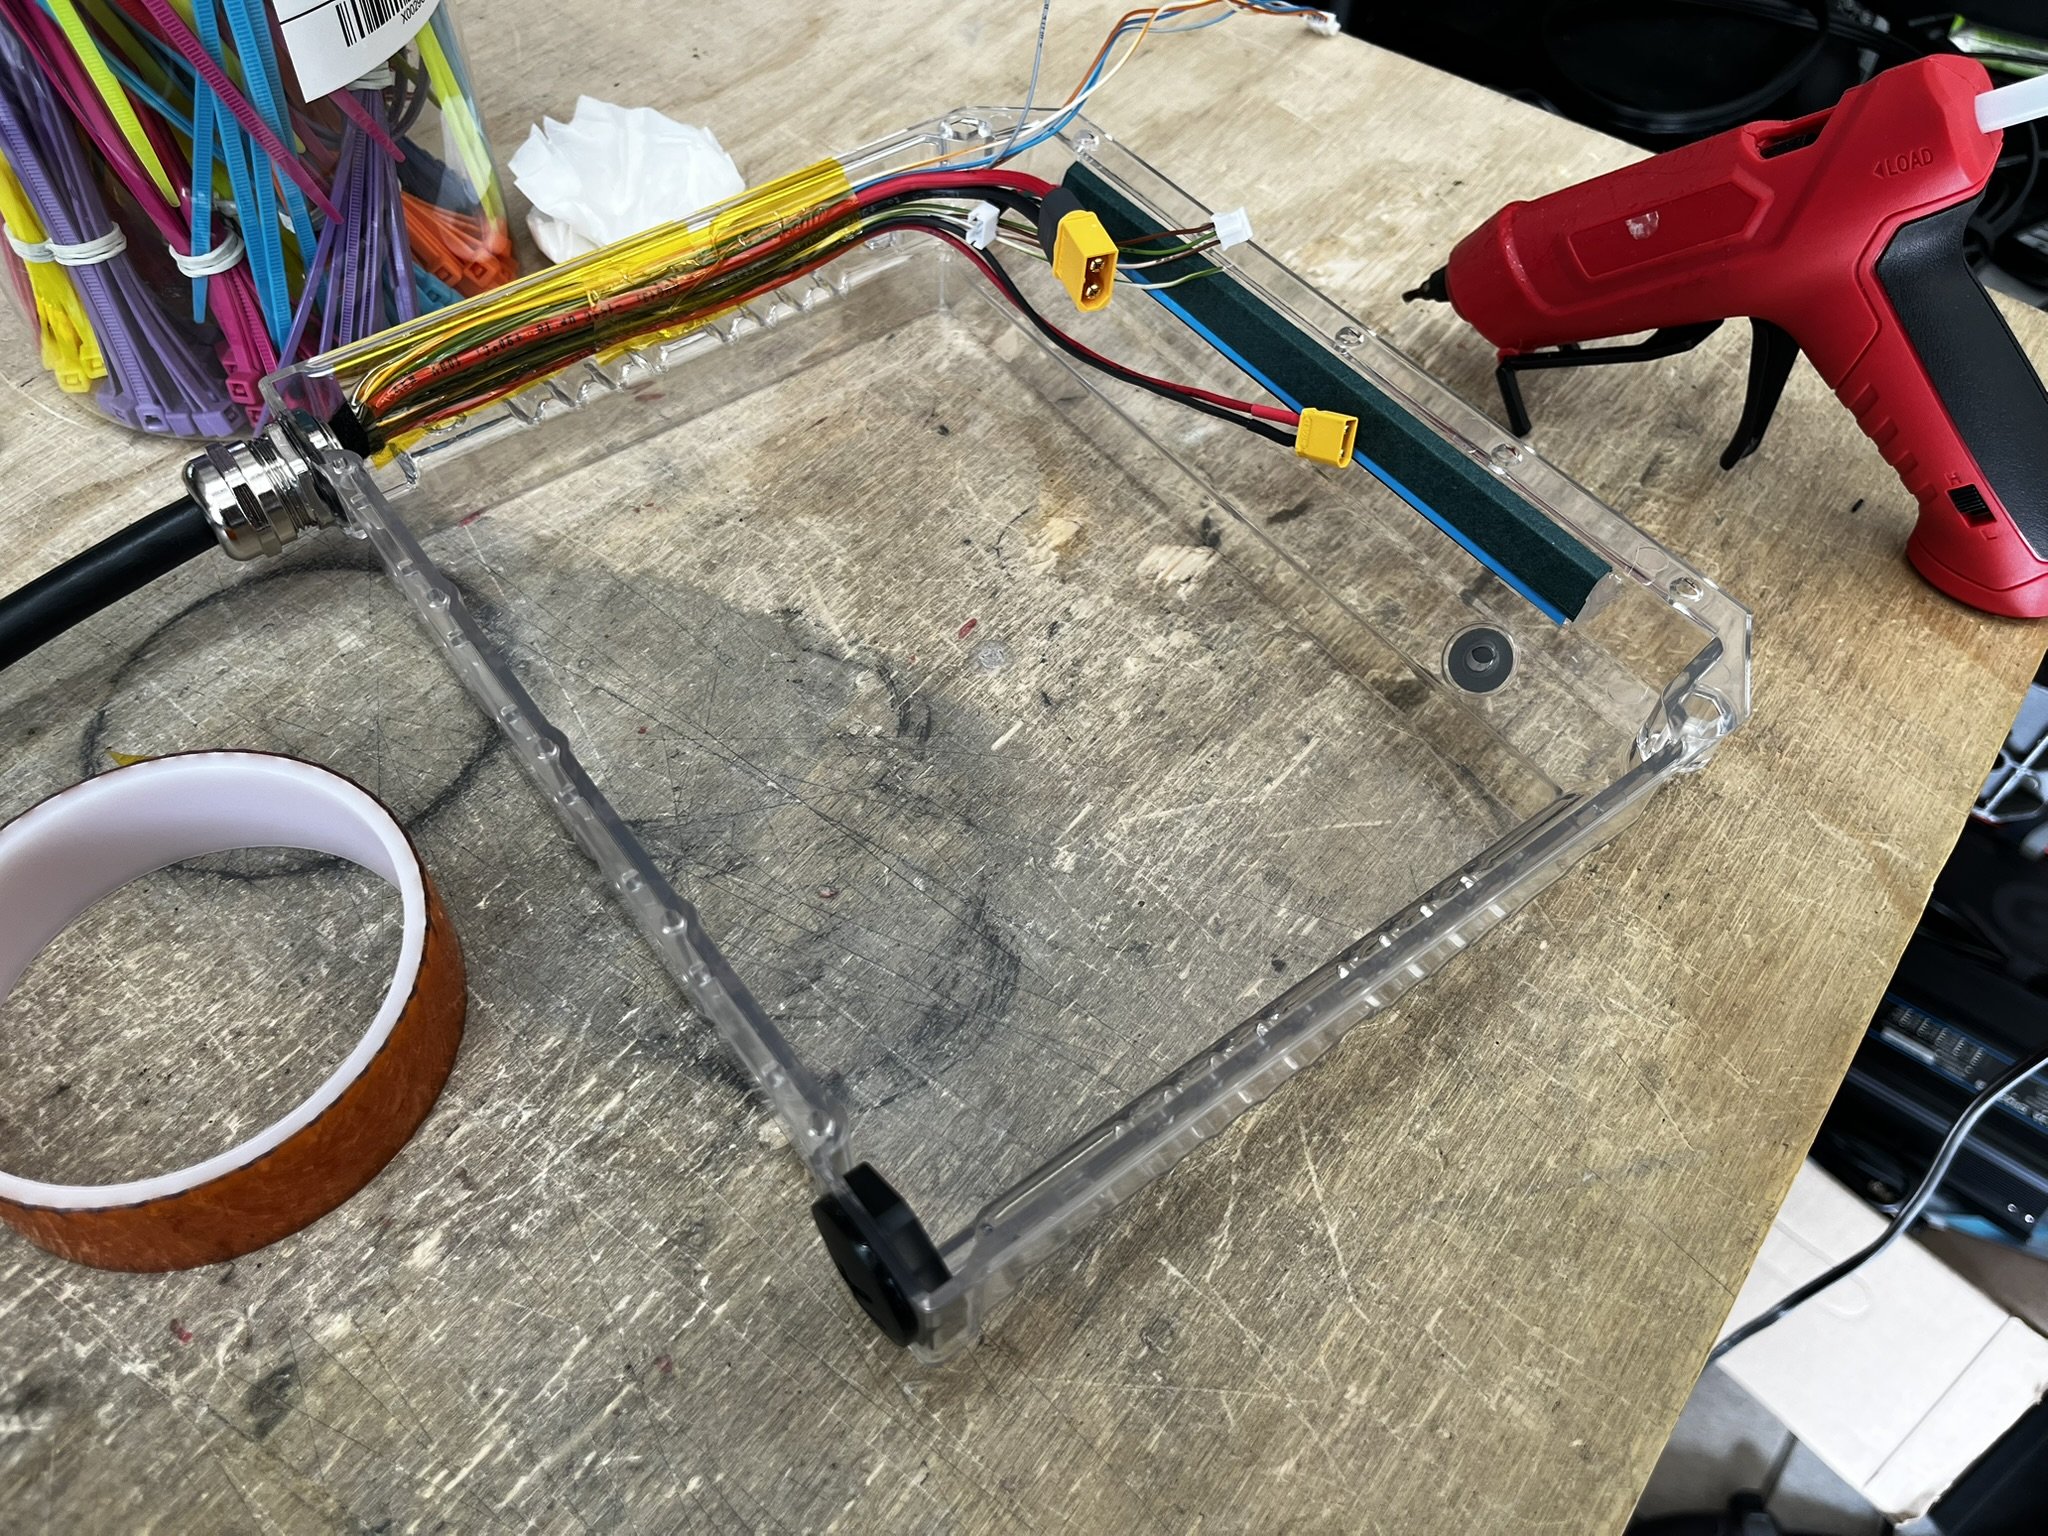
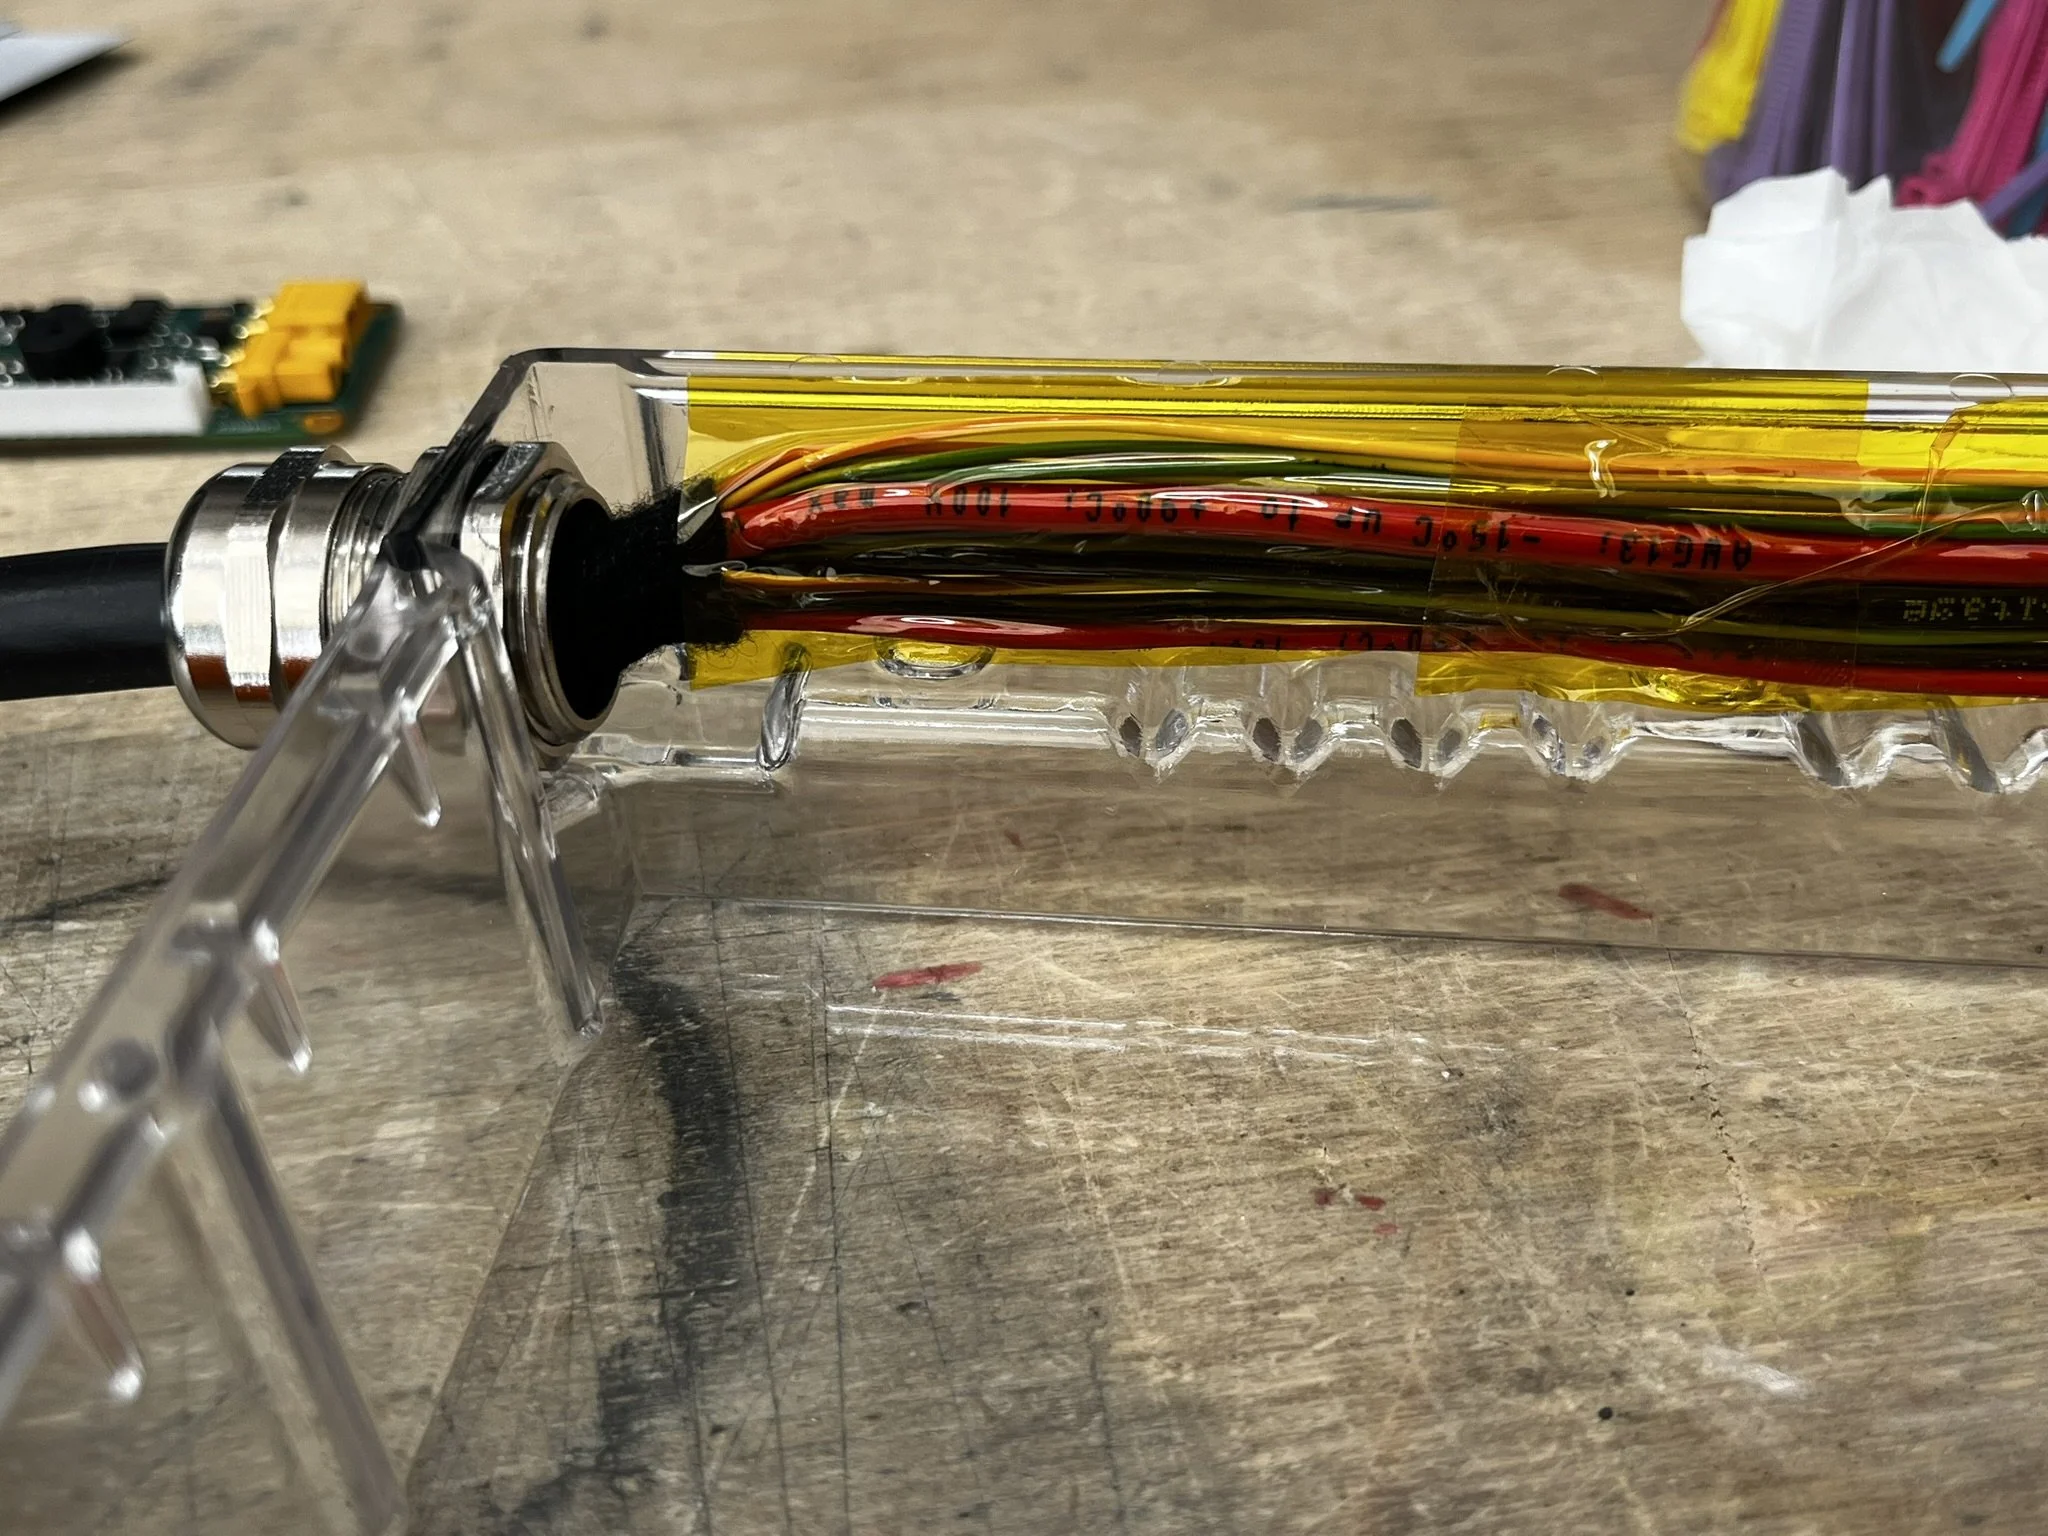
Incoming Cable Wiring
The wiring that enters the box has to be trained (pre-bent) to route around the corner of the pack, and then taped along the side wall of the box. That corner is the area that requires the most attention to avoid any pinching. Pre-bending (training) of the wires is key.
Also, while installing the battery, I find it helpful to keep the gland collar loose, so that the wiring can be allowed to move as the battery pack is seated against them in the box.
The wiring then routes up the side of the box, around the rear corner, and then leads to the tail light and the BMS.
In the photos below, I added some TESA fabric tape to pad the wire bends against the corner of the pack.
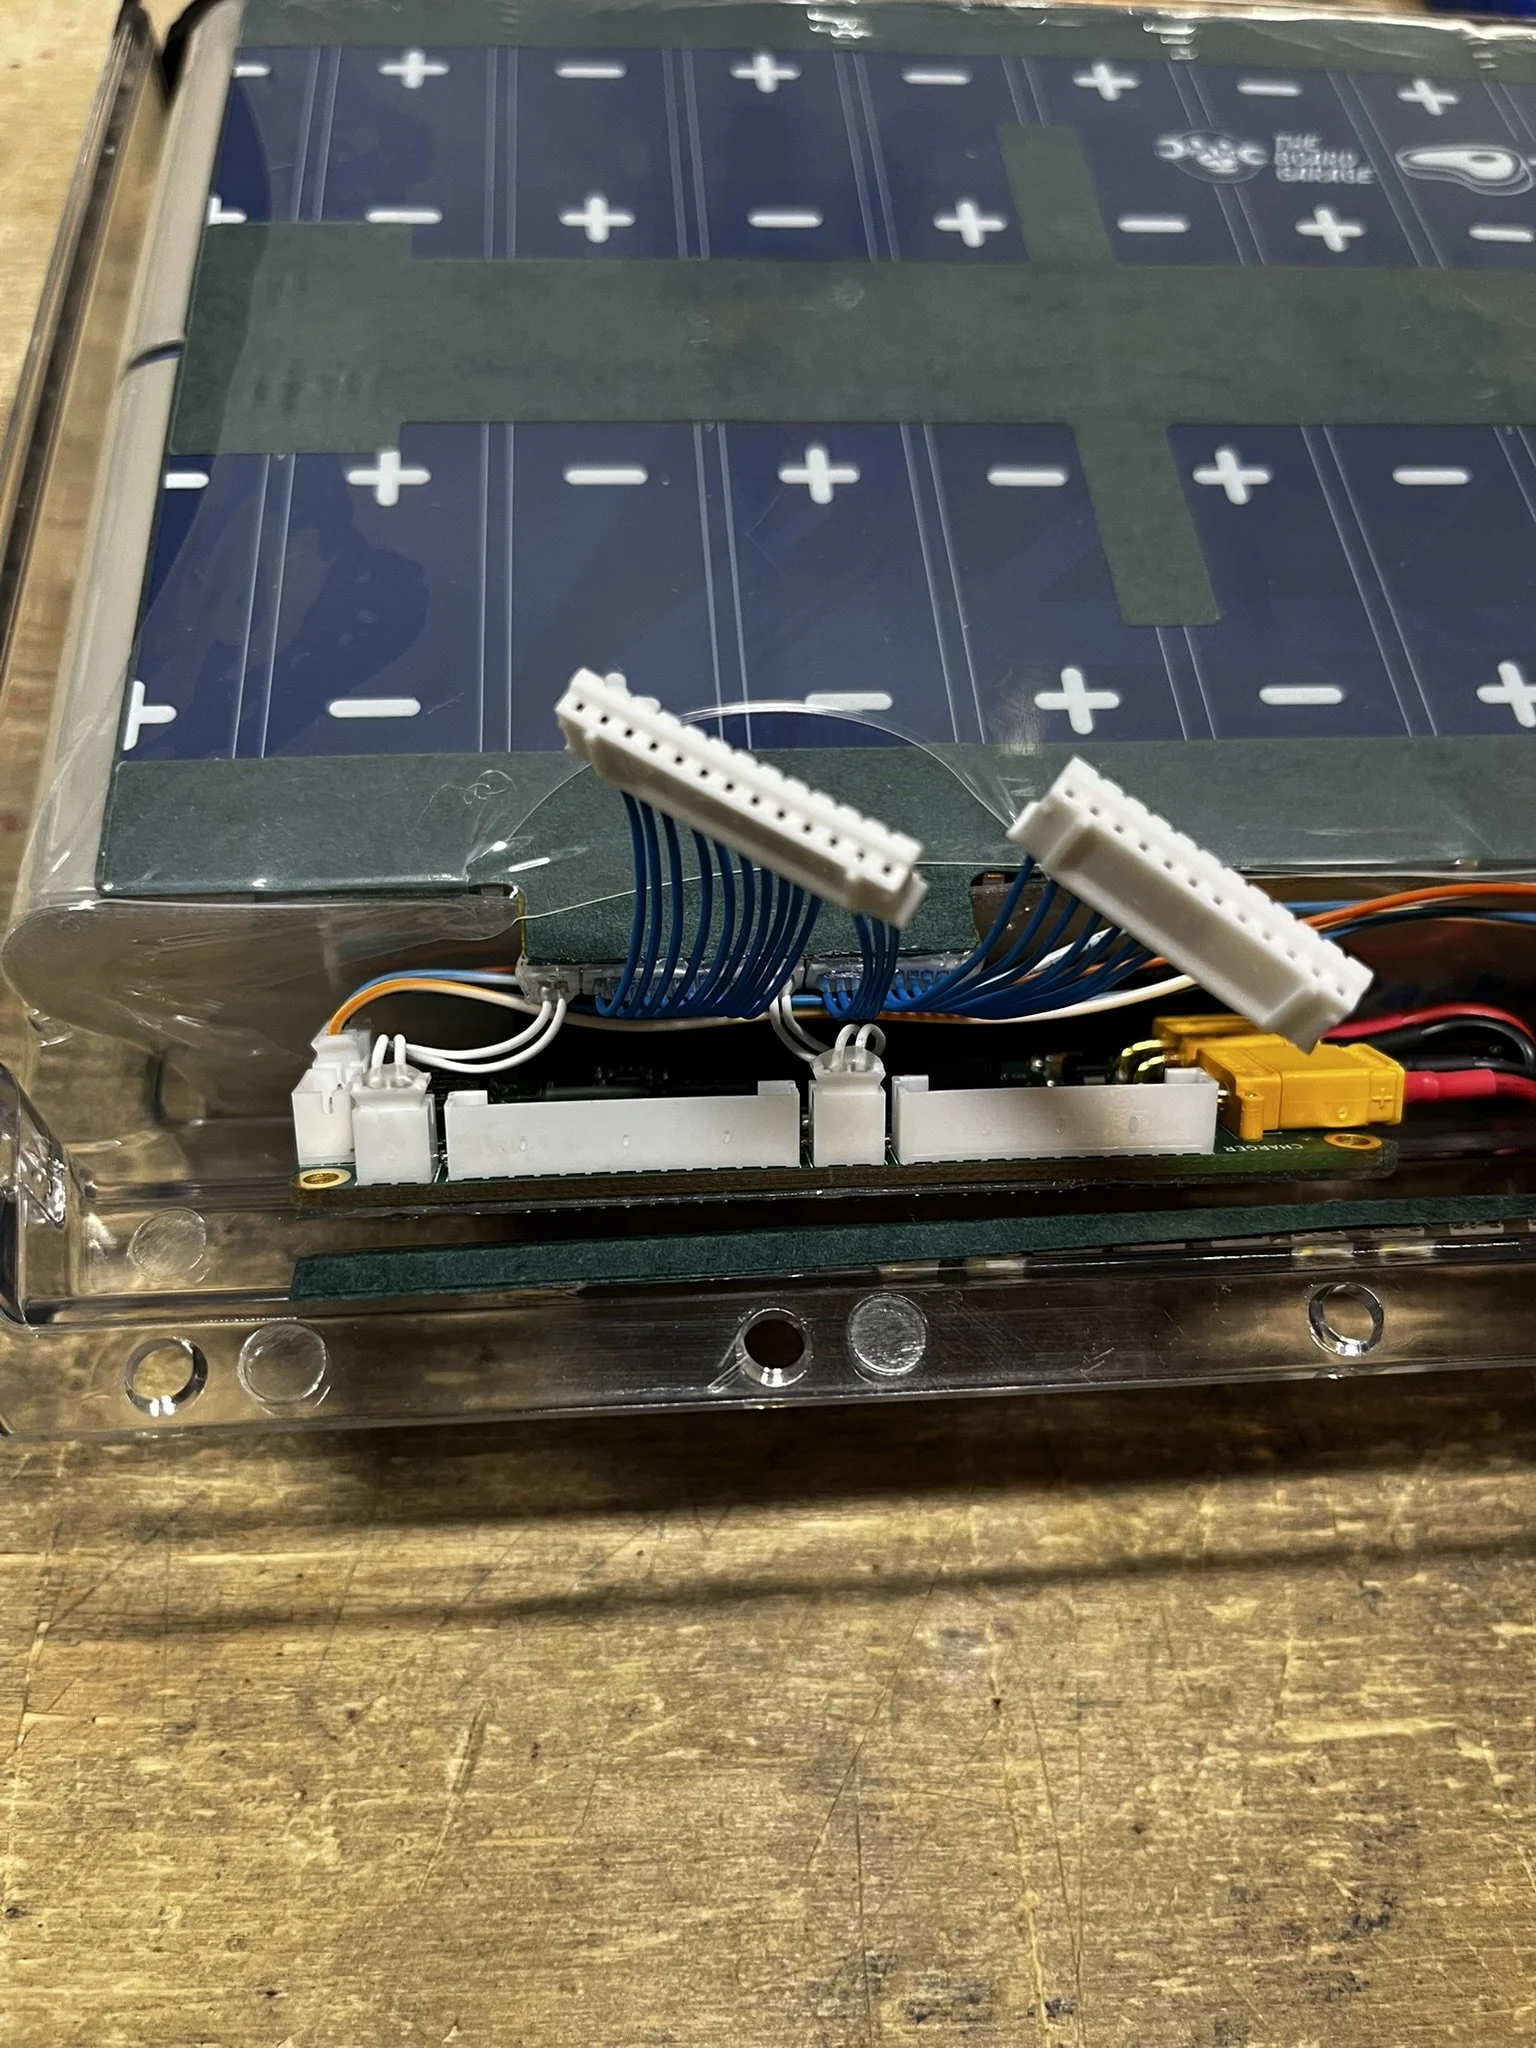
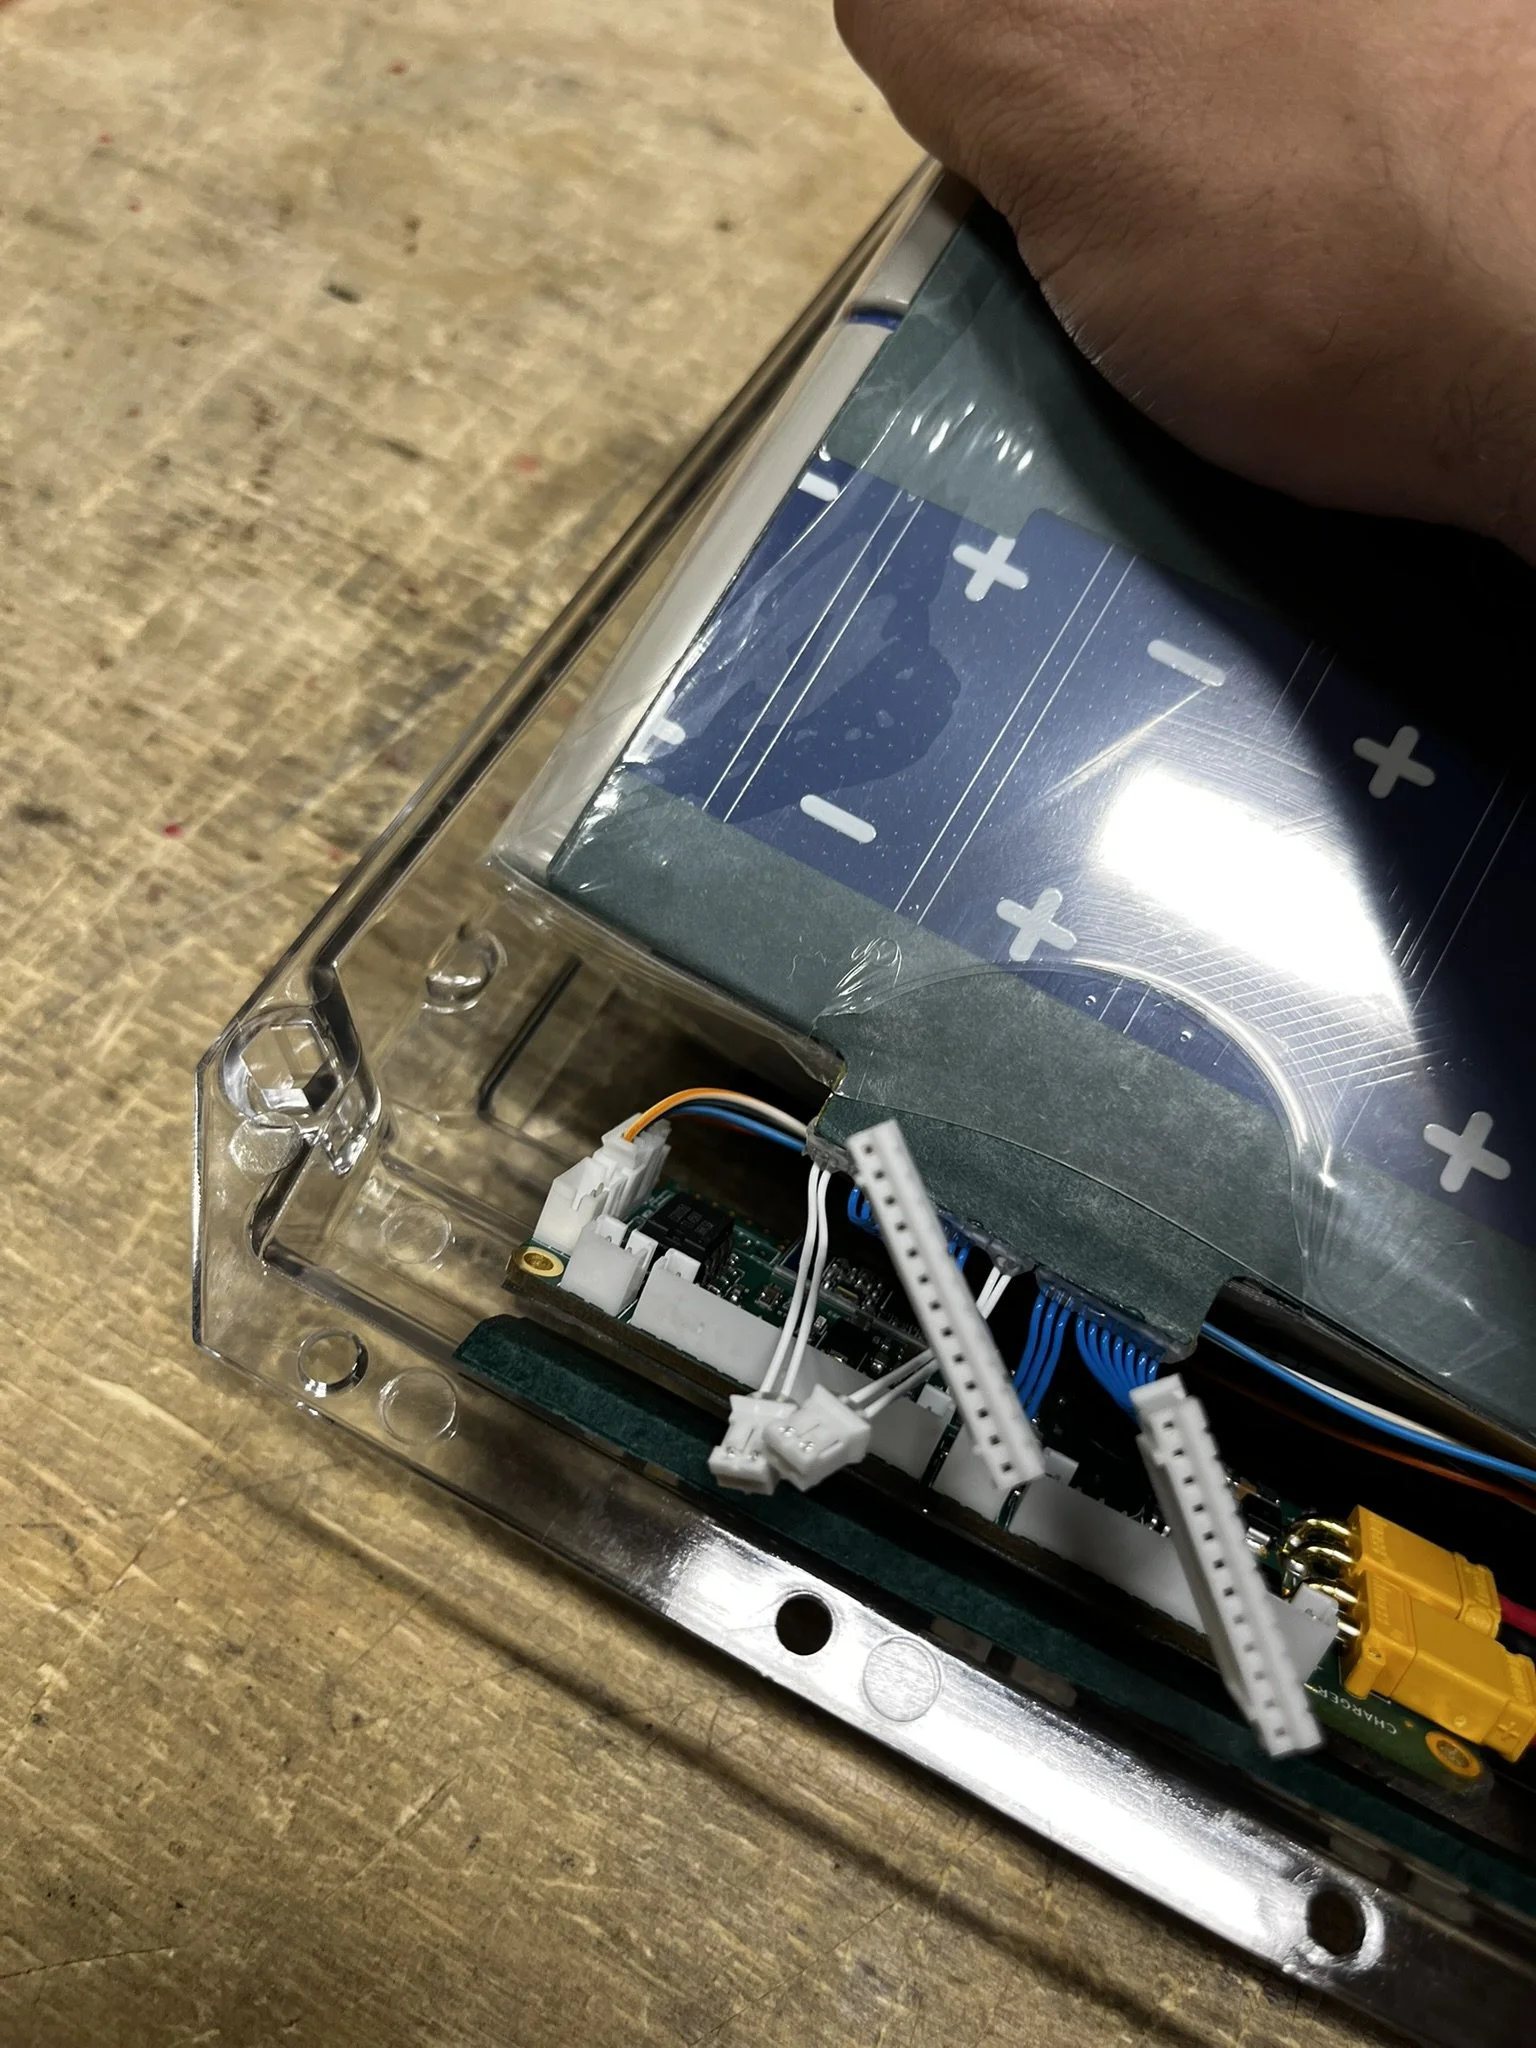
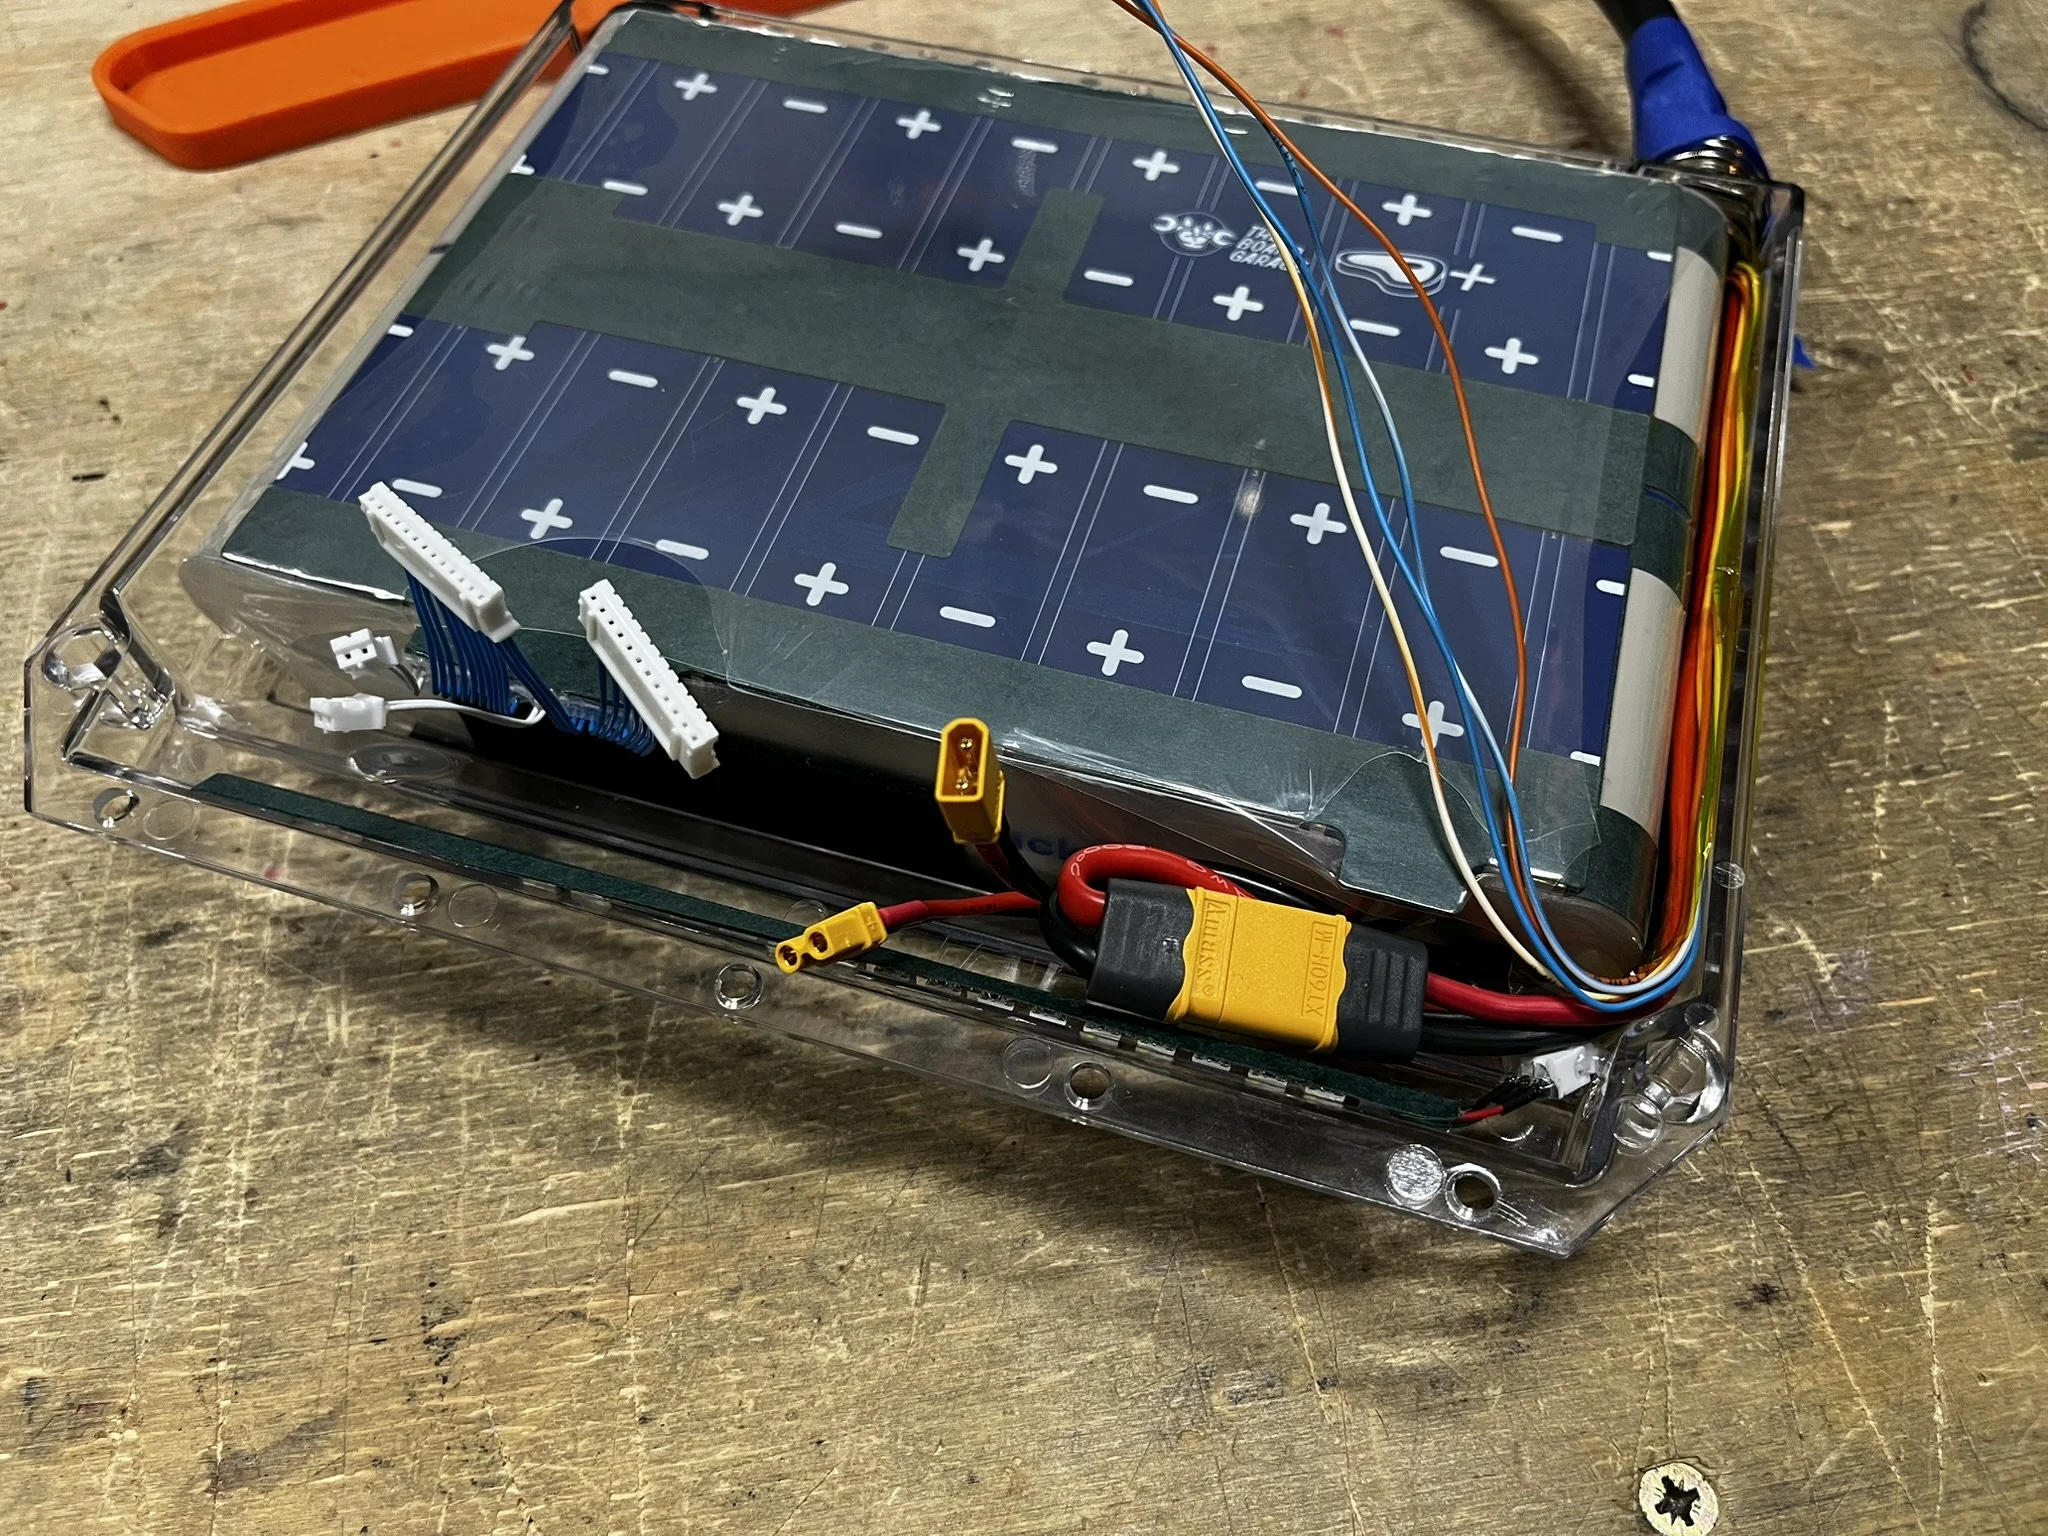
ENNOID XLITE V4 BMS
As mentioned before, the BMS has the 6-pin header removed. This helps it sit low in the box against the battery pack.
To mount the BMS, I use VHB Clear Double Sided Adhesive (linked here)
I make sure to have a cut out for the humidity sensor in the middle of the BMS’ underside.
Once the BMS is prepped, it gets seated in the box, aligned with the BMS connector set on the pack.
I also put some kapton tape on the surface of the BMS just for the wires that sit on top of it.
Routing the CAN wires is a bit tricky, so I will lift the pack out a bit, seat the connector, and then place the pack back in.
Finishing
Once everything is seated and connected, I turn on the BMS (via CAN) to check for function and configure the BMS. If everything is working as expected, I run a bead of hot glue along the BMS’ JST-PH connector to keep everything secure under the pressure of the lid and rider’s weight.
Once that is cooled, I run kapton tape over all the wiring to cover it, and keep everything in place.