

ChiBattery Quart Rebuild & Review

Context
(Scroll down for a parts list used for this rebuild)
This blog post expands on my thoughts and the details of rebuilding the Quart battery upgrade from ChiBattery Systems, for the Onewheel Pint. It is sold as an extended battery pack to be installed inside the Onewheel Pint, in order to provide longer range via more battery capacity.
For those who aren’t familiar, I’ll provide some context.
The Onewheel Pint has an internal battery made of a 15s1p configuration (15 cells in series, 1 parallel, for 15 cells total) using the Murata VTC6 cell. Being a 3,000mAh cell, the whole pack is 3Ah in capacity, with a full total voltage of 63v.
The Quart pack is still a 15s1p battery, except it foregoes the cell holder frame of the stock battery and instead uses the space to fit 21700 sized cells (stock cells are 18650 size) to gain capacity. The Quart has the same full total voltage of 63v (otherwise it wouldn’t work in the board), but a larger capacity of 4-4.2Ah (depending on the cell, and also how it’s actually used, since capacity changes with current draw).
The Video
Breakdown & Thoughts on the Quart
The video shows a decent amount of detail regarding the construction for the battery pack. And so, I feel the need to preface my thoughts by saying that I have only personally built about 20 or so battery packs. The majority of those have been for portable chargers and electric skateboards (ranging from Kaly.NYC boards, to Wowgo boards, to DIY builds, etc.). I have only ever built 3 Onewheel batteries.
Opening up this pack, knowing how much was pair for it, was fairly disappointing. It looked fairly sloppy, without much effort behind it, and it unfortunately gave off a “just good enough” vibe when looking at how it was assembled. Of course, I understand that an entity as large as ChiBattery has production quotas and profit margins to worry about. Of course, I understand that “just good enough” is still “good enough” to work and not fail catastrophically. However, the level of craftsmanship is low, and the thought put into making the build robust is clearly not there in this pack.
The use of nickel strips measuring 0.15x8mm doesn’t inspire much confidence, since that’s about the bare minimum that one can get away with in a pack like this. The current draw of a Onewheel isn’t generally very high, but it can be if one does a lot of trail riding or hill climbing. It doesn’t cost much more to use nickel that’s 0.2mm thick or 10mm wide. It certainly fits, and if I can weld it with a budget Malectrics spot welder, I’m sure the industrial level Sunstone machines have no trouble with it either.
I haven’t done testing of it, but I worry that soldering temperature sensors to wire, with heat so close to the resistor, isn’t ideal. Nor is burying it high temp hot melt glue. It just looks like a production line corner cut. Generally I try to avoid overt negativity with content and postings. In this case, the main point that I think is important is that this doesn’t look like $450-level work, I’m sorry to say. Not to mention the quickness with which the pack’s performance degraded.

The Rebuild
Parts List (some are affiliate links)
Molicel P42a 21700 Cells
JST ZPDR-26V-S Connector
JST SZPD-002T-P0.3 Crimps
I’ve seen two ways of configuring the cells on this build, but generally they’re similar. The video shows the circuit path from negative to positive terminals, and generally it isn’t TOO hard to follow once you take a look. There are some wiring gymnastics to do for the series connections, which from my experience seem to be on-brand for extended Onewheel packs.
It’s actually a big reason why I’m not a big fan of them generally and haven’t yet installed any in my boards. The builds and pack designs are inherently less safe than a stock battery, and by virtue of the limited space, one is forced to make compromises that affect longevity. These packs are all relatively new, so there just isn’t any long term data on their lifespan, or potential avenues of failure. And the landscape of fandom, affiliate sales codes, and overall hush-hushness when it comes to product criticism, there’s likely never going to be any transparency when it comes to that kind of information. What I have found interesting is the general opinion of these packs from experienced and prolific custom battery builders that I’ve learned from and come to know. The opinions aren’t high, at all. And it’s very much a case of watching brand and hype overtake skepticism and critical thinking.
But alas, I’m a nobody. And these are just the opinions of a nobody. So this nobody attempted to take the design and make it with generally more robust and safe building practices as possible, learned from more experienced builders.


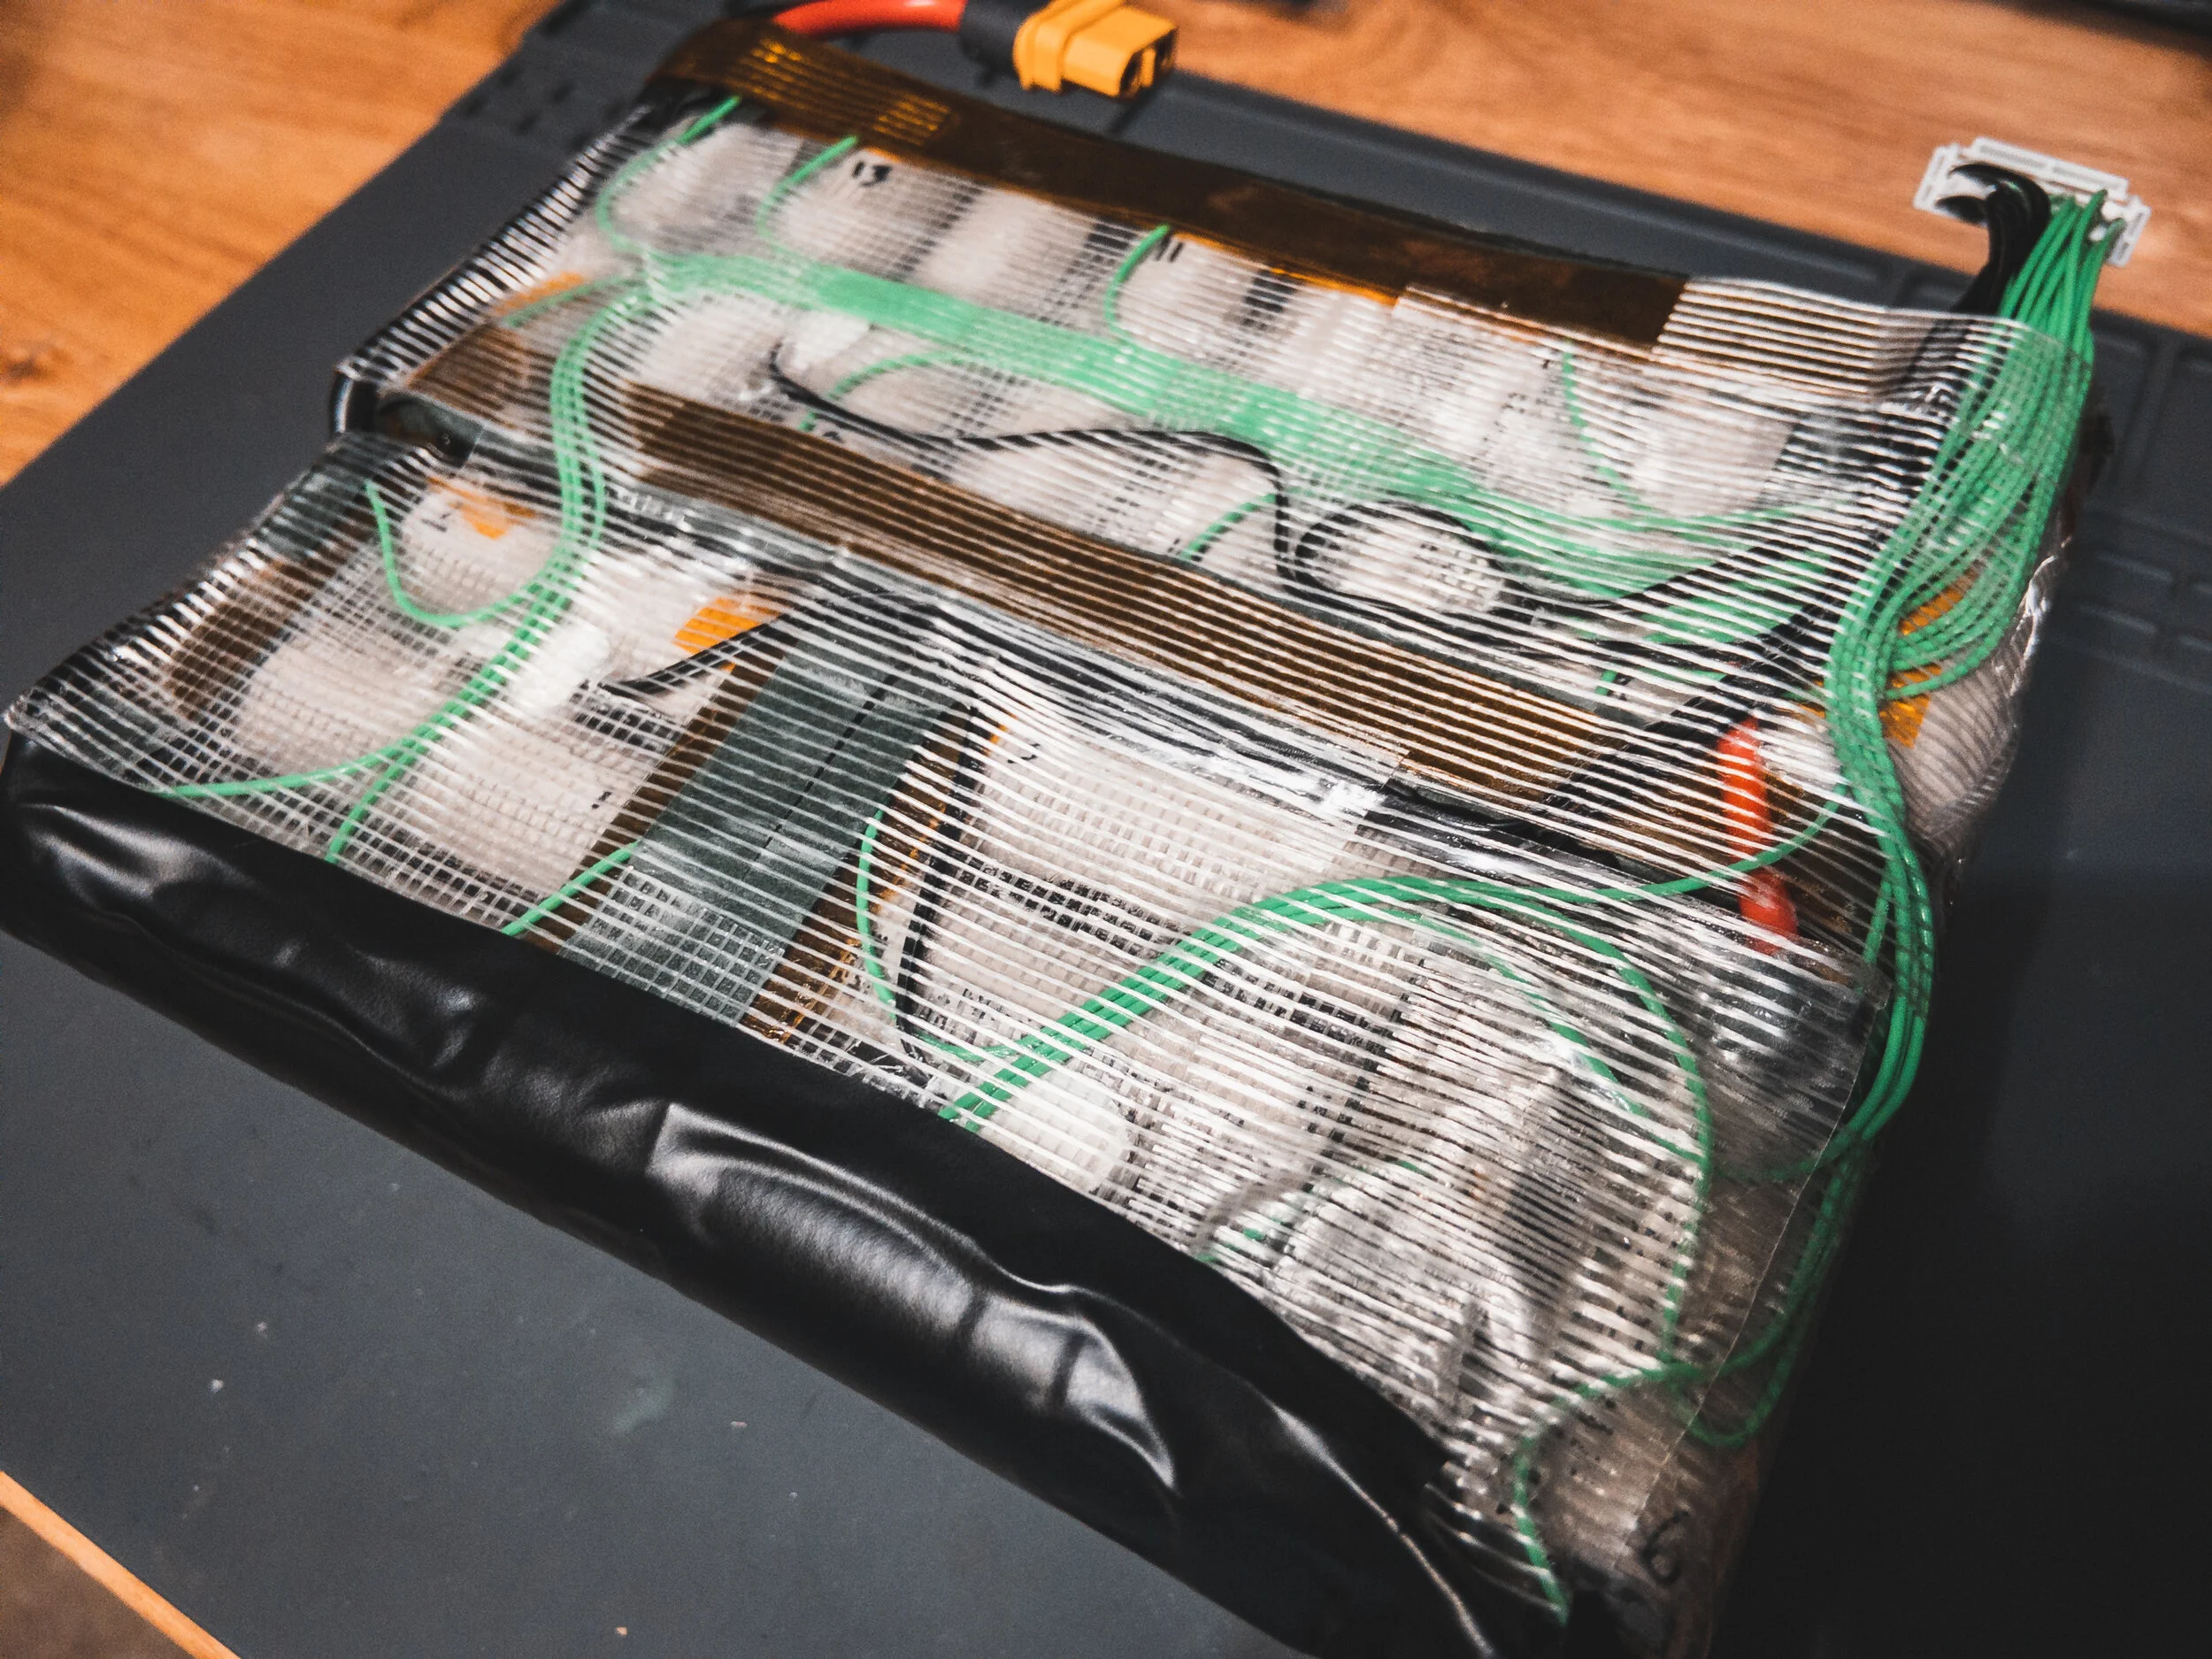
The unfortunate reality of this build (and others like it) is that you don’t have the space for much insulation or separation between the cells, even though they’re facing opposite one another for series connections. Each positive pole goes to a negative pole right next to it. I used Kapton tape between the cells so there’s at least something there. Fish paper (the green stuff) is there around the ends of the cells, since the balance tabs (nickel strips that the balance wiring goes to in order to make sure cell voltages are equal) lay on top of them and they’re metal bits.
You’ll notice that on the right side, the top most group has its last cell shifted upward slightly. I think it was about 2mm. It requires the bending of the nickel strip in order to follow the groove it creates, so be careful with that if you ever try this layout yourself. It’s not too difficult, but deserves some attention. Apart from that, the nickel used is linked above, 0.2x10mm. I used a Malectrics spot welder running off a car battery, and it handles 0.2mm thick nickel perfectly fine. Generally 4 welds per cell end.
It’s always a good idea to tape over the parts you’re not welding. A rogue nickel strip can land on another cell pole and cause a short. That’s never fun.
I pre-tinned the larger series connections before welding them so I wouldn’t have to heat them up for too long when adding the series connection wire. Balance tabs are laser cut, I got them from the same eBay seller that also sells the KWeld welder. You could look him up at 18650Shrink-something-something and contact him for them. I found them on eBay and they work well.


Balance Connector Pinout
The balance wiring isn’t necessarily a problem, but making the crimps and connector for the balance harness is a massive pain. Certainly one of the more tedious tasks to do on a battery build. They’re just so small, and finicky. Many builders and the larger companies usually get them all pre-made. I don’t have that kind of capital so I get the parts and spend time crimping them myself while listening to podcasts or Kitboga on YouTube.
Thermistors (temperature sensors) were secured with Kafuter thermal glue. I got this on AliExpress but you can use any hard setting thermal glue.
The rest is really just wire management and taping it up. Make sure that everything that should be insulated, is. Then use the vinyl tape on the top and bottom. It took a little bit of crafty cutting with detail scissors to get it all clean, but it wasn’t too bad. A few tries with the PCV shrink wrap, and it was good to go.
I do hope this write up and video were helpful. Thank you for watching the video and reading this article. Take care of yourself.